May, June & July 2026

May, June & July 2026

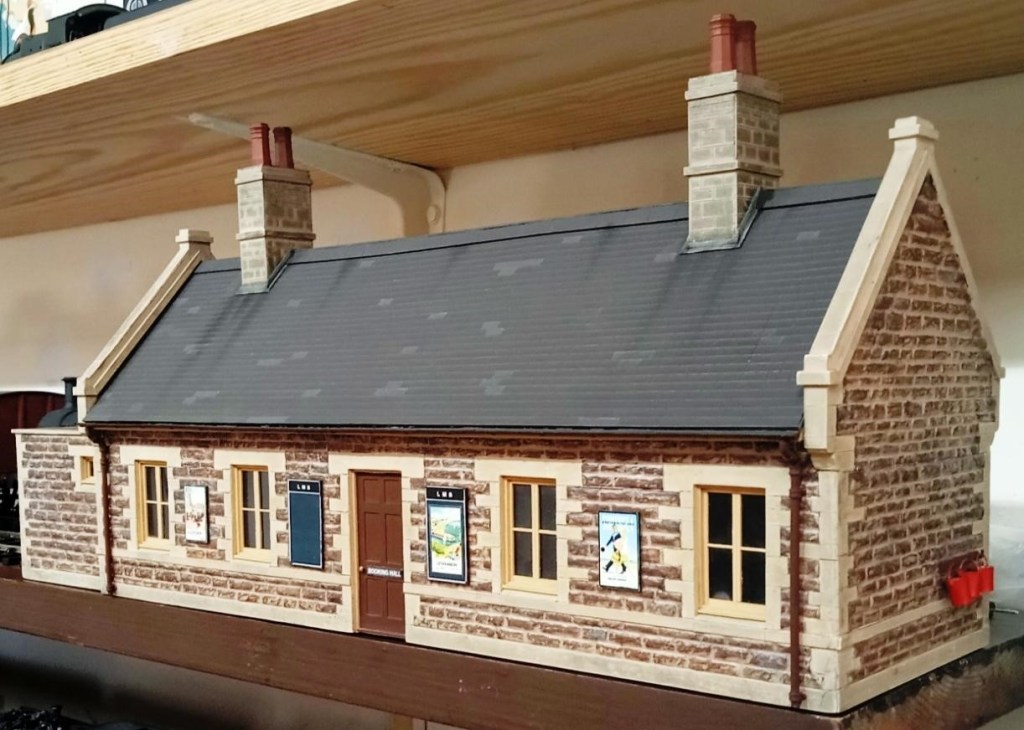
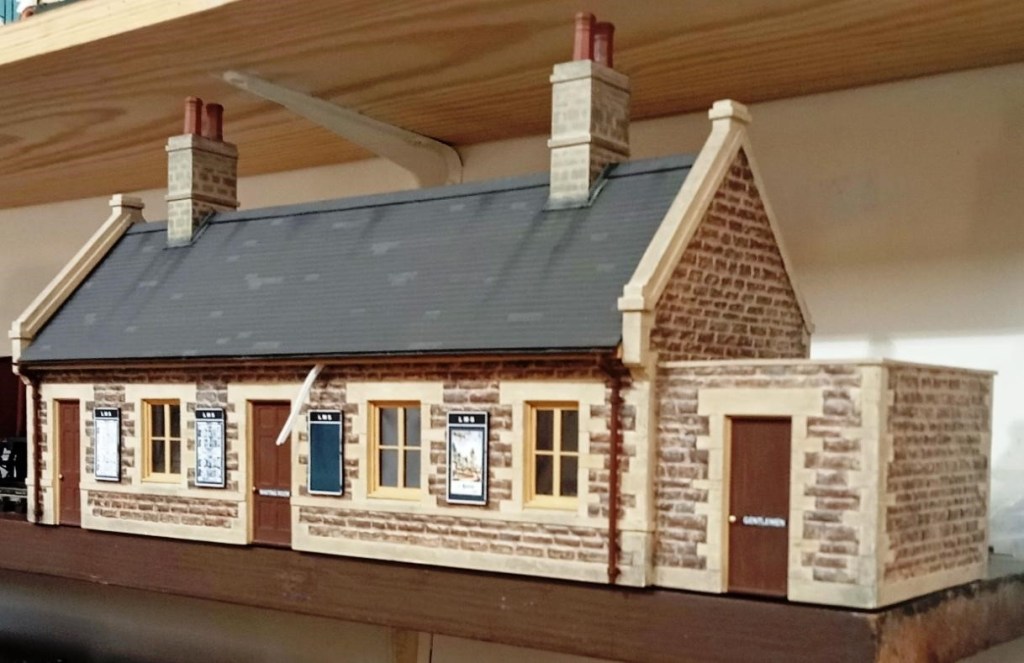
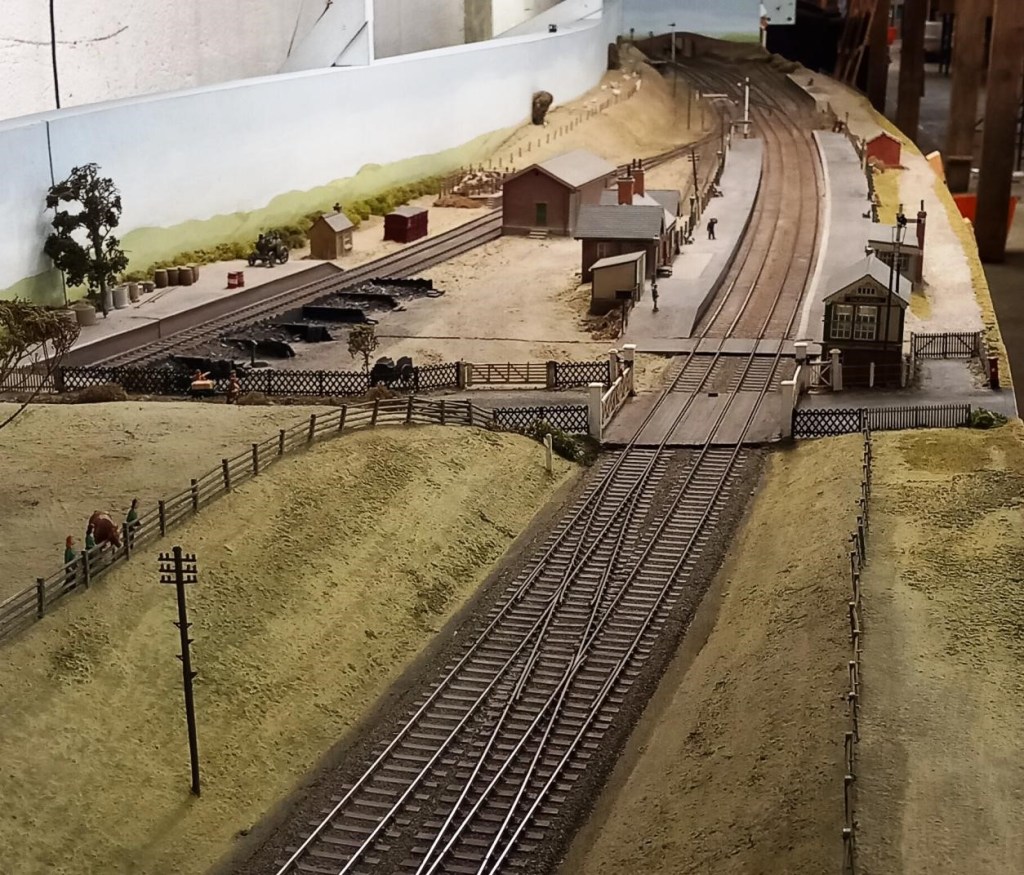
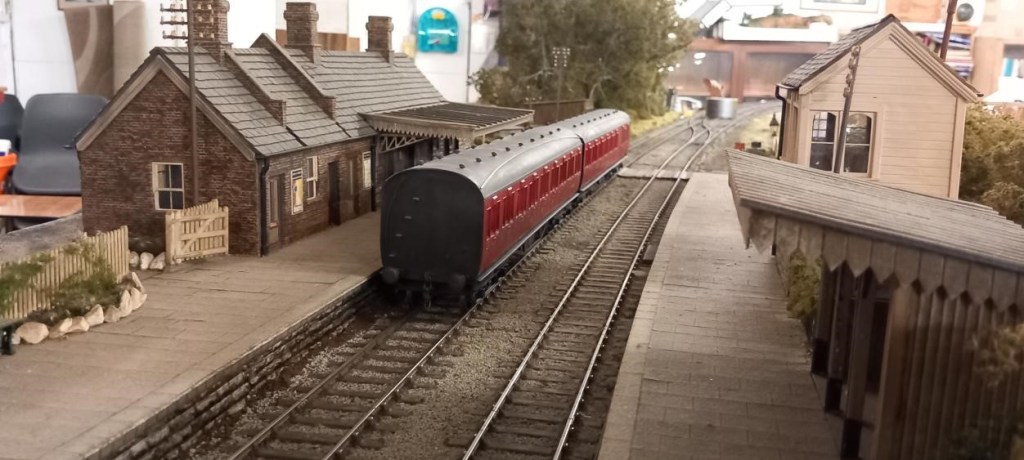
Allan is building a 7mm rendition of Cole on the much-lamented Somerset and Dorset main line, just south of its crossing over the GWR Berks & Hants line. The period that Allan is modelling is the late 1940s, hence the white lining to the platform edge. The building paint colours are LMS cream and brown. Purists will be critical of this. It was most likely the colours were SR green and cream (the restored Midsomer Norton station is in these colours) but in his choice to model the LMS he just couldn’t bring himself to see his black locos and maroon coaches trundle through a SR station!
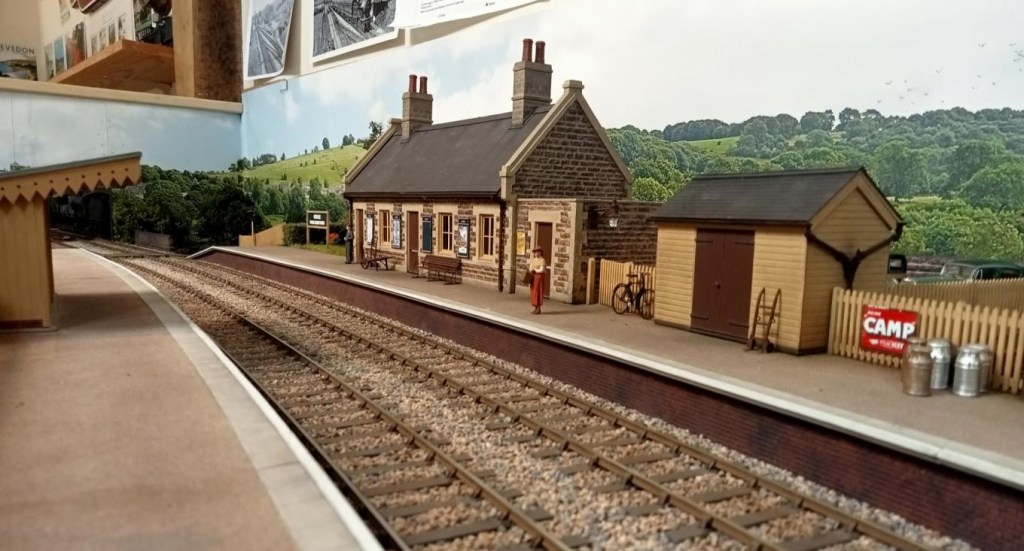
The station building is a replica of the real thing. Now a private house, Allan was able to measure and draw it thanks to the kind permission of the owner. The signal box, up platform shelter, shed and bridges are based on photographs and are near replicas of the real thing
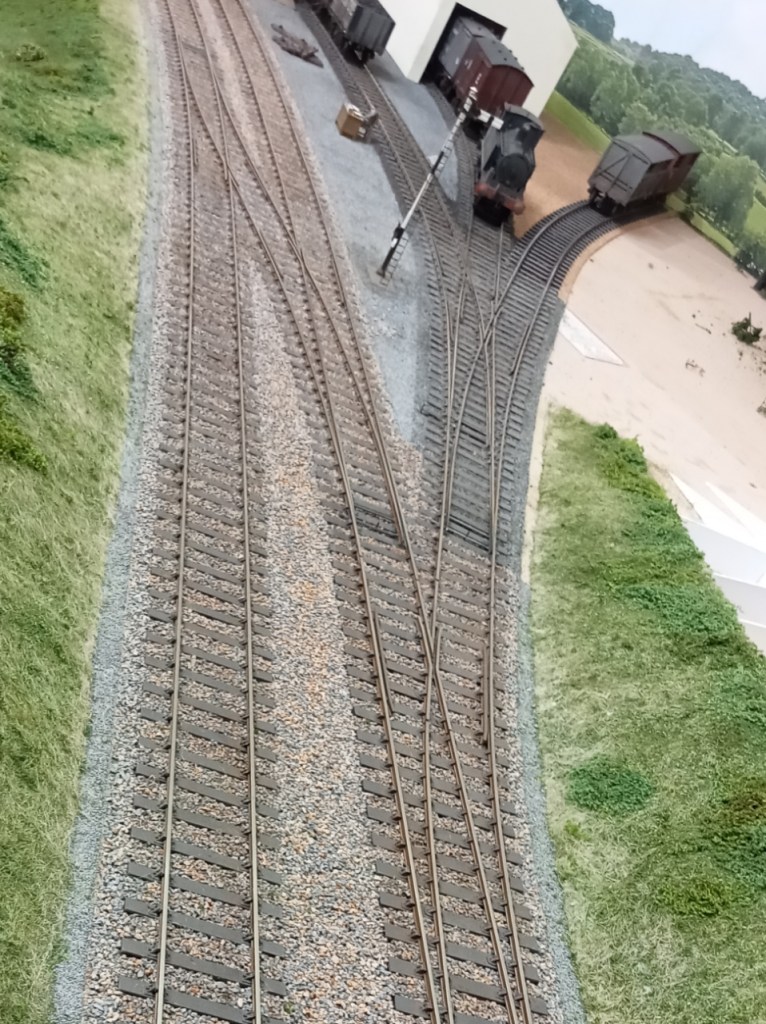
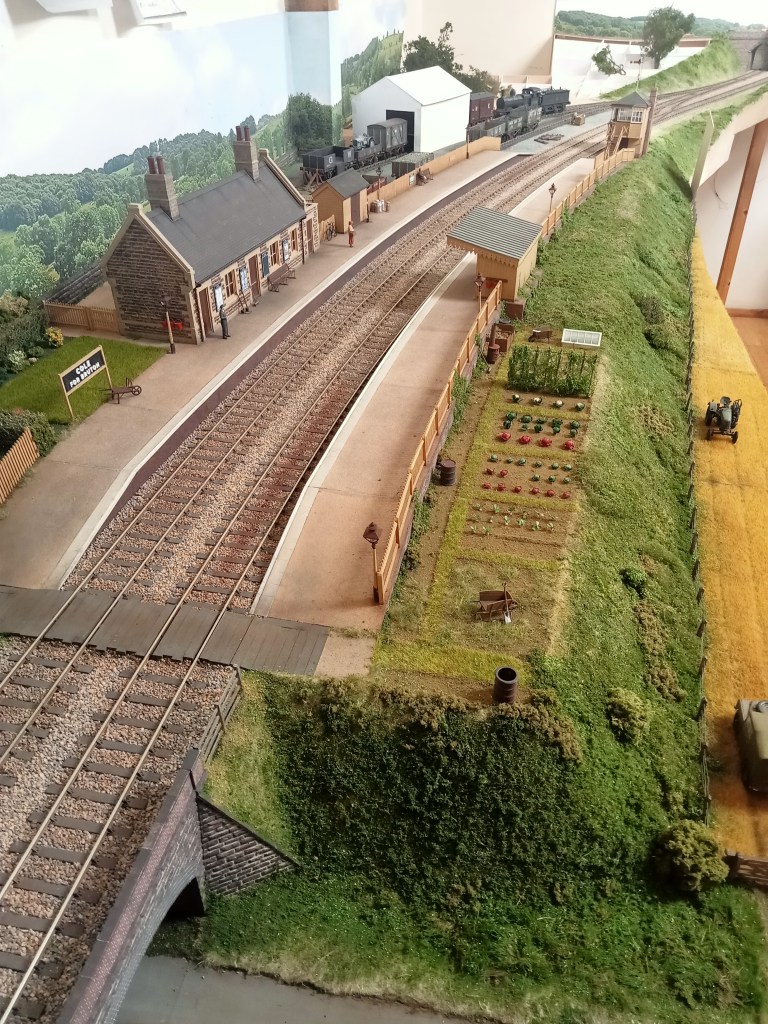
Allan has yet to build more than a placeholder for the goods shed which will be mostly imagined; he has one photo of it just peering above a passing train! It was demolished in the very late 1940s.
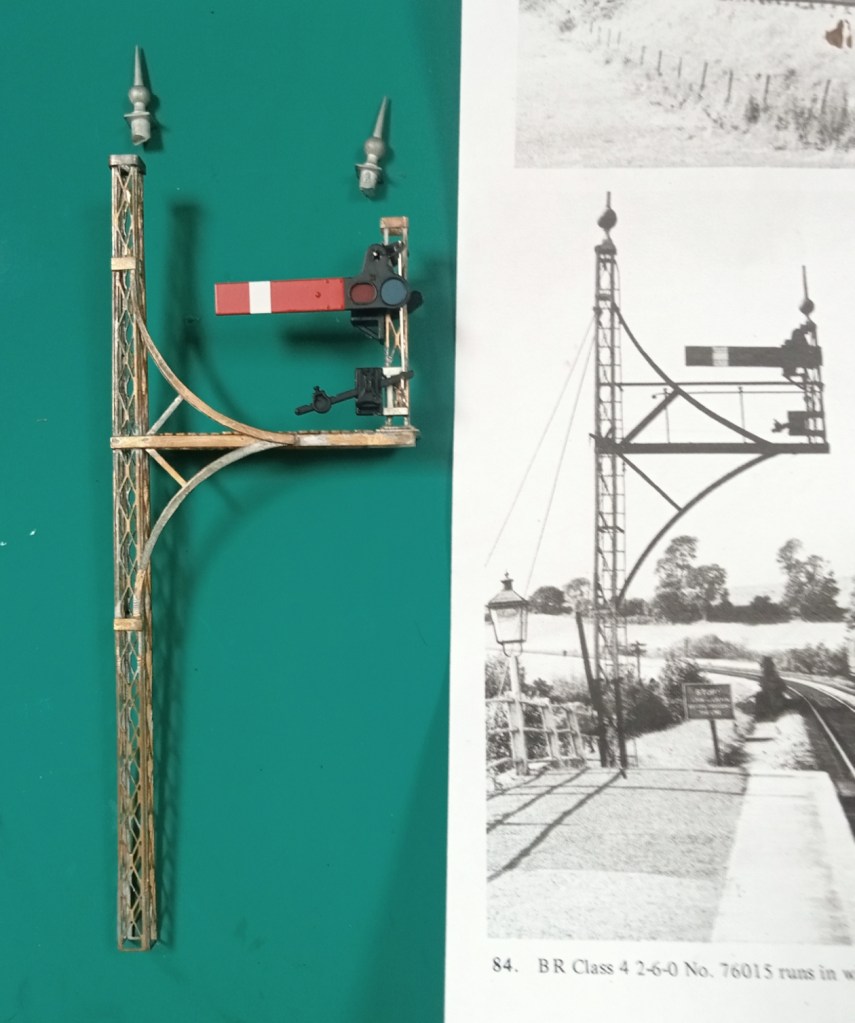
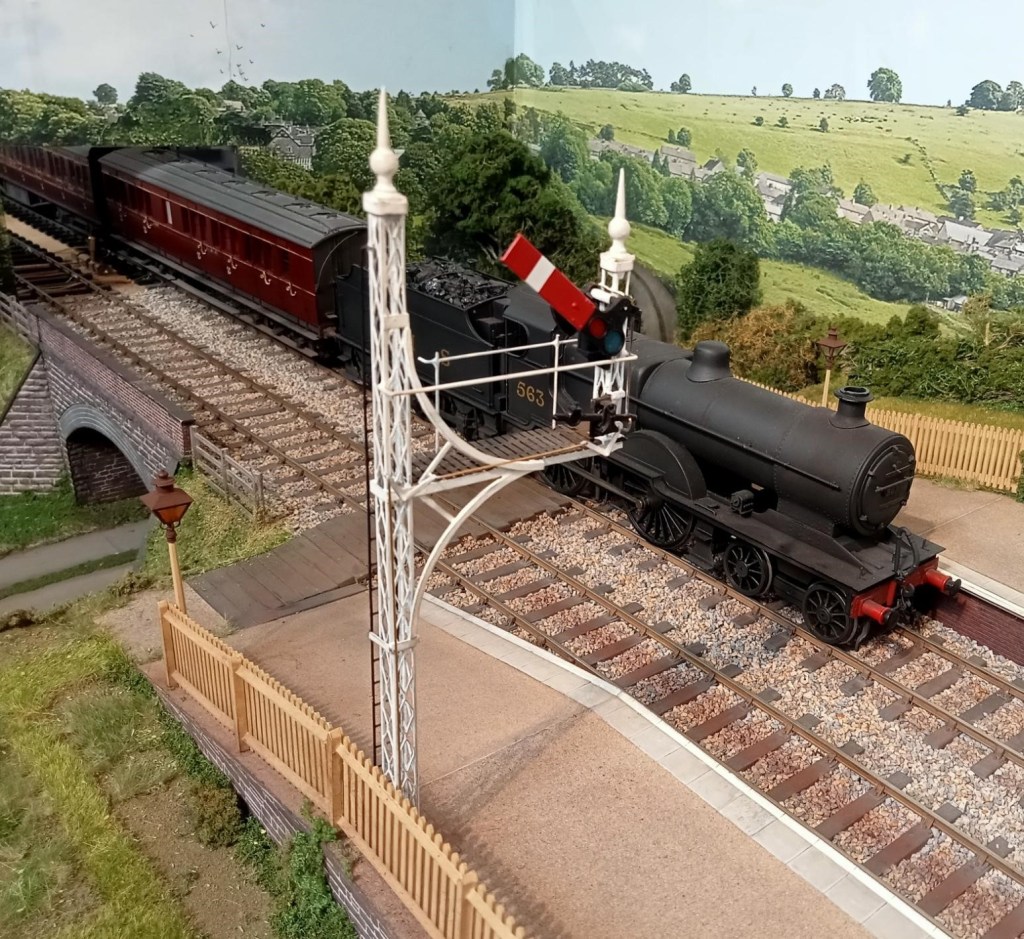
Allan’s recent project has been the creation of the very elaborate starting signal, shown clearly in this crop from a well known photo album. And the finished signal below.

Our new Chairman, Richard, has been fettling some truly superb Edwardian Great Western locos in 7mm scale. A particularly nice feature is working inside motion.
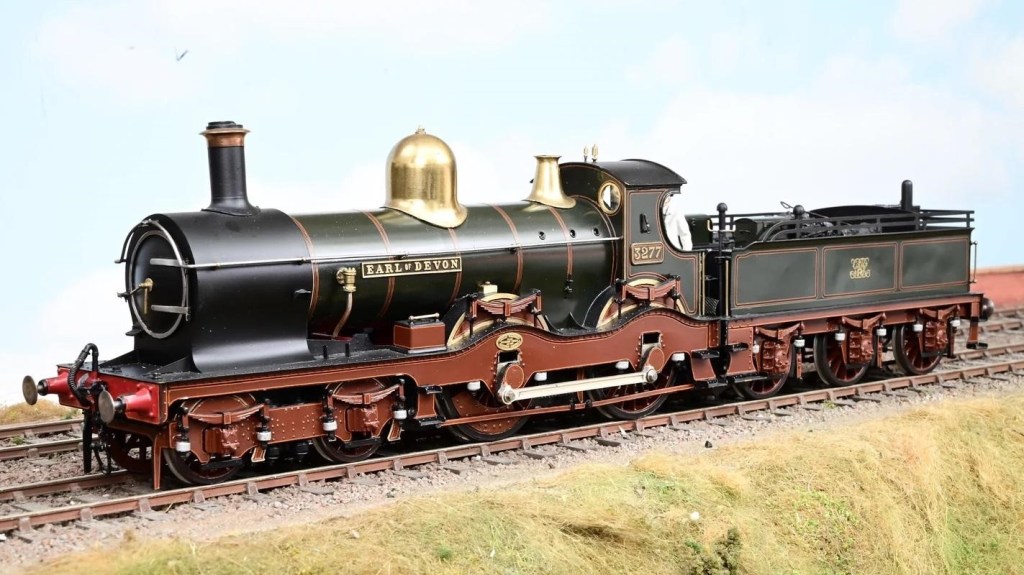
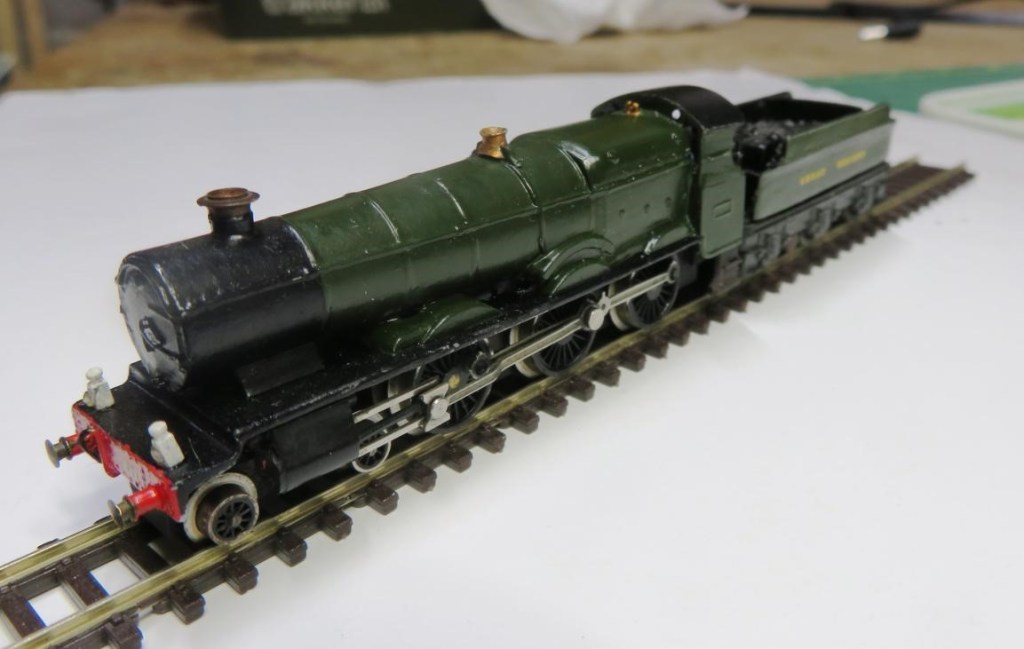
3277 was a Duke Class locomotive built in January 1897 for working the gradients of Devon and Cornwall, but these locos were spread around the GWR region in early 1923 when they were replaced by newer locos. In May 1930 the name was removed from the loco when it was rebuilt as an ‘Earl’ or ‘Dukedog’ class of locomotive. 3277 was withdrawn from service in April 1939. The model is from a Finney kit (builder unknown) and was painted by Alan Brackenborough.
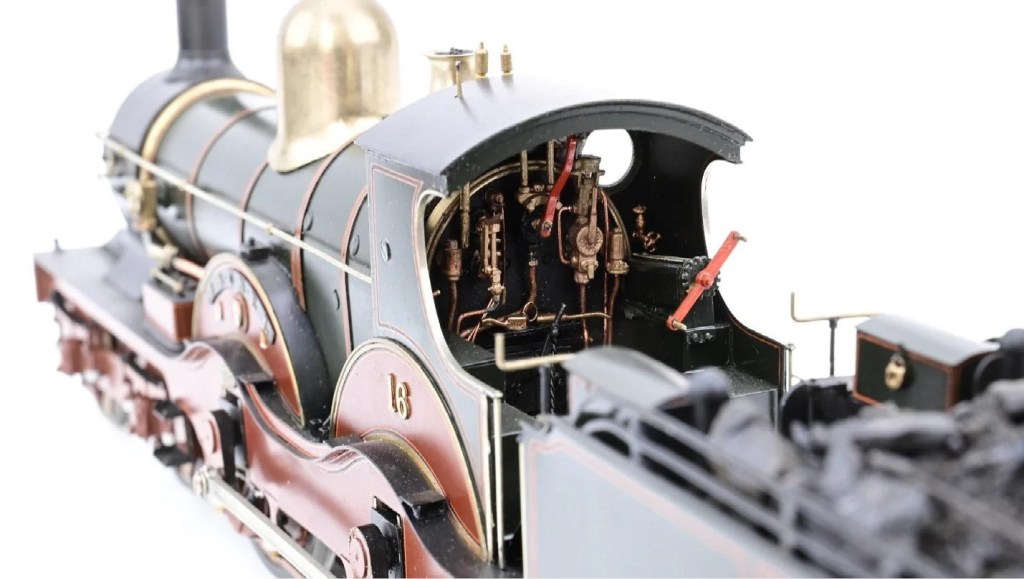
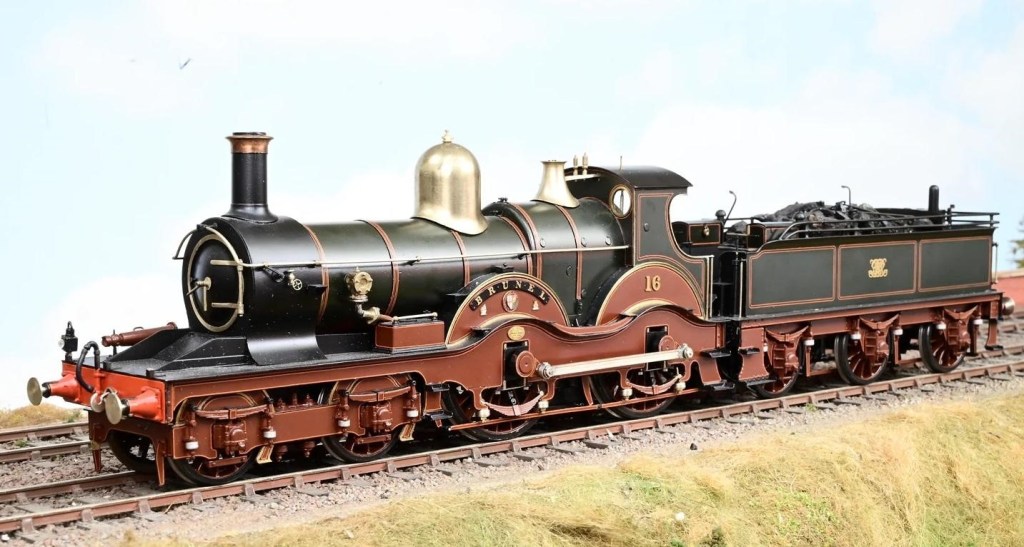
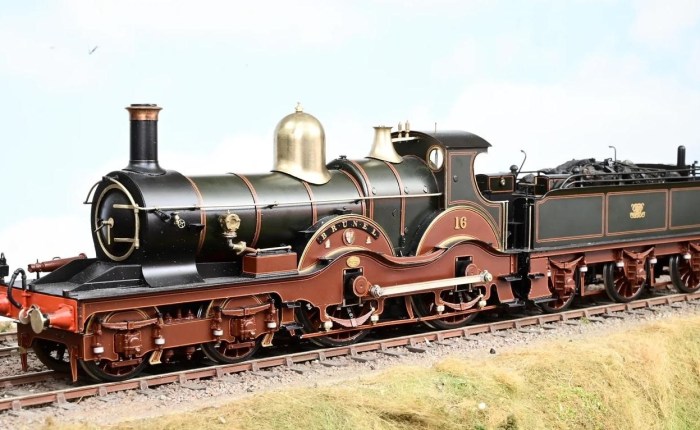
The Armstrong Class were a group of four locomotives designed by William Dean and built in 1894 with 7 ft 1.5 in (2.172 m) driving wheels. In April 1915 no. 16 Brunel was rebuilt with 6 ft 8.5 in (2.045 m) wheels and piston valves, having already been fitted with a Standard No.2 boiler. It was renumbered 4169 as a member of the Flower Class. The model is from an MOK kit, built by Bob Merry and also painted by Alan Brackenborough.
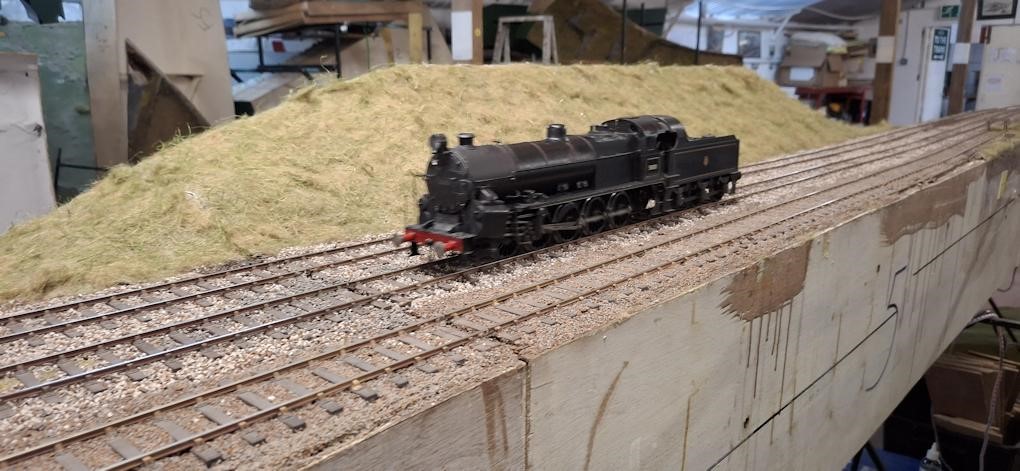
The completed Big Bertha (it needed brakes) running round “The Summit” in July. It ran faultlessly and is now home with its owner John, who is very happy with the result. Some details of Dave S fitting the brake gear: Big Bertha Repair in 7mm Scale, 0 Gauge – Part 3

With the Class 156 finished Steve made a start on the build of the Lion Class Stour, from his own design of etches and 3D printed parts. By June the superstructure and chassis were substantially complete and ready for wheels and chassis ready to be painted LSWR Umber.
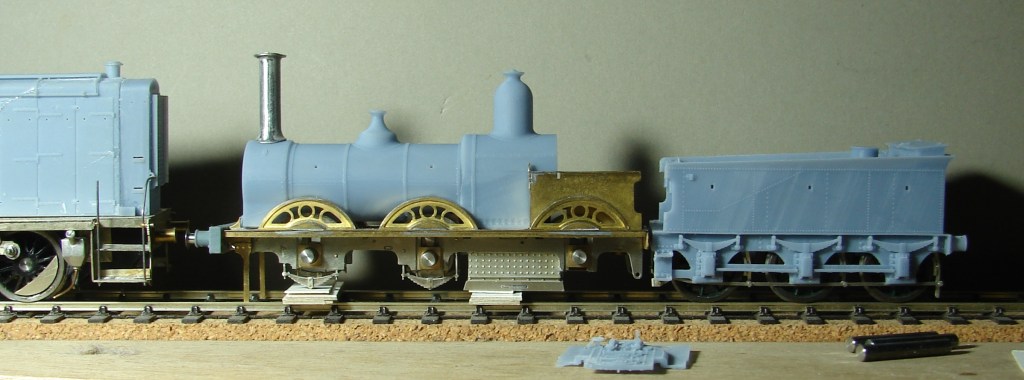
This is the revised boiler printed on his Mono 4K. It’s much more accurately formed with thicker walls (1.2mm), and was supported on a grid with knife edge supports to start the print properly. It has fixed cutouts for the splashers and variable cutouts for different gauge wheelsets, and as a result it is a much better fit to the etched parts. On the question of unfeasibly tall chimneys, the K’s chimney is a scale 5′ (same as the driving wheel diameter). A photo of the original Lion suggests that this relationship is entirely feasible, and as it happens it’s just a little taller than that on the AW Diseasel.
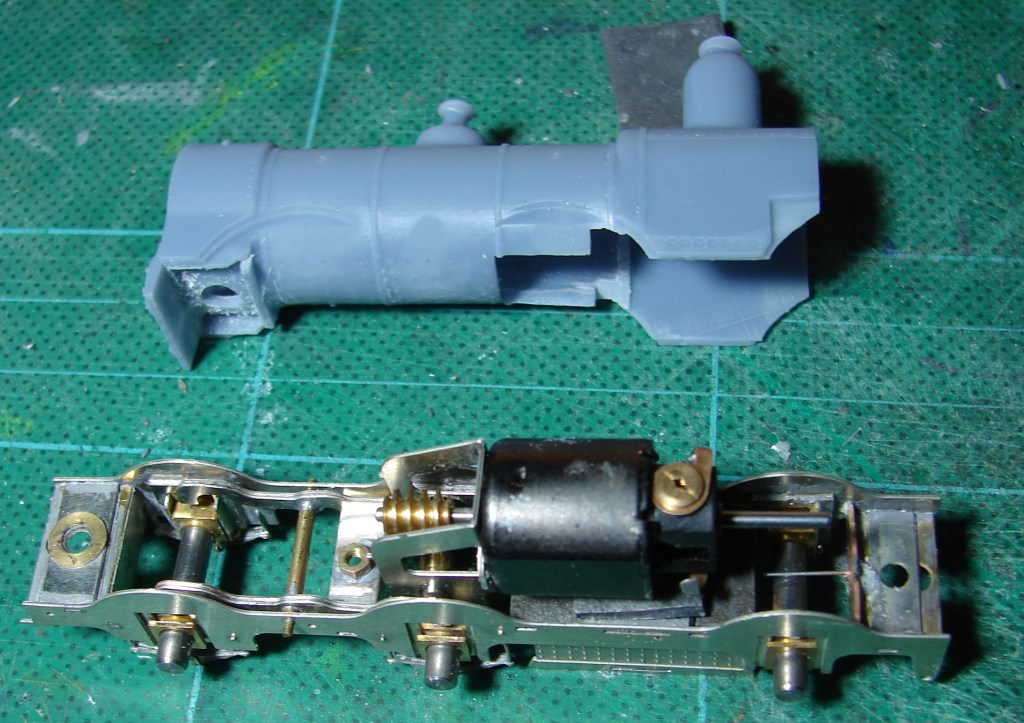
The chassis has the equalising beams and HLK RoadRunner gearbox built up and fitted. A steel wire has been soldered in as a sprung central pivot to give the crew a more comfortable ride. The grate area has been filled with sheet lead contributing a fair bit of weight. The rear motor shaft still needs to be removed. There will be some scope to add weight round the motor and above the wheels at the front of the rear splashers, as well as in the domes, smokebox and boiler. Seen are the fixed cutouts for the splashers and the additional cutouts needed for EM Gauge wheels which of course are inboard of where they should be. There’s plenty of room for the M1220, but only with the ends filed off the protruding motor fixing lugs. The centre bearing hornblocks and gearbox bearings had to be drastically thinned to get the 0.5mm side play required for a 3’6″ minimum radius curve.
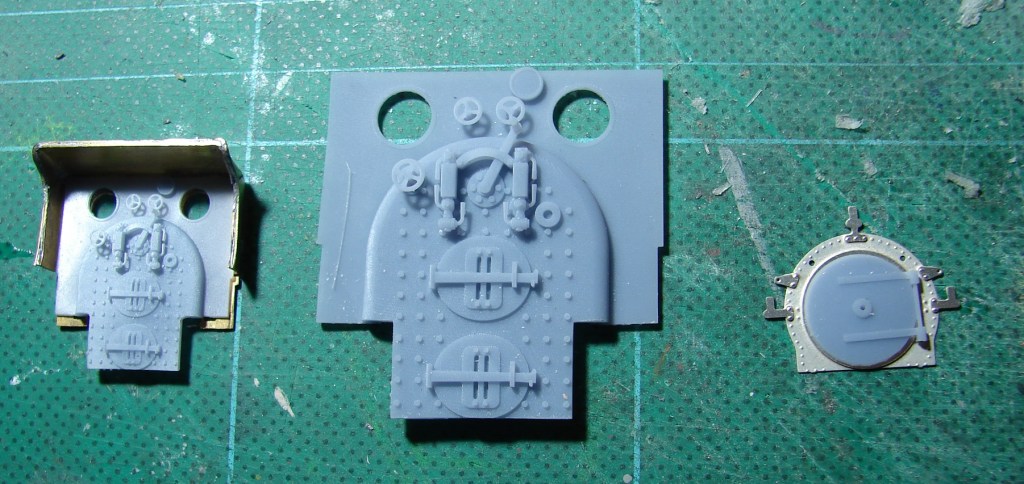
On mature reflection (in conjunction with someone who should know), the regulator has been moved to the middle and two gauge glasses fitted, one a mirror of the other. Whether they should have guards in 1884 is moot. On the left is a JH Beattie version of the revised backhead test fitted in the JH Beattie cab. In the middle the same in 7mm scale, printed with a view to encouraging a friend to build a 7mm scale Lion. On the right a nickel silver version of the smokebox front with handrail and lamp iron rivets set using a less pointed punch in his GW Models rivet press – with that it was much easier to centre the tool in the half-etched holes, thus ensuring that the embossed rivet is accurately placed.
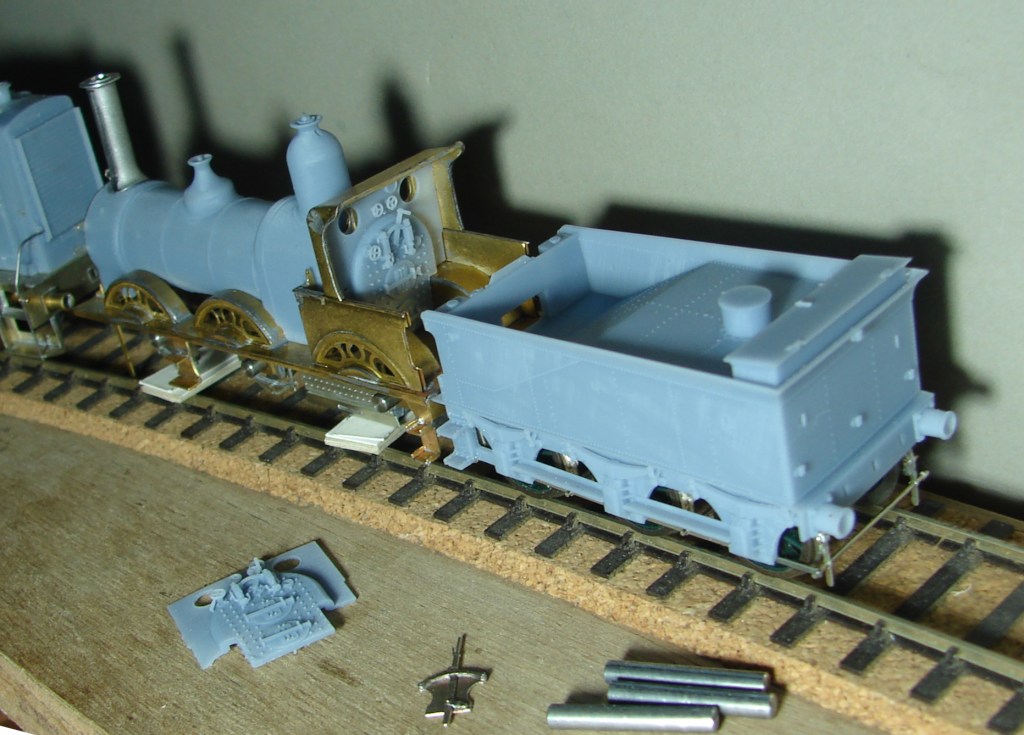
Steps assembled and fitted, and the rear splashers now soldered on. Quite fiddly, but no problems other than the slots being a fraction too wide. So far only 188C multicore solder has been used, carrying the solder to the job to burn off the unwanted resin flux in the process. The forward steps were a later upgrade to the Lions. Rather than cut the second shaft off what turns out to be his only M1220, He ordered an HLK 1219 coreless motor, and removed the M1220 so that the loco could be posed with the backhead in place. The motor is further forward in the Vesuvius and there might therefore be scope for a flywheel needing at least some of that second shaft. The reverser lever has been assembled (foreground). Height of top of the chimney from rail height is 54mm which is a scale 2″ greater than the LSWR loading gauge of 13′ 4″.
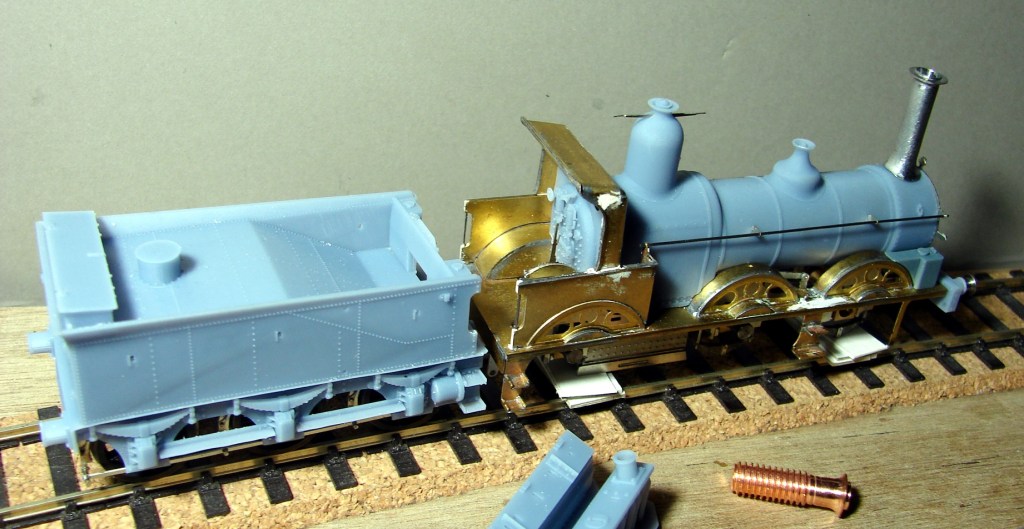
Handrail and etched handrail brackets fitted and 0.5mm steel wire loose fitted to confirm alignment (0.35mm wire looked too thin). In this photo something has been fretted out that looks like a reversing crank and rod between the leading wheels, in this case soldered to the outside of the narrow EM frames. The assembled reversing lever has also been soldered to the inside of the splasher in the cab. If this was 00 gauge there would be a temptation to solder it to the top of the splasher in correct alignment with the firebox sides. The cab has also been soldered in and some white Milliput used to fill some gaps, hollows and scrapes. The handrails have been fitted in the slot formed at the rear of the cab splasher and secured with the Milliput. Unfortunately it was very slow to go off and took a week to harden so suspect it’s actually ‘dried’.
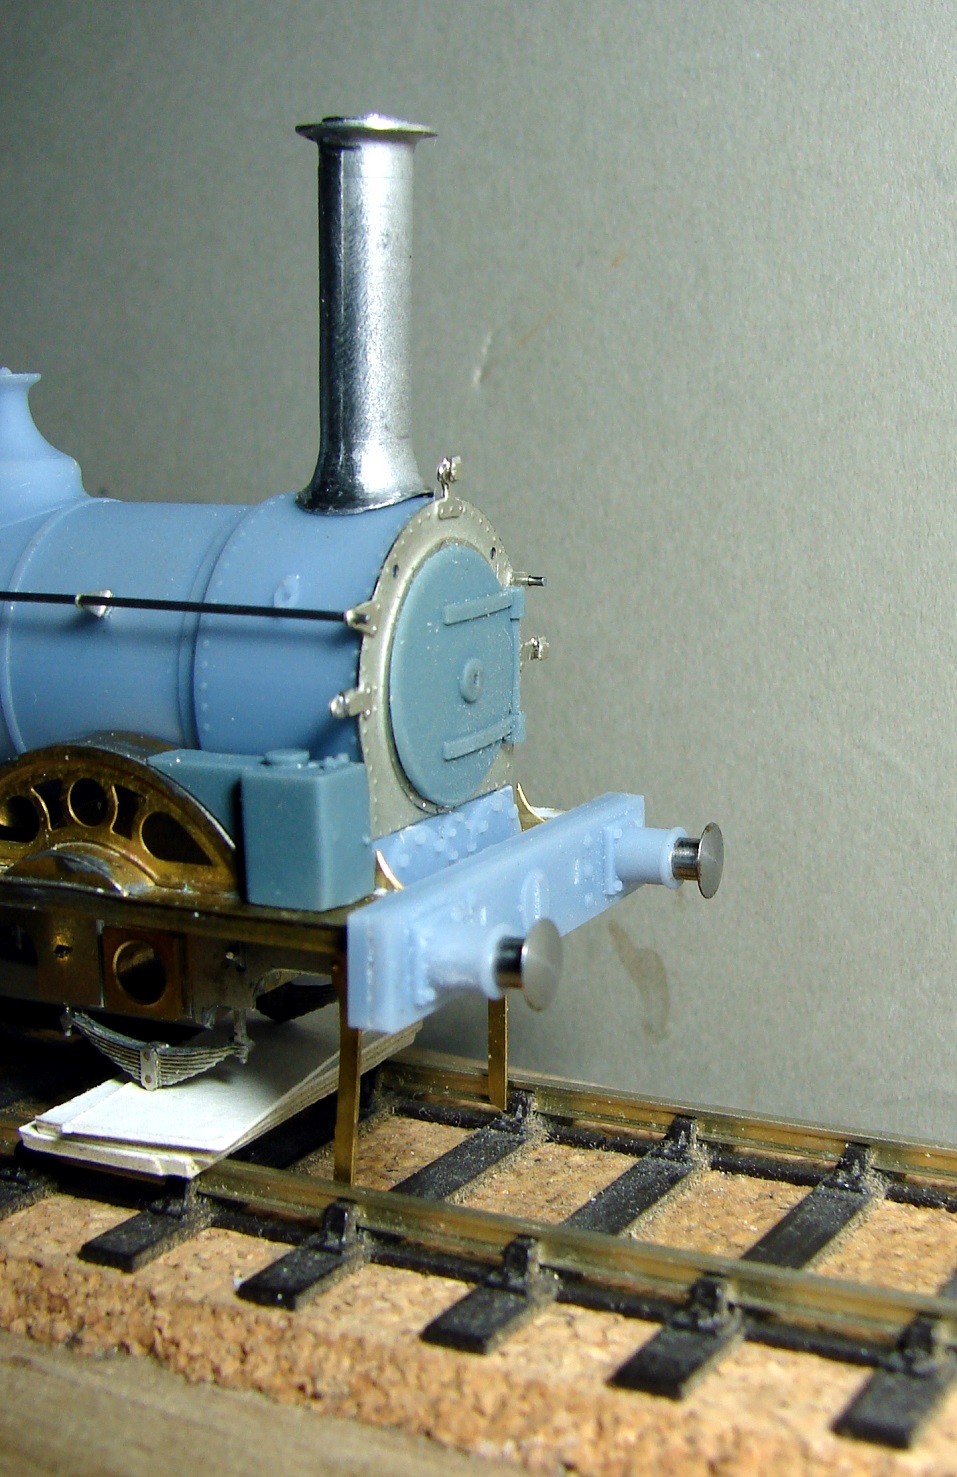
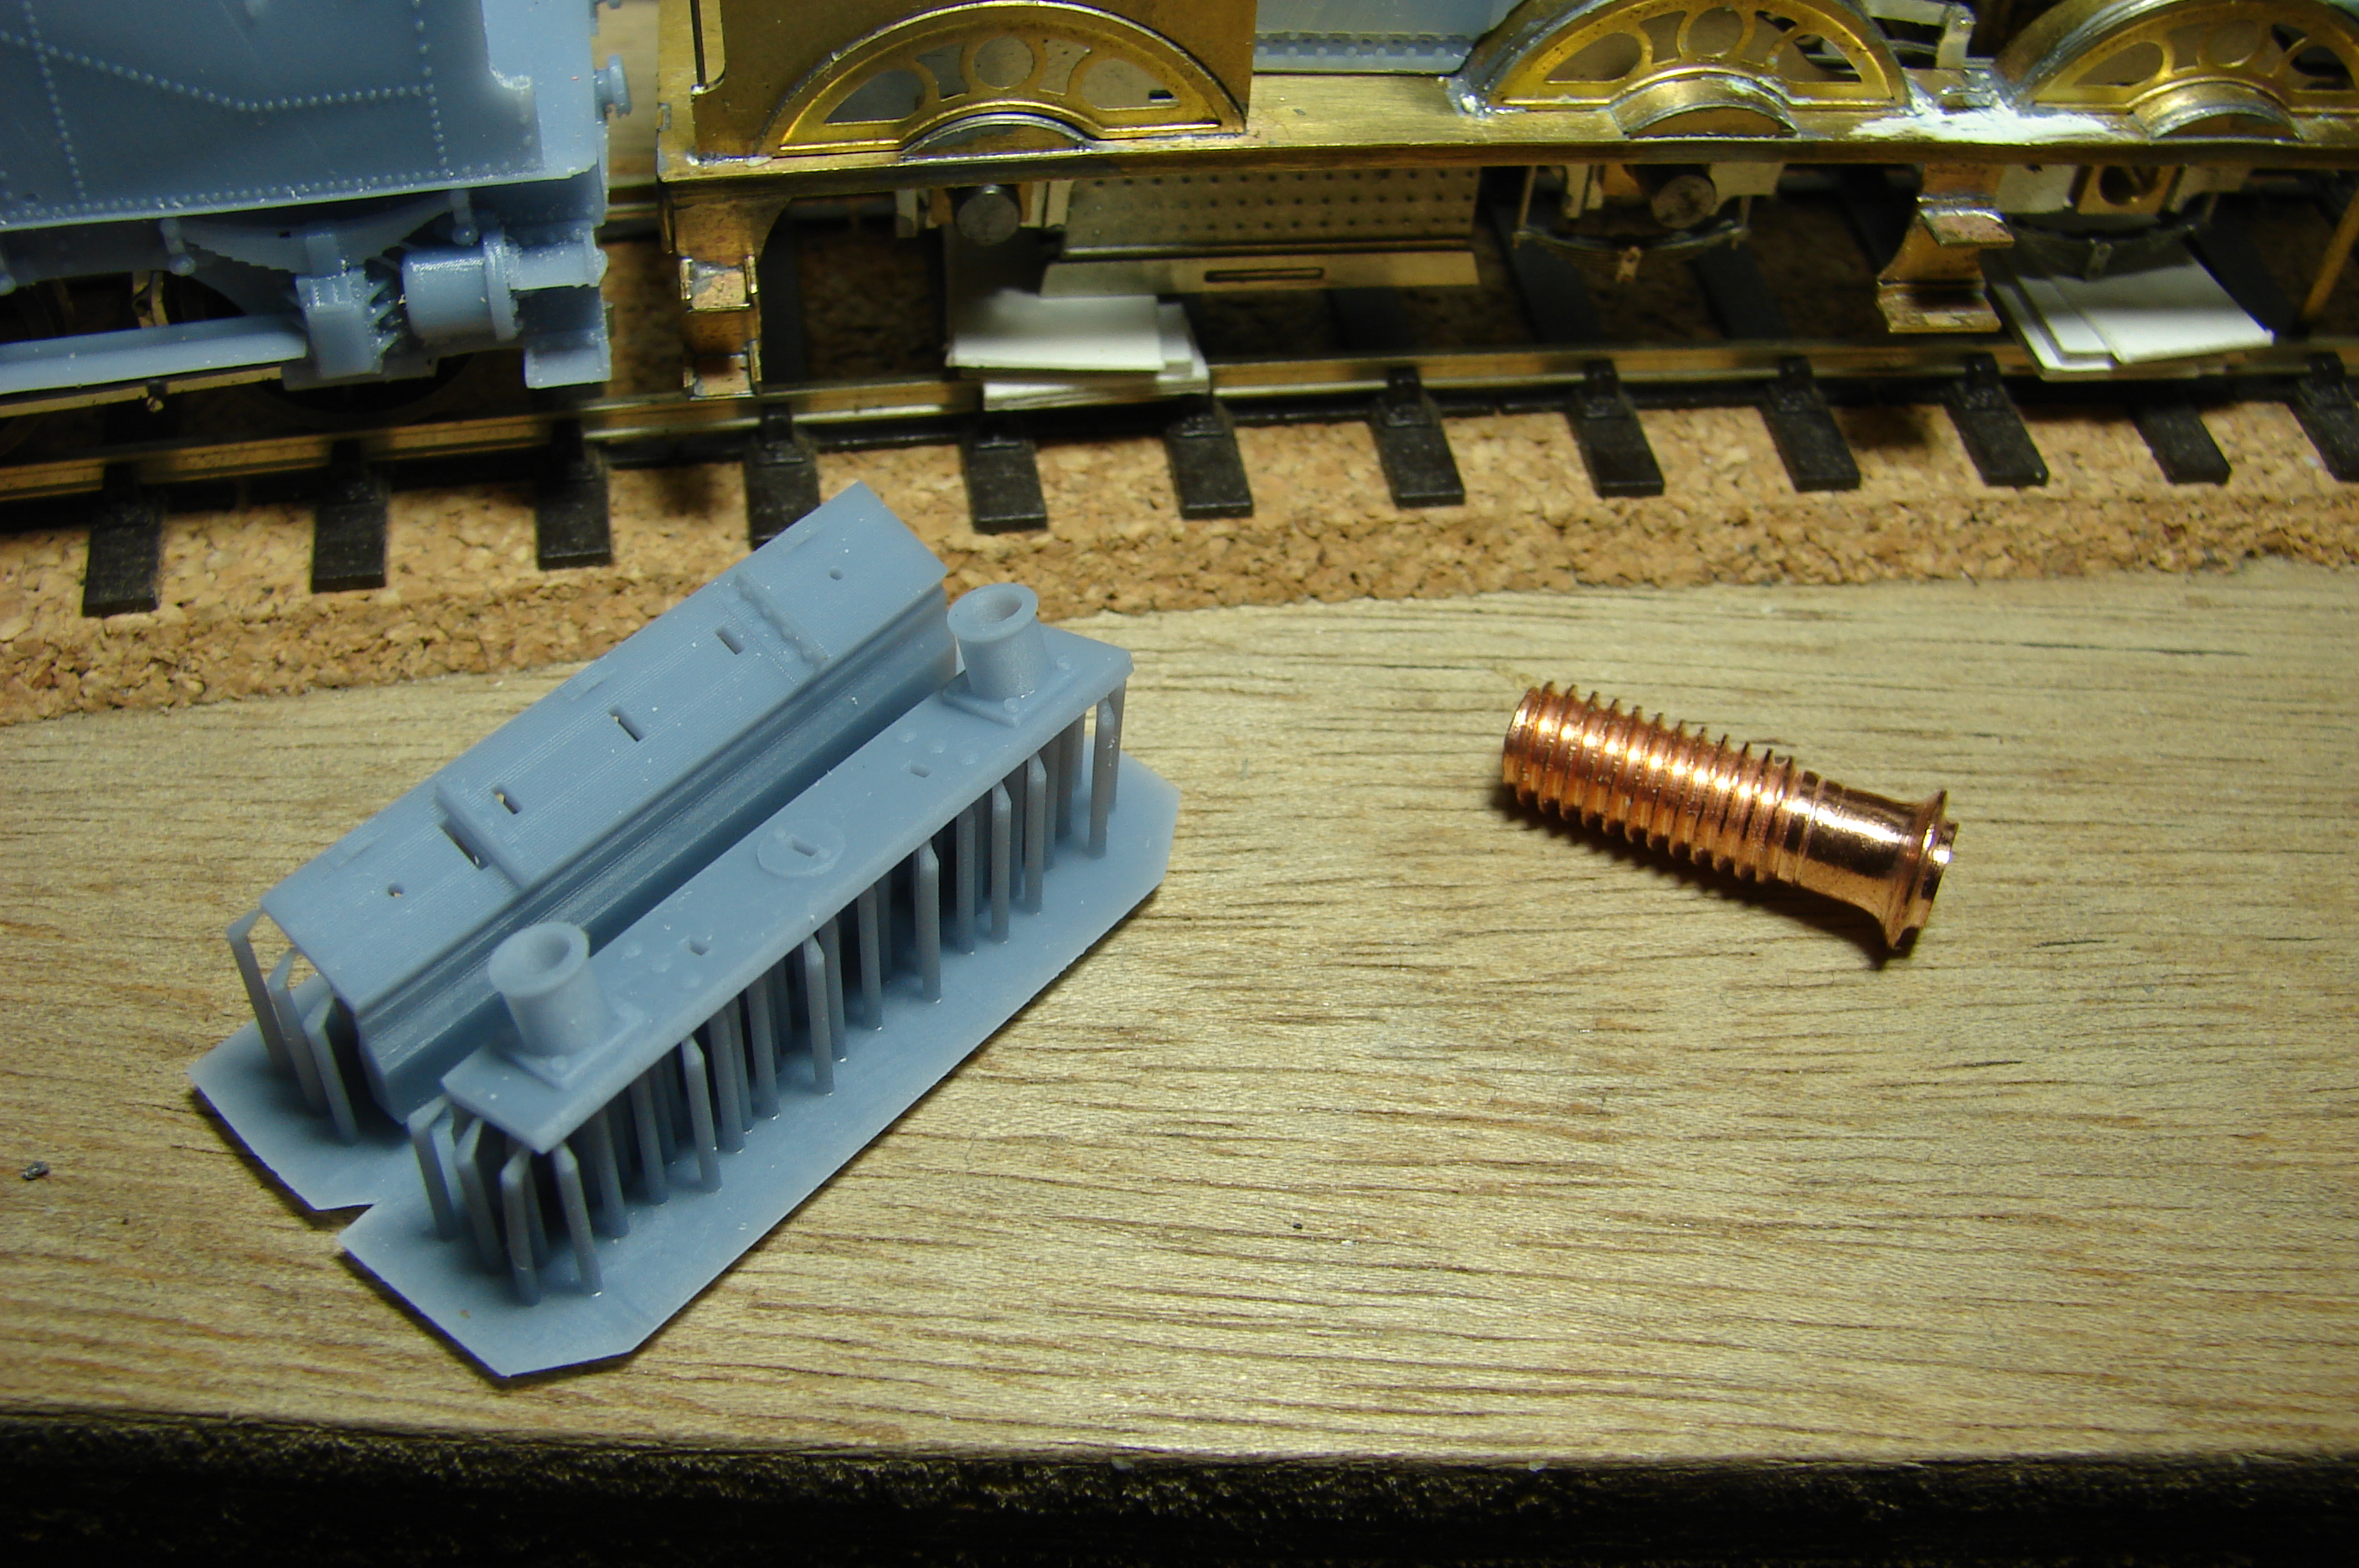
As usual it’s a photo (not the mk1 eyeball) that highlights that the smokebox door might not be fully home. 3D printing the buffer beam presented a problem in that it has two fair faces opposite each other, one of which must perforce be peppered with supports. Steve’s solution was to print it in two halves with a knife edge support at the bottom of each support and the fair faces printed at 20°. Both halves had to be thinned to compensate for ‘additive kerf’. A nice sliding fit was required for the AG buffers the shank of which was 3/32″ or 2.4mm. The housing was printed at 2.5mm diameter internally and that gave a perfect fit, but that took a couple of iterations to get exactly right. In the process Steve has been able to thin the walls of the housing to a nominal 0.34mm. As before the supports were added via Blueprint Studio and it was sliced in Anycubic Photon Workshop.

Also seen is his attempt at a copper capped chimney. Not being a GWR modeller Steve had no idea how nasty copper was to machine, but with files and cordless drill he eventually got somewhere close. The later Beattie chimney had a sloping top to the flange unlike the earlier ones, and Stour would have had that later chimney. Steve needs to cut chimney and cap square losing 1.5mm of height in the process, and that will be his next task, followed by painting wheels and frame LSWR Umber ready for assembly.
March & April 2025

March & April 2025

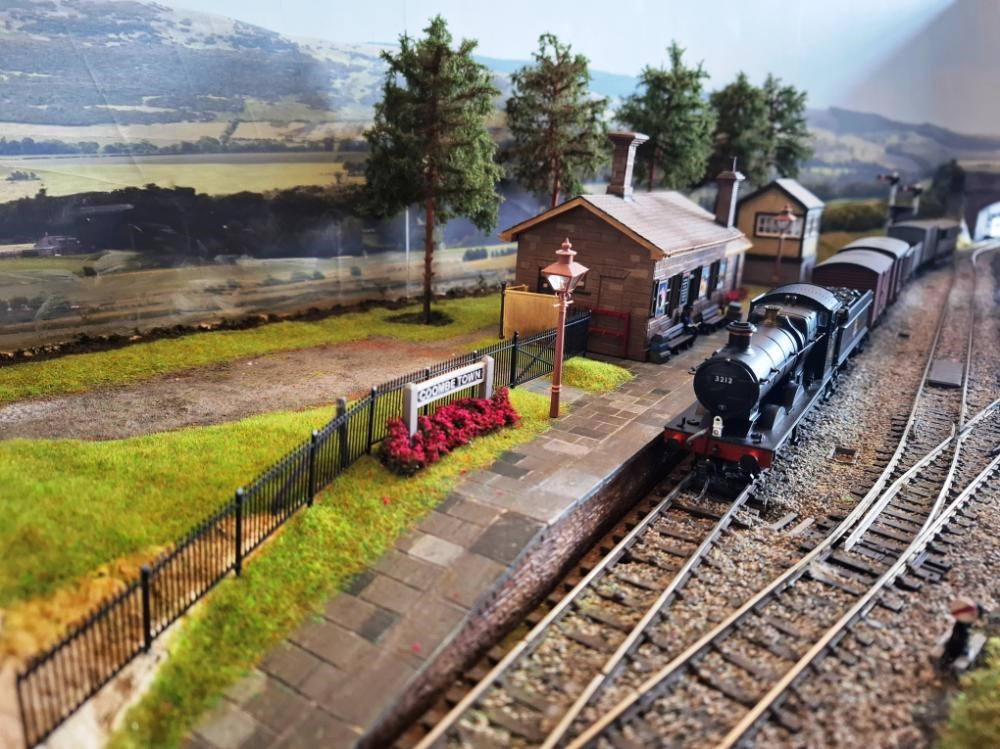
Dom has been making progress on both the scenics and fleet at 00 Gauge Coombe Town.

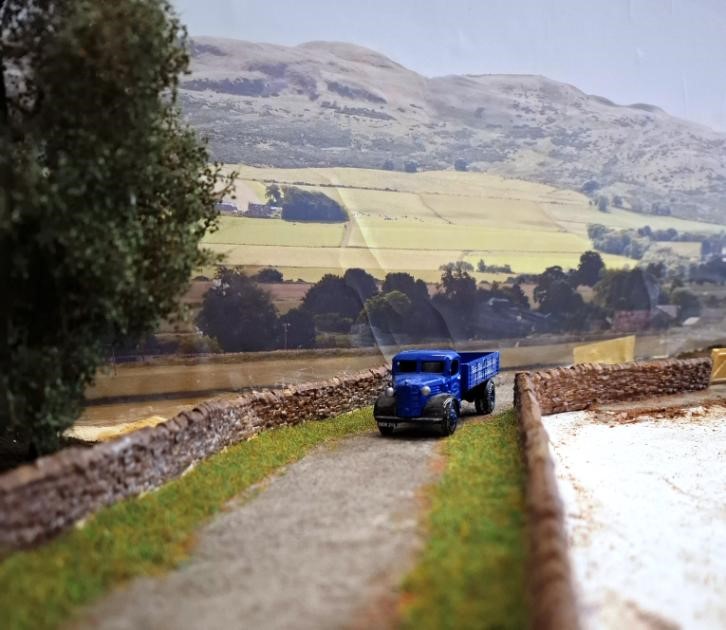
The remaining road surface has been added forming a nice country lane.

The station forecourt and more grass has been added as well as planting on the platform. 3212 has now been fitted with sound and a firebox glow adding a tender locomotive for the goods roster.

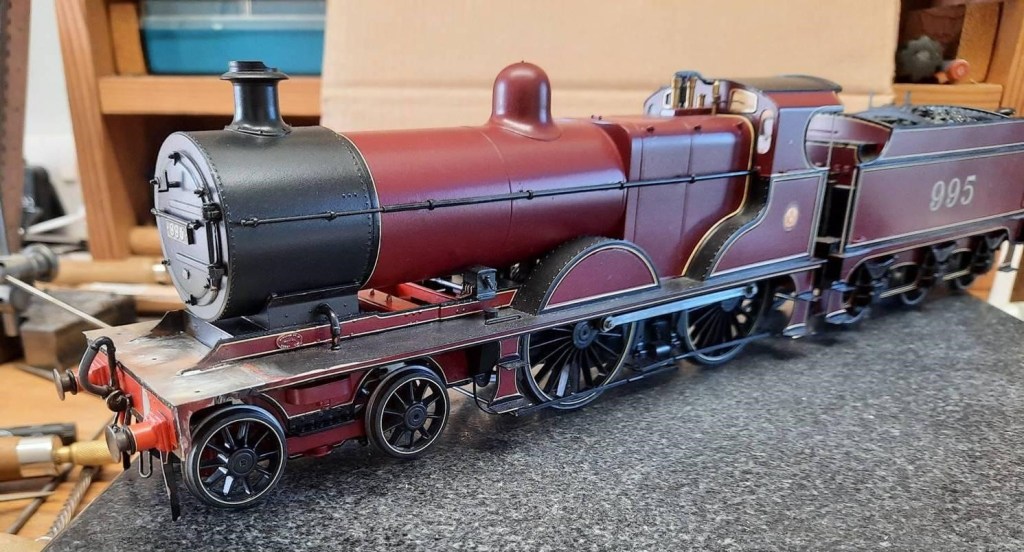
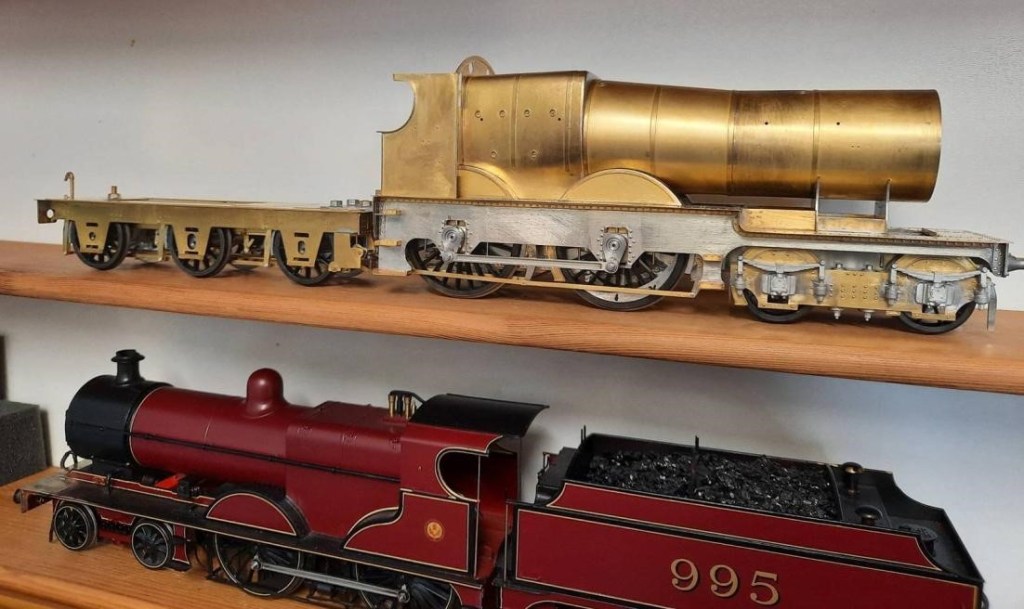
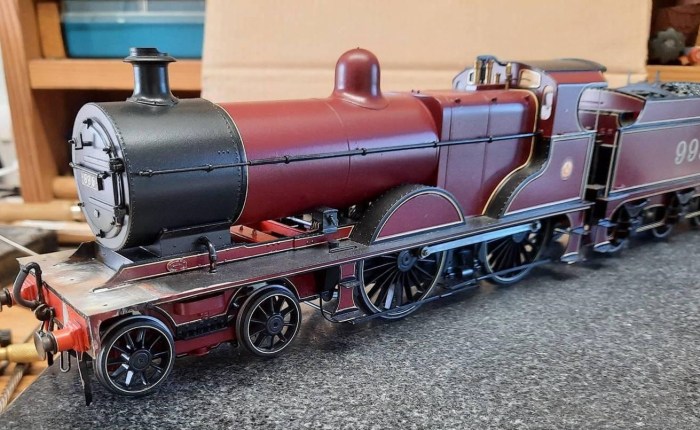
Hinted at in a previous post Dave H’s fabulous scratchbuilt 990 Class (0F Gauge) had indeed had a close (and abrupt) encounter with a floor. He had spent a couple of days with Dave S in North Wales and took his mangled 990 with him, which had been sitting in a “too sad to look at it” box for a year.

Dave S took it out of its box and set about unbending it during an afternoon with the aid of a blowtorch. In the end he had to make and splice in a new piece of footplate, but managed to get the S shaped buffer beam straightened out, and some other nasty dings and bends straightened while Dave H watched. Every now and then Dave S would say “Look away now, Dave” and there would be an almighty thump. Something to do with techniques for restoring vintage cars, I believe! Dave H took heart watching all this and took the big Z bend out of the front frames with some pliers.

Anyway, the photo shows the results. So a big “thank you” to Dave S, who persuaded him that it can be fixed! If there is a silver lining to this cloud, then the necessary repaint could be partly justified because the alleged Halfords etch primer didn’t etch, so the paint is not very fond of the metal. It won’t be ready for Bristol, sadly, but maybe it will run on The Summit another day.

Dave H has also been working on City of Gloucester over the winter – the bones of it are done now, just detailing to do. Fitting the upper works to the footplate was very fiddly but he got there in the end. The ‘City’ is a much smaller looking engine than the 990, although I think the heating surface in that fat Std. 4 boiler might be greater. The ‘City’ didn’t have to get over the Settle and Carlisle, though, just trundle along on Brunel’s billiard table! [Ed] There was a definite lump in the green baize between Tiverton Junction and Exeter, even if these engines never made it as far as the infamous Devon banks!

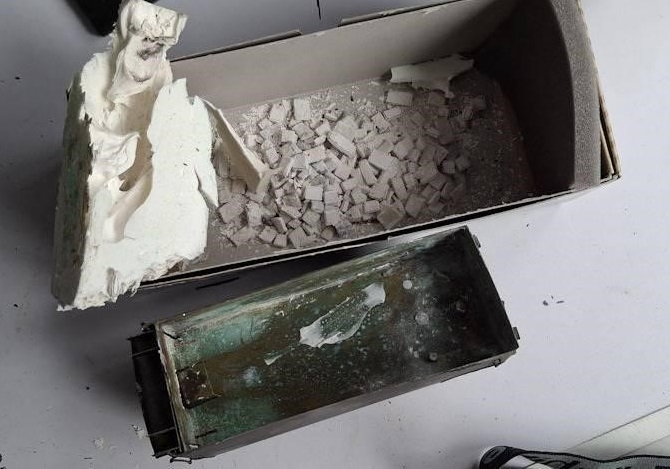
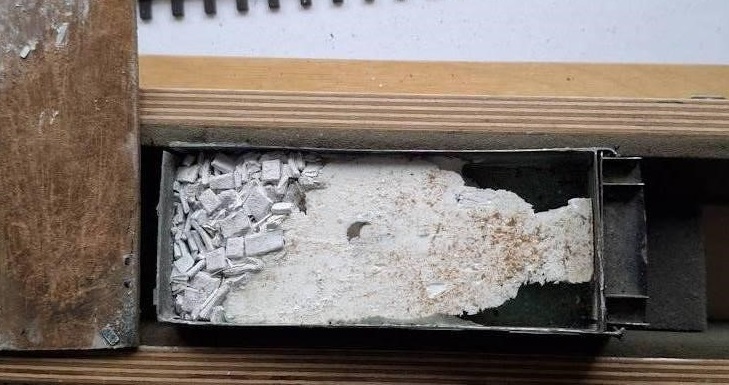
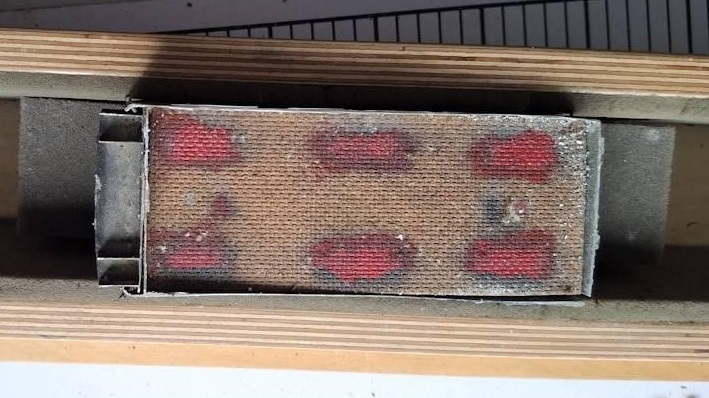
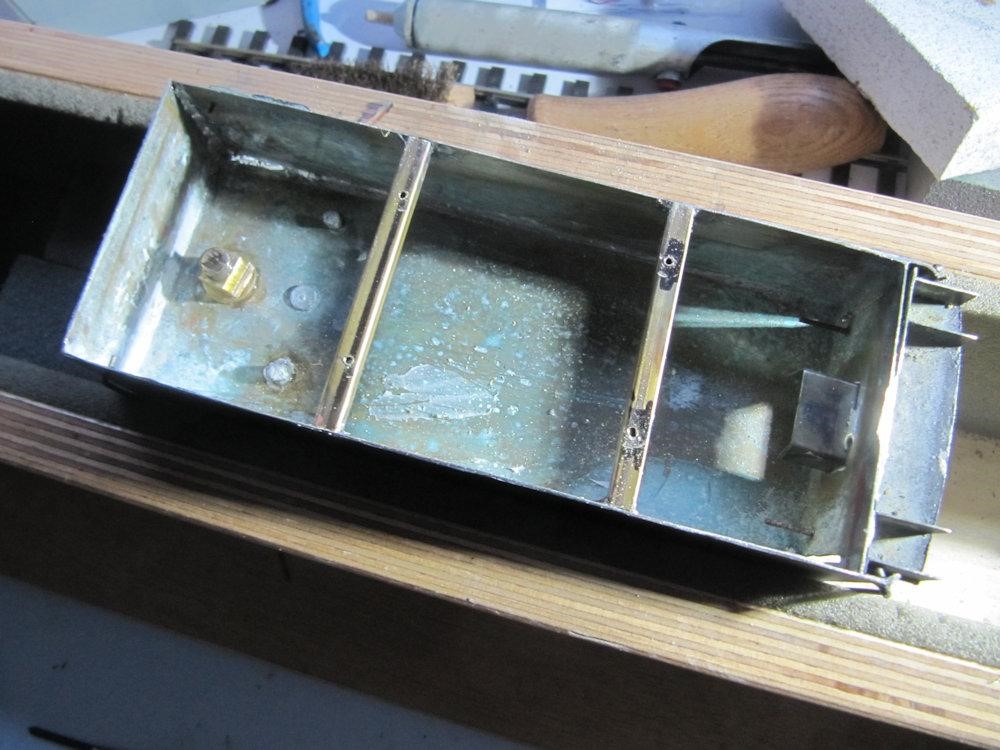
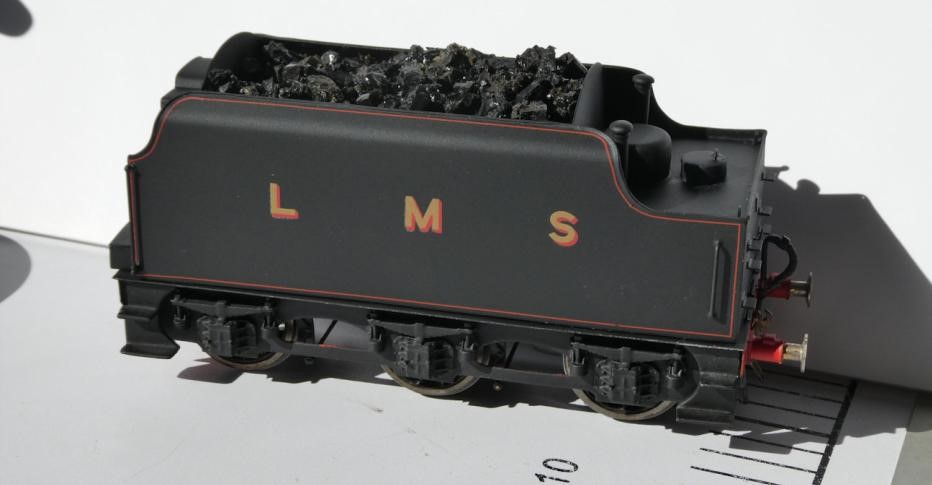
Dave S (master of the hammer) was asked if he might be interested in fixing a Black 5 tender with a split corner. Unfortunately Dave did not take an initial picture of the tender. It was an old model and it was built not to be taken apart. The tender rattled when shook but there was no way to get to the inside. The first job was to remove the tender body from the chassis. A thin fine toothed back saw helped in that process. The first three pictures show the contents of the tender body. I’m not sure what the white mineral was but there was a lot of white bath sealant in there too.

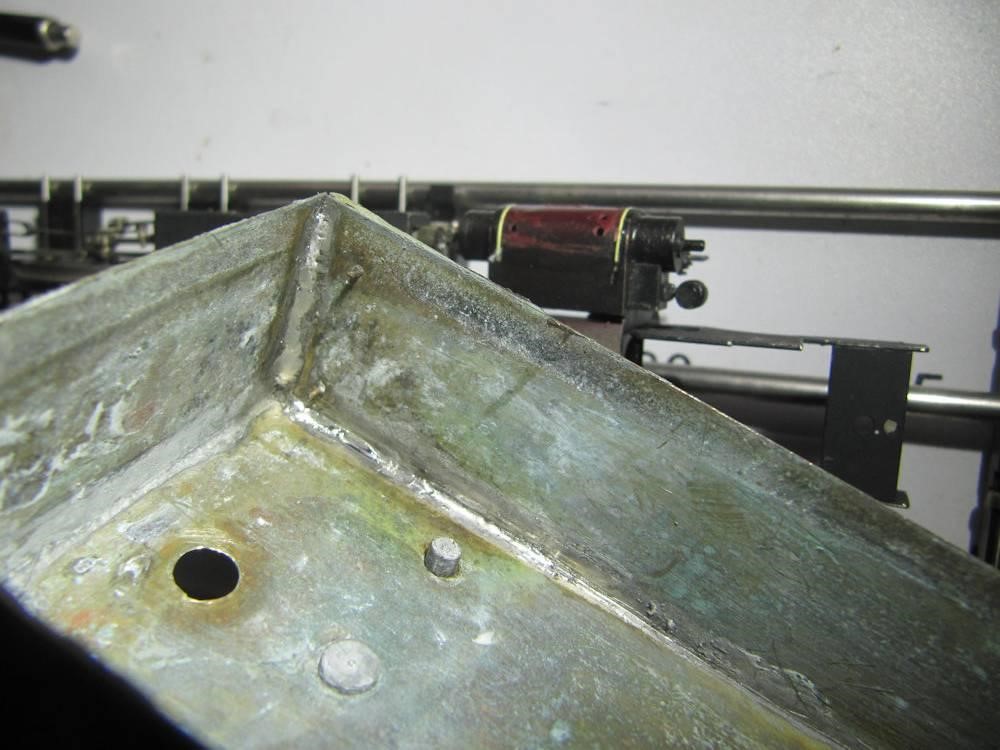
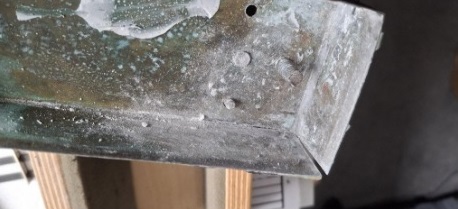
After cleaning up, we arrive at the re-soldered joint and the split in the hopper before.

The next problem was how to attach the tender body back onto the chassis. Two hollow square section brass stretcher bars were soldered across the tender body base.

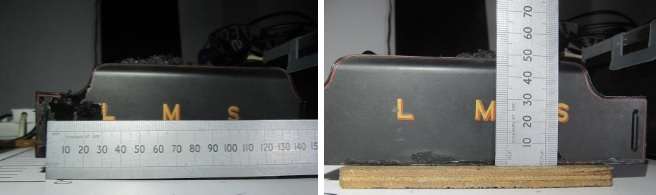
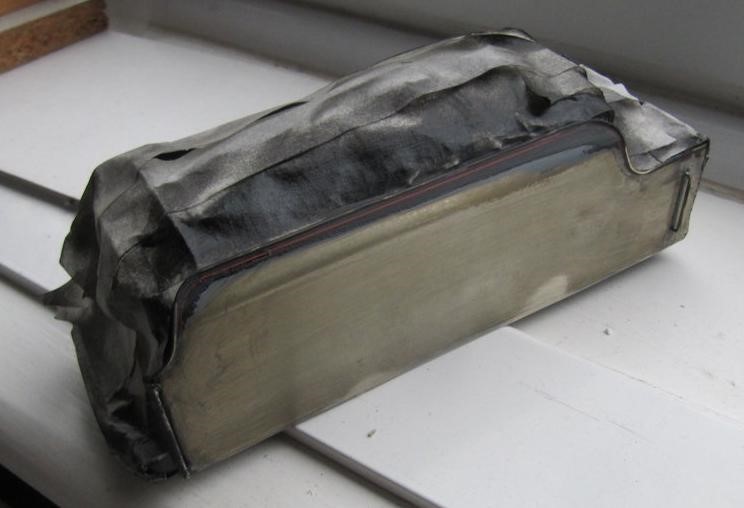
The heat from the soldering process burnt the paint on the outside of the body. As some of the original varnish had already come off, a repaint was in order. Transfers for the letters L, M and S along with some thin red lines for the edges of the tender body were ordered from Fox Transfers. These pictures show me measuring the positions of L, M and S to ensure they went back in the same position as received. [Ed] Looking at that ruler this model must be in 7mm Scale 0 Gauge (for those wondering).

The tender body ready for painting. Dave needed to mask some small etched plates on the tender body so that they did not get painted. He used Phoenix Precision PQ7 Superacrylic Masking Fluid. He’s sorry that he did as he found it to be awful stuff to remove – never using that again. Sue then gave him some Pebeo Drawing Gum that she used. This he found to be totally acceptable on further masking he had to do. [Ed – This is exactly how marriage should work!] The body was given a coat of light grey primer followed by a few coats of gloss black (as recommended by Fox transfers). Once dry, the transfers were applied and then given a few coats of matt varnish – part of the owner’s request.

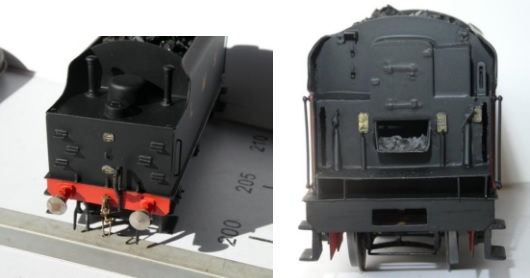
The last pictures show the finished item looking good again. It has been returned to the owner who is delighted with the repair.

Allan’s superb completed model of Cole station in 7mm Scale. The wires sticking out are for a light fitting. Allan thinks that perhaps the roof could do with a little more weathering. Purists [Ed. That would be me!] are going to dispute the LMS colours but, as with the signal box, he would find it difficult watching his LMS trains passing through the station painted in SR colours!

September 2023

This month some very small models book end some very big models.

This is Dean’s 2mm scale N Gauge Saint Class 2929 St Stephen. This is a Grafar Hall cut and shut with a Langley Saint conversion kit. He still needs to source name plates and cab side numbers. The kit went together quite well but the cab needed a scratch built brass front plate, all white metal joints were low melt soldered without any blow outs, so that was a new experience and a technique he feels he’s got to grips with.

Dave H finished another Shelf Queen while he had Covid – it’s a Slaters kit with some scratch built bits so as to match the rest of the Queens when they are finished. He thought he’d try a kit to save time (and frankly 8 compartment thirds are a bit boring to build), and having the sides ready made did save time, but I think it was harder to paint.

The kit is accurate though and builds a good likeness of the real thing. This is the spoofed “Swindon official photo” which he think matches photos from the time quite well.

The transfers are Tony Reynalds (still available from CPL) and they are streets ahead of anyone else’s for Edwardian coaches. They are waterslide but very easy to apply. This model was started in 2007 then abandoned after I messed up the initial paint job, but then John M suggested dropping it in hot caustic soda to strip the paint off. That worked (lots of bits fell off in the process), and Dave decided to have another go. Main lesson – carve off the top and middle door hinges before spraying the chocolate and cream. They just get in the way and they are completely invisible once painted.

This is the first of five clerestories which will form a fast non-corridor train, topped and tailed by two 40 ft PBVs I’ve already built. The next on the shelf is a 58ft clerestory tricomposite which Dave started building in 2000, making it the longest serving ‘Shelf Queen’ by three years. It just needs lining, lettering, glazing and varnish so maybe it won’t take too long!

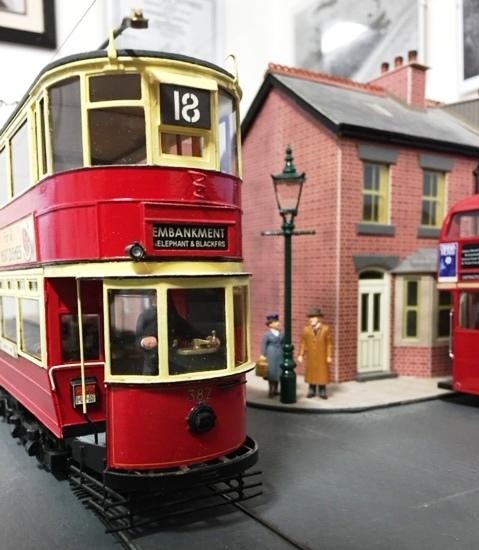
Simon K has a ‘small’ 7mm scale 0 Gauge tram layout. Your editor is going to take a wild punt and suggest that it’s a ‘London tram’. Simon comments that ‘The Brief Encounter’ couple look a bit out of focus. As someone who worked for years at Elephant & Castle, Jim couldn’t help chuckle at the destination blind. And no, your editor couldn’t understand why either.

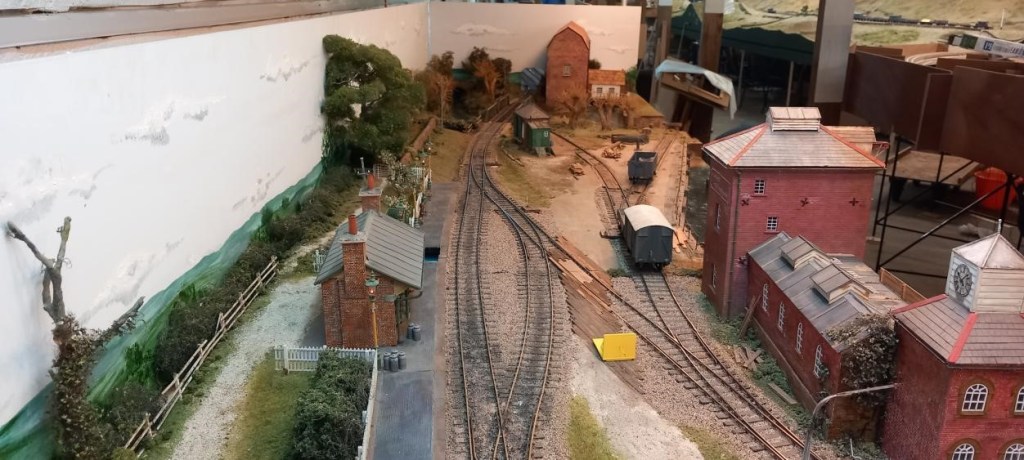
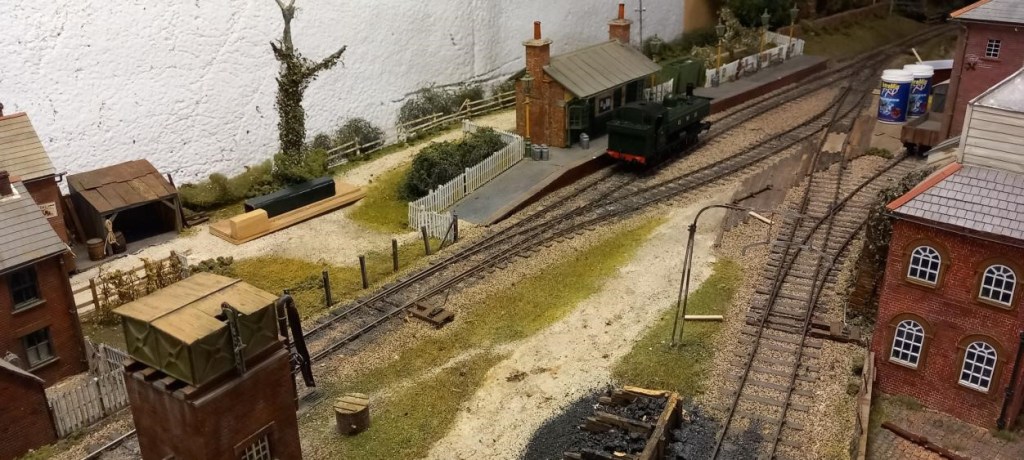
An overall view St Martin’s Wharf looking towards the fiddle yard. This masterpiece was Bob Alderman’s penultimate layout. Inevitably, extended storage had taken its toll so members have been cleaning and fettling it, and also working out how it works. Pete C has found the missing platform bits, and the platform filler is now repaired. The explanatory Colonel Stephens display page has been reworked, the contact details having changed, and it will be laminated.

Dave H is fitting DCC chips to the locos and giving them a service so that they can be reliably controlled by the Z21 and Hudl portable tablets. He has also organised the operating rota for Taunton so that operators can benefit from free admission and, even more importantly, free school dinners!

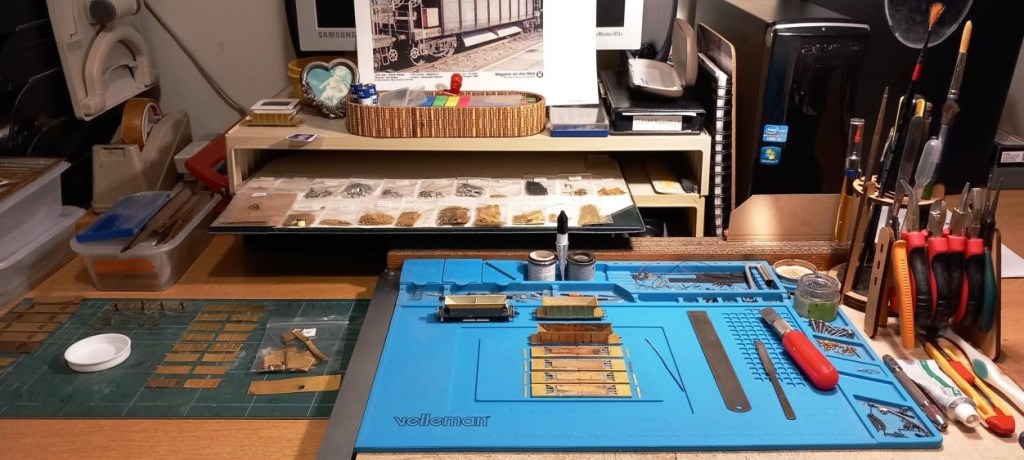
Jim has been creating some “Whale” bogie ballast hoppers in 2mm finescale. In real life these were a development by BR in 1966/7 of the more common 40 tonne “Walrus” and “Seacow/Sealion” hoppers with extended bodies (eight panels instead of six). They were not a huge success, and were transferred from the Southern Region to the Midlands in the 1980s, making them ideal for my (maybe one day!) 25KV overhead project “Bungham Lane”.

Inspired by an article by Tony Buckton in the May 2010 issue of “British Railway Modelling”, the main difference is Tony carefully “cut and shut” two Farish RTR products. These now cost over £50 a piece new (!!) so I am butchering N gauge Society etched brass Seacow kits which otherwise were mouldering away in the gloat box. No longer available, they require considerable dexterity with a soldering iron, but Jim has loads to make mistakes with!

Seen above one basic bodyshell sitting on the temporary workbench that Jim uses in his study. For comparison above it are (a) a Farish RTR Seacow and (b) a NGS Seacow body. Also in the picture is a photo of the real thing from Gareth Bayer’s excellent website “Wagons on the Web”.

Five basic bodyshells completed – which is as far as Jim has got at the moment!

August 2023

This month a selection of layouts from our club house and a garden railway.

Ray Hammond’s layout Thursford (M&GN) as set up in the club room. This is a pioneering layout built to S4 rather than P4 standards – so absolutely no compromise on check rail clearance and back to back. This layout is in the capable hands (and care) of Ray’s daughter Susan.

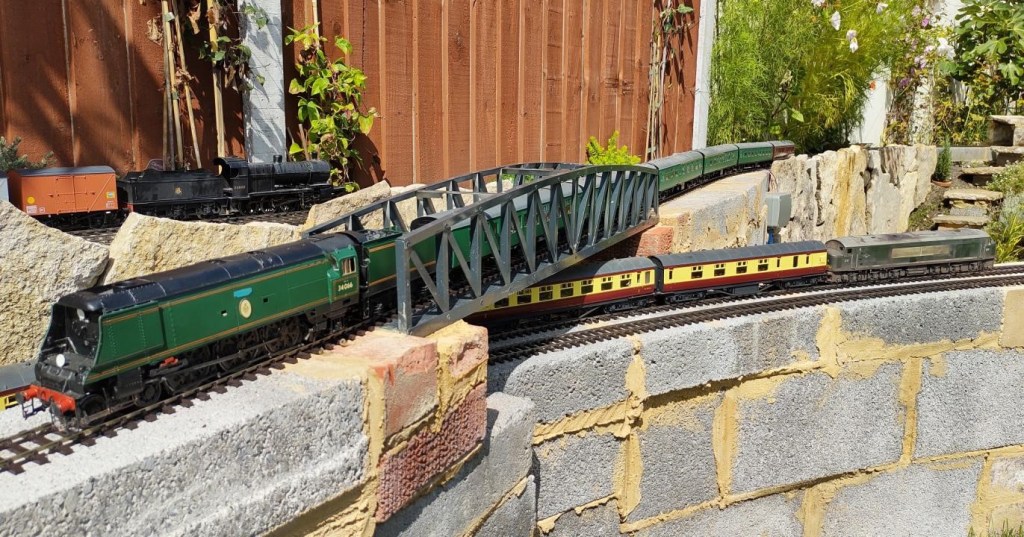
Dick has been thinking about building a garden railway since he bought his first house in 1978. There were two aborted projects at different houses, but now he has retired, he decided to get on with building an O gauge railway. He has built a 36 ft. long shed, (insulated, heated and fully plumbed), that will house a terminus station based on Bournemouth West. From there the line runs out into the garden, around a pond and returns to the shed at a lower level where there are storage roads. The track continues out of the other end of the shed around another pond and then returns the way it came to eventually arrive back at Bournemouth West. There is a link line outside that allows for continuous running. The total length of run is around 4 scale miles. At the moment the station is just track on boards and outside is bare track on concrete block walls. He is running DC control at the moment but intends to move to DCC. Running outside commenced from the beginning of August.

Evercreech New station with buildings by Allan Downes (7mm 0 Gauge). A dedicated team is now working on cladding Pecking Mill Viaduct which will be quite a feature on the layout.

St Martin’s Wharf (7mm 0 Gauge), Donated to the club by Sheila Alderman and being readied for a return to the exhibition circuit.

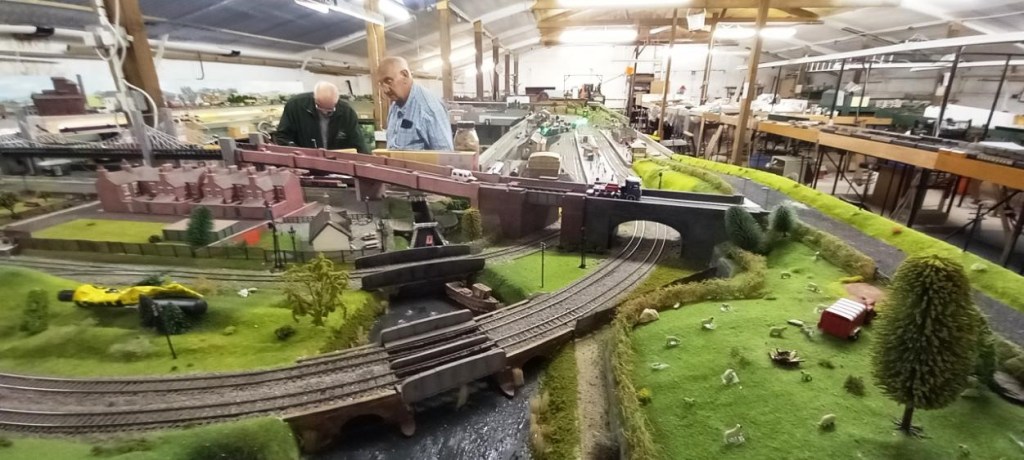
A view inside our spacious clubroom, Holly Junction (4mm 00 Gauge) foreground and South Junction fiddle yard right (4mm EM Gauge).