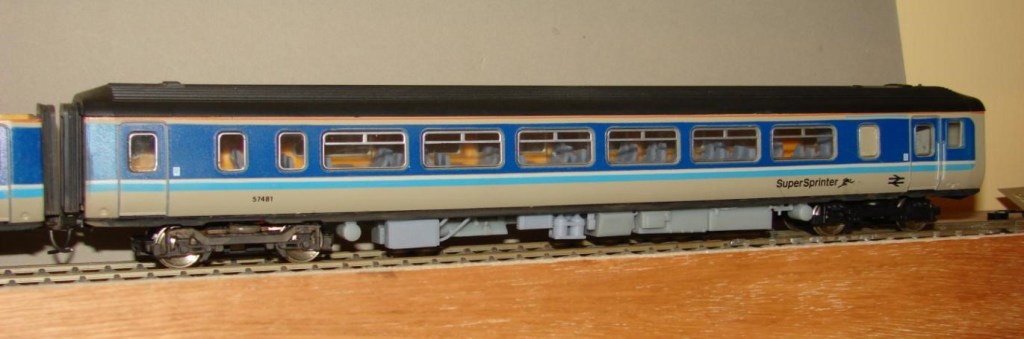
The Lima Class 156 had been purchased for my son’s 00 gauge model railway as it was a good looking ‘modern image’ model and of course being Lima, went like stink. When Charlie decided model railways wasn’t for him, it was converted to EM Gauge using UltraScale wheelsets and a Diesel Trains can motor fitted with additional pickups, and yes it still went like stink!
About three years age Ed mentioned that Hurst Models had once sold an underframe detailing kit for the 156. Hurst Models by this point were operating under the radar, but on being contacted via email it seemed a batch of underframe kits had just been produced and one was available! This arrived alongside an email with a link to the instructions – that wasn’t clicked at the time. Three years later a change from metal bashing was sought, and this seemed a nice ‘little’ project to christen Steve’s new large workshop that he’d just finished rebuilding and decorating.
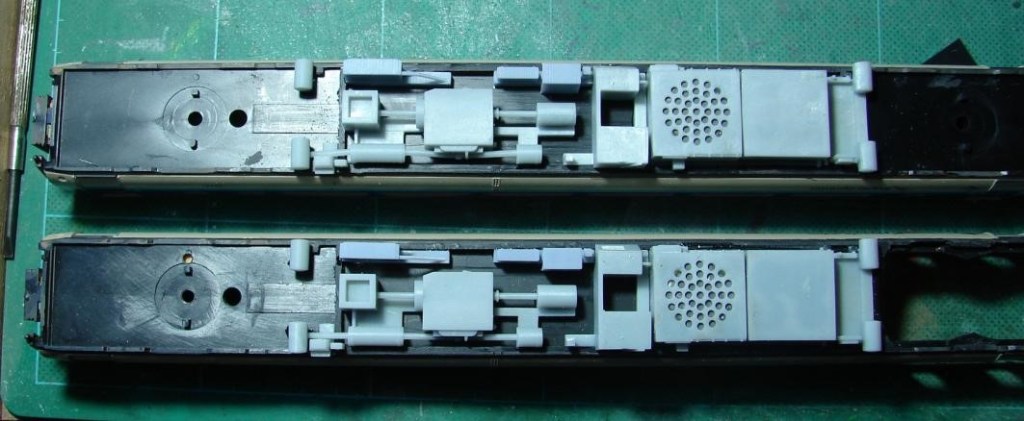
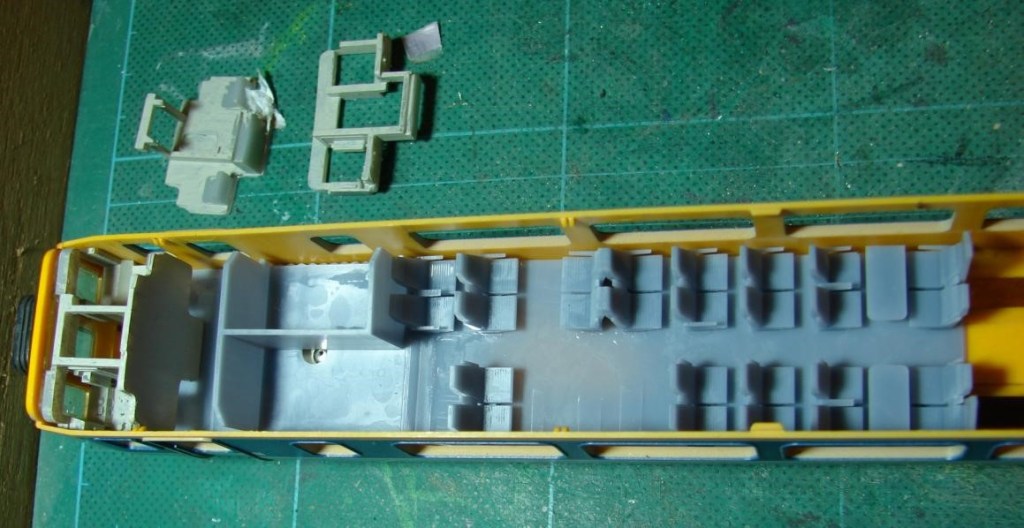
By this point the link in that old email had expired, so Hurst was emailed and Daryl sent the instructions as an attachment, and this is where the scope creep crept in. As well as the underframe there were parts in the kit to replace the exhaust, corridor connections and BSI couplings (not that BSI though). The instructions revealed that Hurst also had a cab interior available separately, so another email to Daryl obtained those too. The picture on the previous page shows the black plastic weight box under the units removed and the 3D printed underframe bits substituted. As much sheet lead as could be crammed in and between these parts was fitted to aid running.
Between the two cars Kadie No.5s are fitted to the body just below the corridor connector – too high for magnetic operation. Note the repaired 3D printed exhaust curling under the body. At this point the underframe has been permanently glued to the body as it won’t be possible to separate these parts again. Those end members on the bogie that carried the Lima coupling are not present on the prototype, but I’ve left them on as they’re almost invisible. They are all that secure the Lima bogie moulding to the Black Beetle motor bogie, as it simply clips over the slightly blunted pin points on the axles.
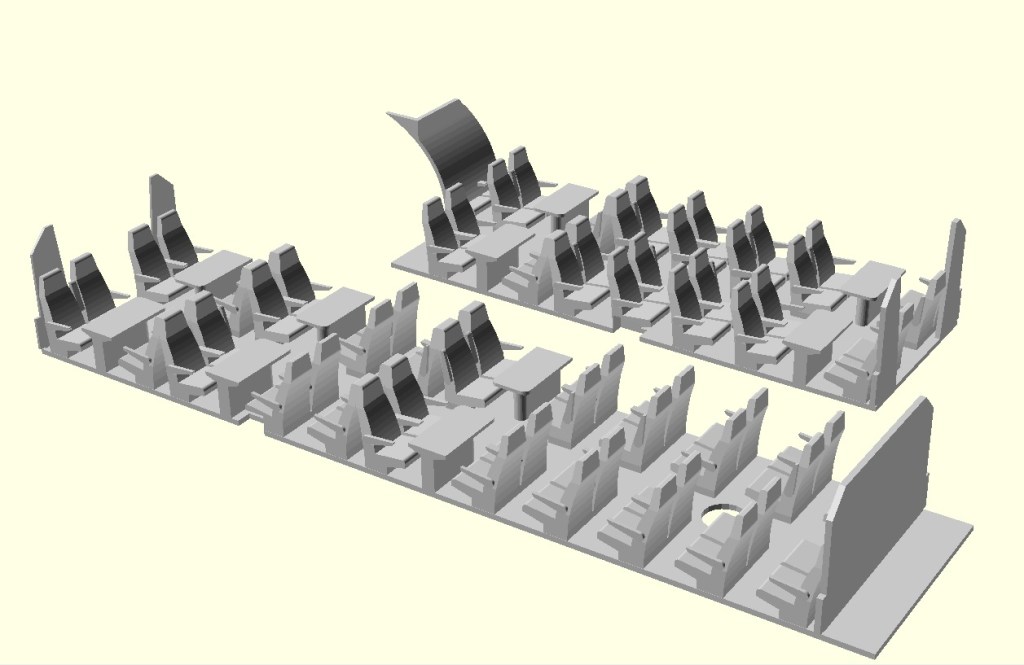
The Lima interior is very simple with no headrests, so a very happy Boxing Day was spent drawing up an upgraded interior to be home 3D printed. Once mocked up it was realised that because of the intrusion of the Lima motor bogie there were a couple of seats missing and more importantly for any model passengers – no loo! What to do?
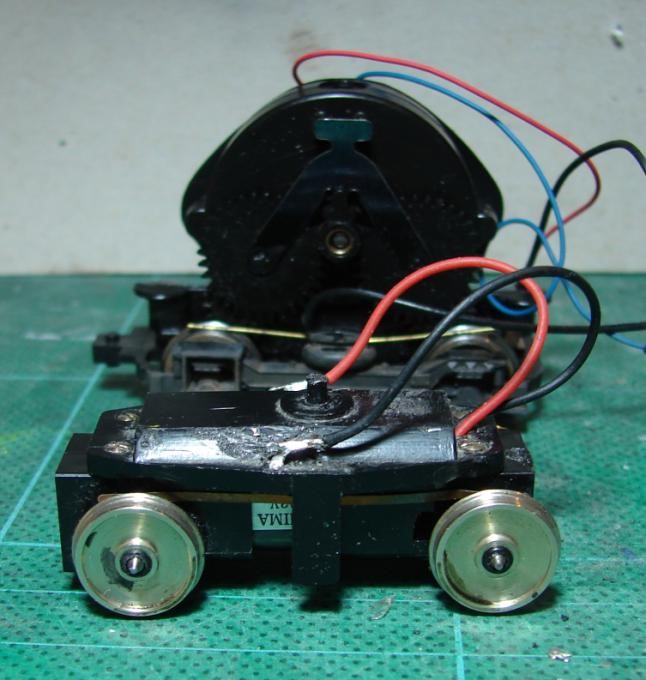
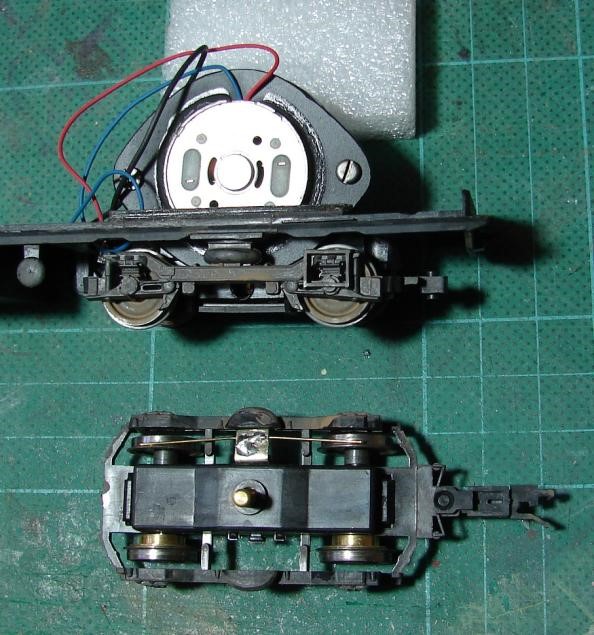
In a spares box was a dismantled EM Gauge Black Beetle motor bogie that had the correct size wheels, but the wrong wheelbase. This was rebuilt with a shorter Mashima 1020 motor to the correct wheelbase for the Lima bogies. With everything nice and clean and lubricated with clock oil, it ran rather well. Actually rather better than it ever ran when it was new in Charlie’s plastic kit built diesel shunter!
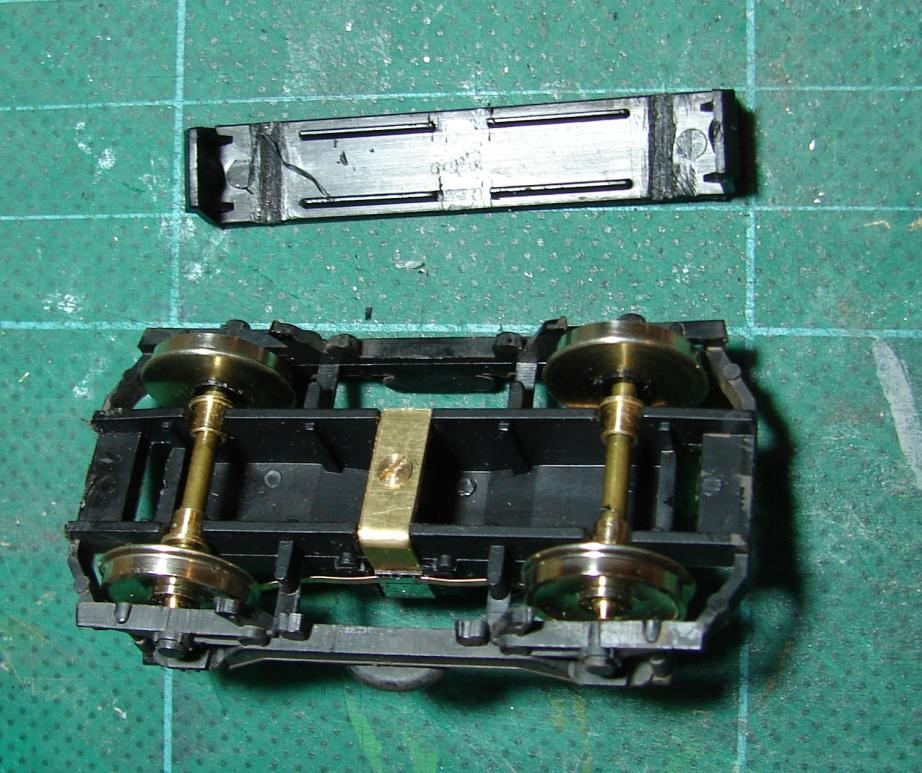
The Lima trailing bogie also received a Black Beetle style makeover using parts that were lying around (see above).
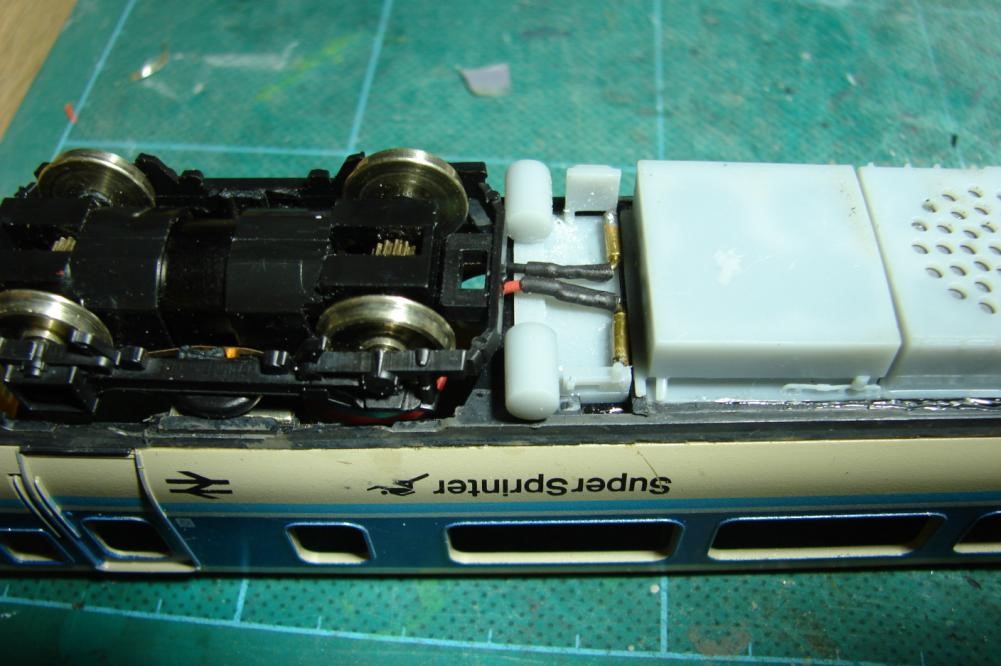
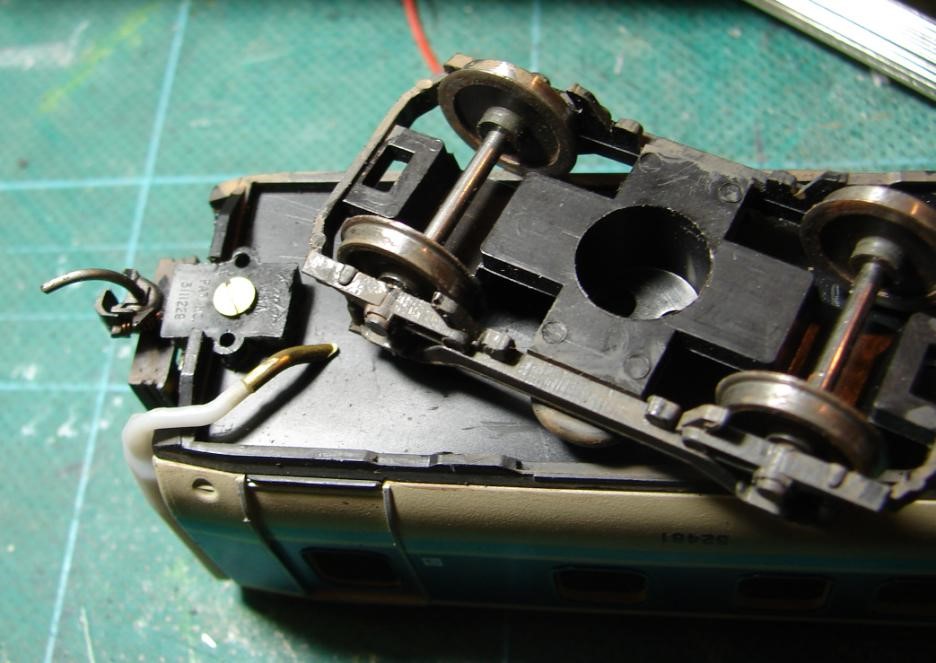
The bogies unclip for maintenance and are wired using plugs and sockets fashioned from bent wire and tube. Self-adhesive copper tape was used to connect end to end. 0.45mm wire soldered to holes in the tube was passed through the floor to be gingerly soldered to the tape to complete the circuit. Brandishing hot soldering irons inside plastic coach bodies still seems like a really bad idea!
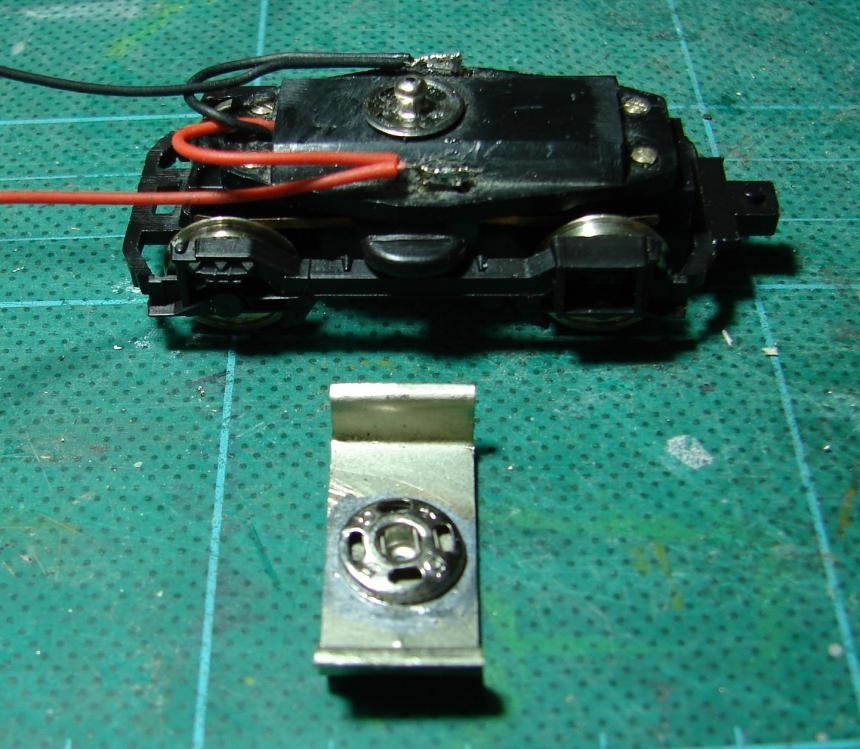
The motor bogie is mounted using a sew-in clothes popper – an old idea. A Lima push in pivot was fitted at the other end requiring a pin to secure the slippery plastic parts used. The nickel silver mount is simply epoxied into the opened out Lima motor bogie hole, and yes it took a couple of goes to get the ride height spot on – or at least the same as the other carriage!

With about 2mm intrusion into the cabin for the Black Beetle mechanism an almost full interior was now possible.
At the beginning of February Steve’s used Anycubic Photon Mono 4K 3D resin printer was finally fired up with a view to printing the interiors directly on the build plate, a plate that they only just fitted with a couple of millimeters to spare. This picture shows the motor bogie end with the Hurst models cab interiors installed and what was actually a print failure in that not all seats and tables were printed.
In fitting a no-name flexible magnetic build plate Steve had neglected to check if the build plate had returned to total flatness after it had been flexed to remove prints. Adding this step has prevented further failures. Being somewhat parsimonious, he used a failed print to repair two other failed prints by robbing the missing tables and seats from them. This is why one (or more) of the tables in the unit are not quite as straight as they could be!
The patched and glued together interiors, test fitted with the Hurst cab interiors under the slightly modified Lima glazing and unmodified roof. It was a good job after all this trouble that the headrests are visible. The 3D printed underframe detailing is a game changer for this model – what a difference!
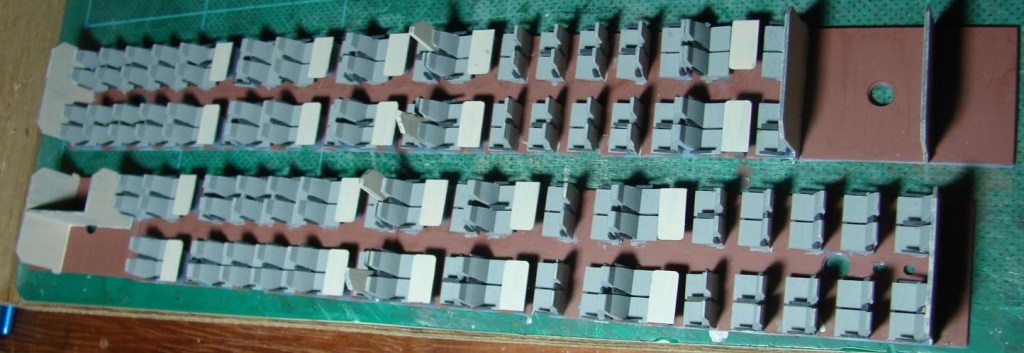
The painted interiors – all in ancient and modern Humbrol Enamels. Dark Grey for all those arm rests, Light Grey for the upholstery, Light Stone for table tops, seat backs and partitions, Rust for the carpets. That’s a lot of painting all needing at least two coats.
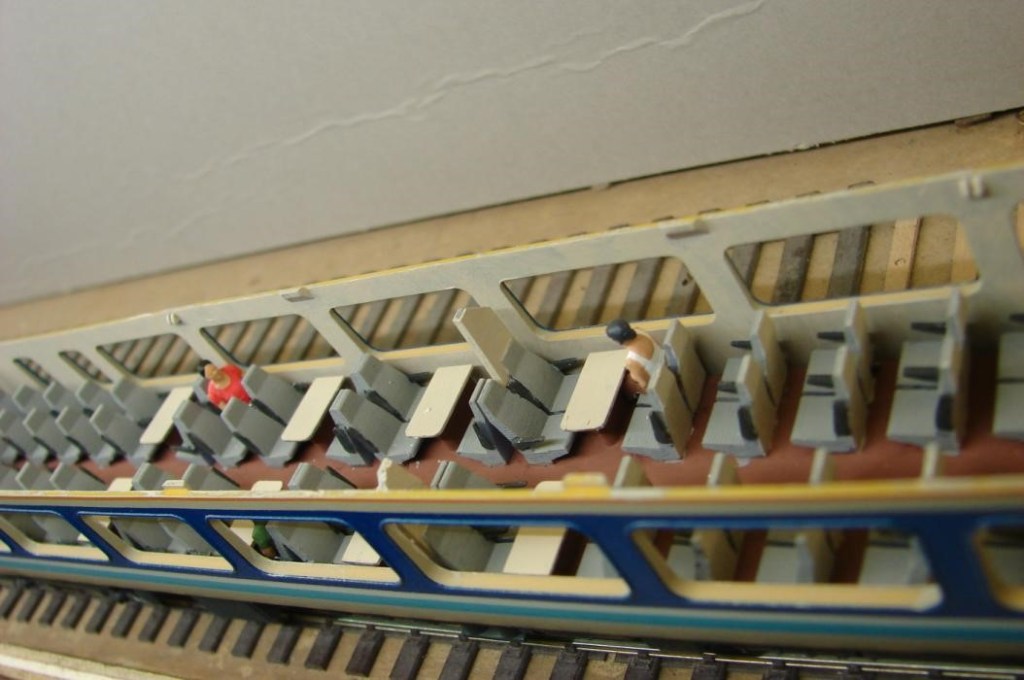
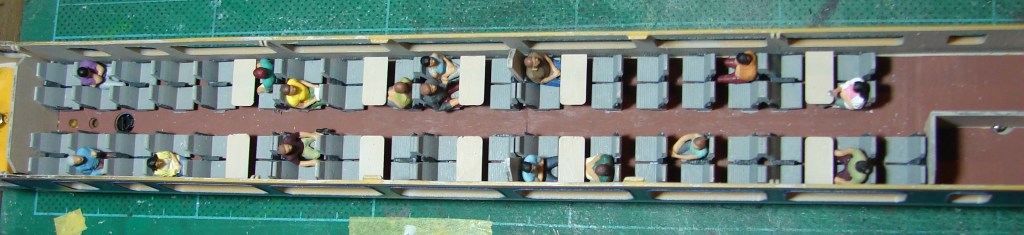
A painted interior in place with the Noch passengers being fitted. This process requires radical reduction of bottoms, backs and knees. The seats are a little smaller than they should be, the size having been set by the headrest position against the window. There is a suspicion that as with the Lima Met-Cam DMU, the floor is not where it should be. Fifteen to twenty expensive passengers per coach (conspicuously placed) seems to be enough to give the bring the model to life. The inside of the coach has also been painted Light Stone.
In reality there were black plastic trays on the seat backs, small black rectangles where the head rests were inserted into the seat shells, the grey upholstery didn’t go down to the floor and the ‘Ashbourne’ fabric used had a lairy red chevron stripe design down the middle. There’s a limit to how far Steve is prepared to go!

One of the Noch passengers passed out as driver with his BR 80s ‘Marshall Petain’ cap and ‘Chairman Mao’ Half Breasted Coat with lapels mocked up with sticky paper. His driving arm was improvised in brass.

This is the only picture of the Lima cab front as it was with that bright yellow interior to add context to what comes next.
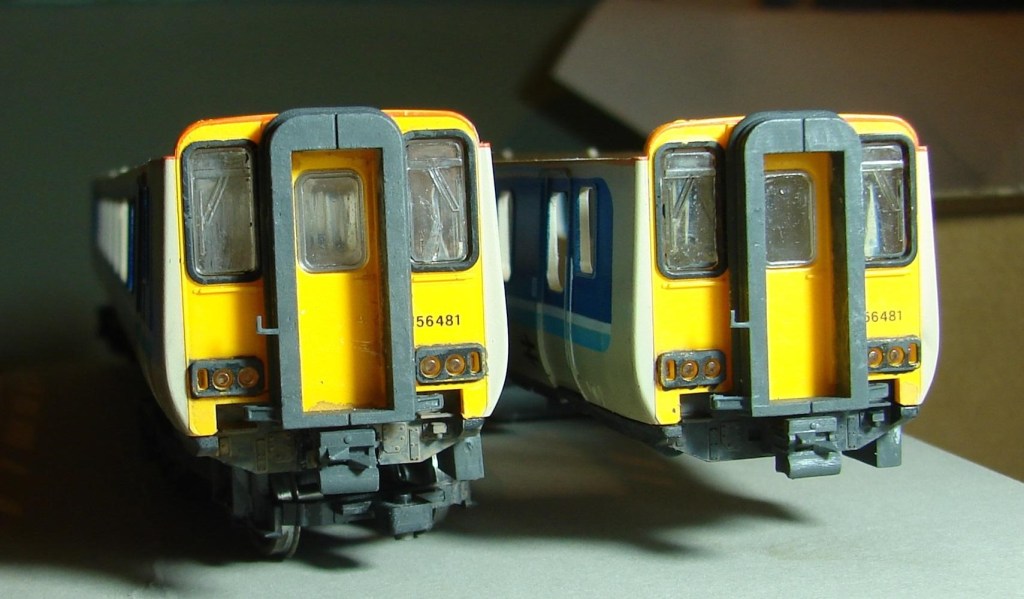
The front of the Lima Class 156 fitted with the Hurst models 3D printed corridor connections. It’s amazing what a bit of eyeliner can do for a gal!
