This month some ‘proper’ modelling, followed by ‘virtual’ modelling.
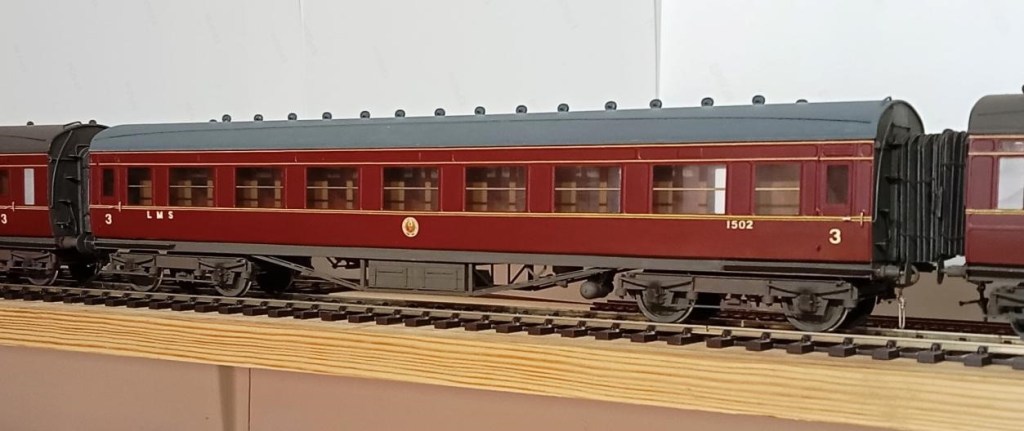
Allan has finished another of his 7mm scale LMS coaches, this lovely example, from the single window with square corners would be a period II corridor third – from another Sidelines kit.

Obviously relishing the challenge of turn-of-the-last-century intricate livery paintwork, Dave Haines has produced the next 7mm scale coach for his “Wellsy” layout. This one is a 58 ft long luggage tricomposite, originally built in 1899 for the Birkenhead to Folkestone/Deal through trains run with the SER. They turned out to be very useful as through carriages all over the system so they built twenty of them in the end. They had six lavatories so it’s surprising there was any room left for passengers let alone their luggage! It’s all plastic except for the Slaters bogies (the long wheelbase version that Dean used for his later coaches) and a few fittings, scratch built using David Jenkinson methods and painted using Ian Rathbone methods.
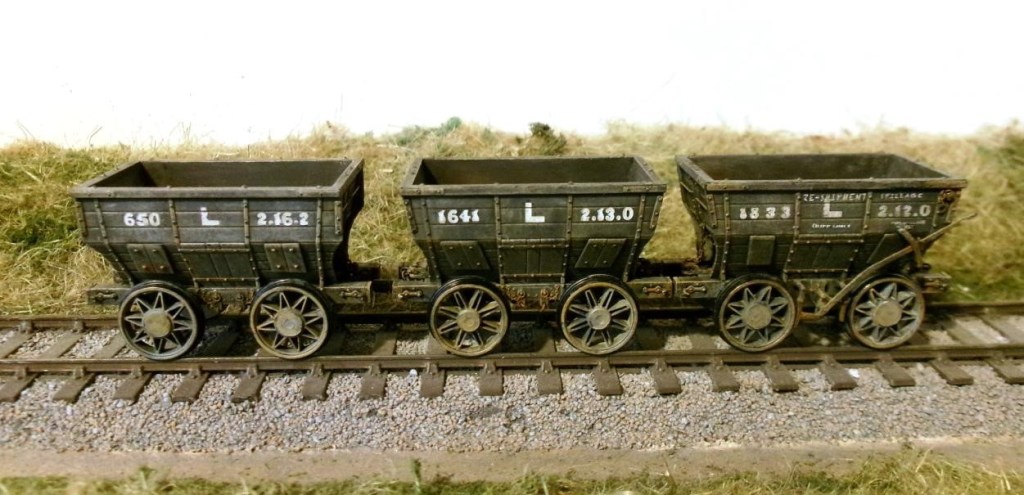
A few evenings work by Peter has dramatically improved the 4mm scale EM Gauge Accurascale Chaldrons that he bought a while ago. Subtle weathering has bought the detail out from the original plain black satin finish.

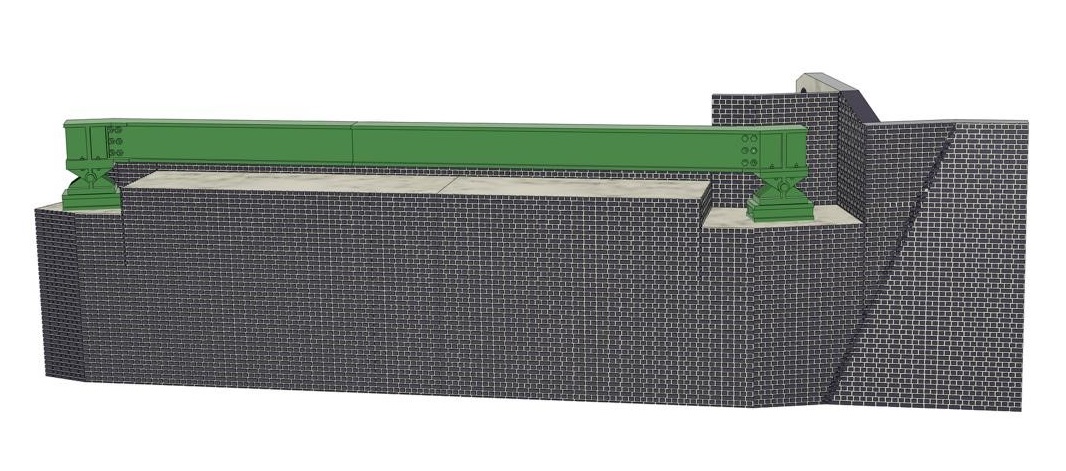


Over the last month Andrew has been working on the flyover bridge for Heyno Junction, the club’s OO gauge layout. It is based on the Aynho Flyover on the Chiltern line. The model has been produced in Fusion360 CAD software and he has started to print out the brick base on his 3D printer. It has been really tricky to do the brickwork as the process makes the computer struggle with long waits while the computer worked out the pattern (he could do with a more powerful computer). The first section took over 20hrs to print out and the 2nd section took over 17hrs. He has started to build up the metal work of the bridge into sections so they can be printed out and assembled

Whilst at CS2 Steve gave his 3D printed AW diseasel disaster a run out on South Junction, which it plodded around for about an hour without managing to fall off. This was after its trip to Martin Finney’s
Semley where this model to EM Gauge serenely clambered over and through two sets of P4 points in both directions without derailing. During this feat it was noticed that after 18 years the original tyreless AG gearwheel had cracked and slipped on the jackshaft axle leading to a slight ‘hop’ on each revolution. This gear wheel has now been replaced by its previously redundant twin (on a slightly shortened axle) with the steel rim retained, the spokes covered over, balance weight fitted and the flange filed off. Steve hadn’t appreciated that he needed macro mode on his new to him Sony camera (2011) for it to focus properly for a shot like this that he wouldn’t have previously considered any sort of close up.

The glazing pockets on the trial 3D print were not satisfactory as I hadn’t made enough allowance for 3D printed items being a little larger than specified – by about 0.1mm and mainly a problem with holes. Thin bubble packaging film could be slid into the side window and door glazing pockets, but not into the front and rear window pockets. To get round this the pockets are now 0.45mm (for .010″ Plastiglaze), and holes have been added above the affected windows to aid resin drainage during printing.
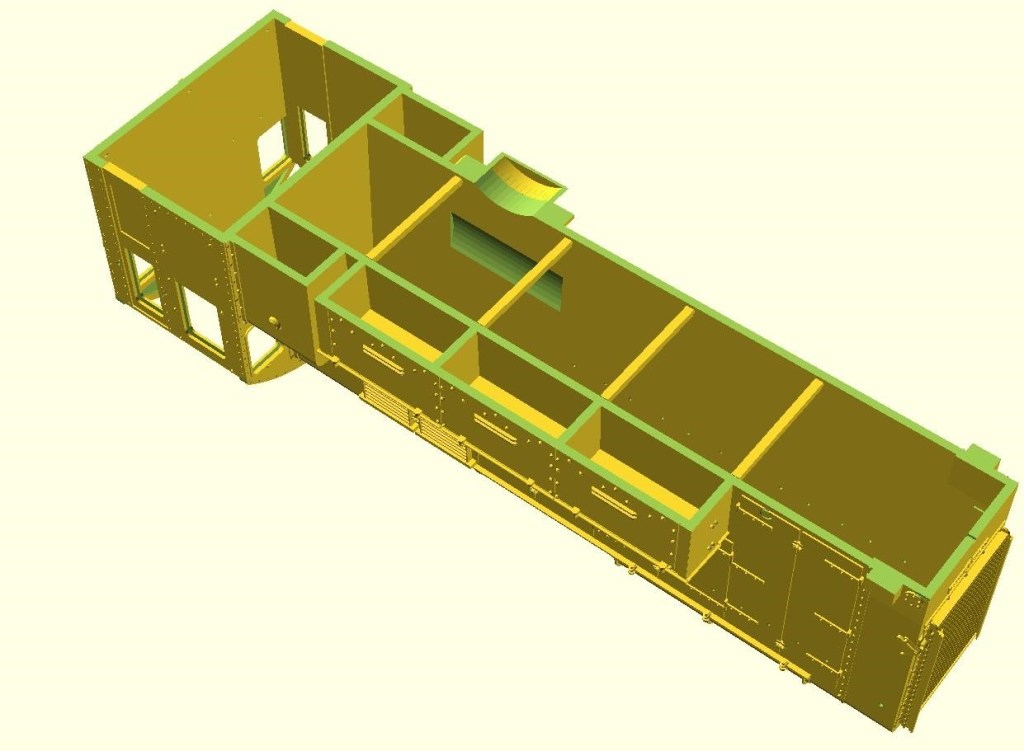
To aid the printing process a sliver of extra material has been added at the bottom of the body for trimming. The fuel and battery boxes have been boxed in, and braces placed across the base of the bonnet to keep everything aligned during printing and cleaning. This render pre-dates that test run on SJ with the larger gear wheel that has required additional clearance to be added under the gear wheel cover.

Lastly a helpful Western Thunder user posted a very useful and clear photo of the prototype from a new angle from which detail could be added to the gear cover area (speedo drive cable and oilers). I also used it as a reference to develop some artwork for the WD transfers.
