The start of another year, still in lockdown, CS2 still shut, but with the hope that the huge vaccination effort will eventually bear fruit. Plenty of bad weather still to be expected and therefore lots of scope for railway modelling – many previously legitimate distractions being out of bounds!
The month kicked off with us submitting our professionally prepared rateable valuation challenge to the Rating Office. We gather that it could be quite a while before we hear anything from that august body. In contrast, part way through the month the Charity Commission very speedily accepted our application for charitable status. As a result YMRG are pleased to report that we are now registered charity no. 1193100!

The lovely Kingsferry appeared as a very worthy Railway of the Month in the Railway Modeller generating a lot of interest.

There has been steady progress on the shelf queens. The photo shows the spraying and brush painting done on one of them, and the E.58 Tricompo having some running repairs after some bits fell off it during cleaning. It’s next for the paint shop – dated 2005 on the underside! Dave H is still getting good results spraying Phoenix paints even in this cold weather.
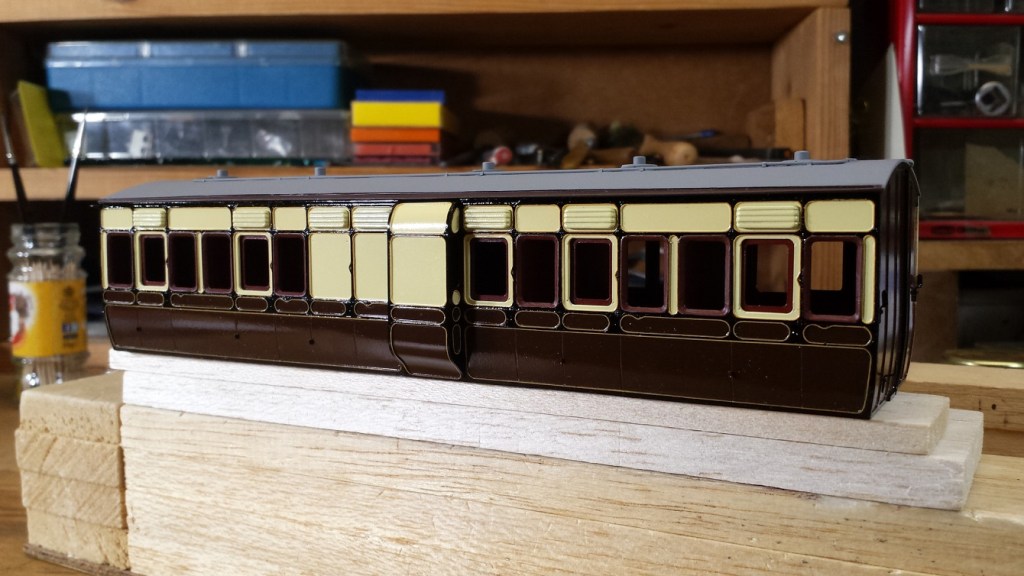
The lining of Queen No. 1 is coming along. The gold is done with a bowpen, then the corners are painted in with a small brush – gold then black works best for Dave. Finally the black lines are ruled in and the remaining gaps brush painted. Then all the mistakes and splodges are fixed. The ‘gold’ is actually an ochre colour paint a bit like M&GN loco colour. Gold paint is a nightmare in a bowpen as it clogs up and then waits until you’re not looking to splurge all over the place. Queen No. 2 is also coming on – Dave is going to try to get them both finished before starting the lining on the others. It takes a while to get your hand in again if you don’t do this very often. It’s in danger of turning into a Spring project at the current rate!


Allan popped along to CS2 (in splendid isolation of course) with card mock-ups of the farm only to find the baseboard had been removed from where the farm would be located. Nevertheless, with a little improvisation the attached pics show where it may be located and should give you all an idea of its scale relative to the viaduct. The road that curves round the farm is indicated with a strip of veneer he found. He did not include the ugly large flat-ish roof shed that fits between the farm and viaduct for the present, nor the pig sties beyond. The hefty old viaduct does an excellent job of concealing the farm from the viewing side!
The alter ego of Evercreech New is another layout that has been in the limelight with the BRM video of The Summit finally premiering on Youtube.
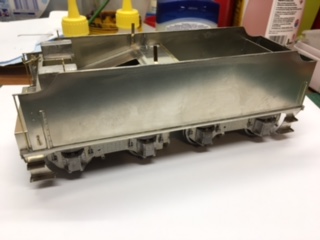
In 7mm scale a 5000 gallon Maunsell tender for a Southern Railway S15 4-6-0. Hopefully we’ll be seeing much more of this build of a proper engine over the coming months.


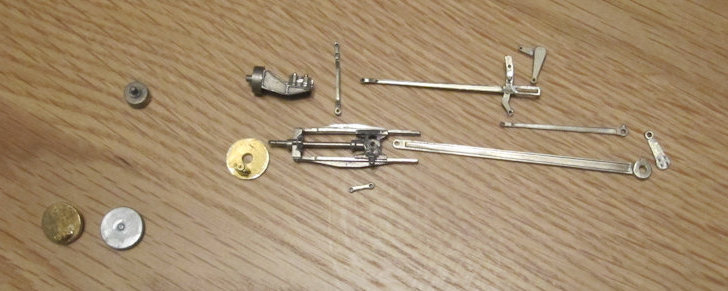
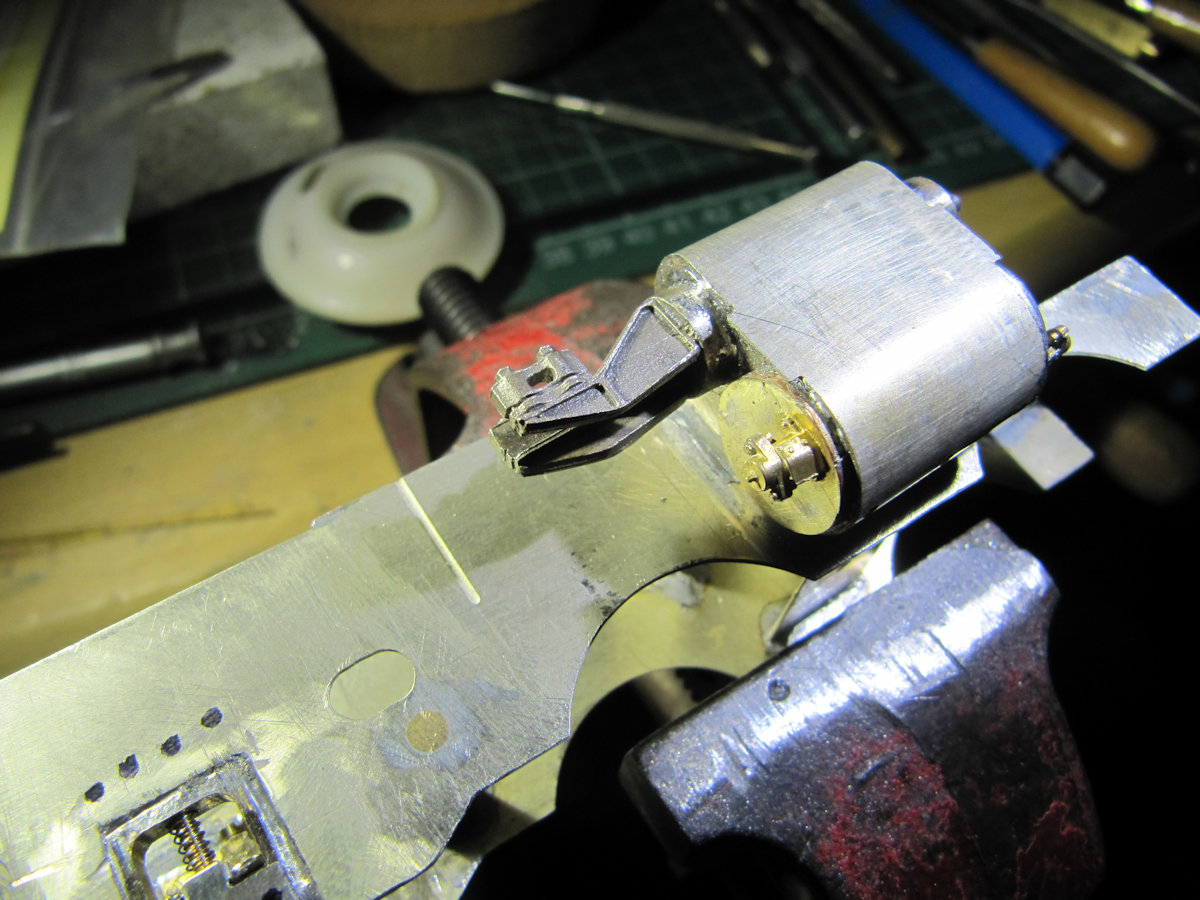
Also in 7mm scale Dave S has managed to sort out a very poorly 55H 9F. A change to the pickups, a different motor and mounts were required to achieve the fix. Needless to say this is a very different arrangement to what was there before. Dave wants the pictures to do the talking.
To prove the fix a video of this smooth and powerful loco being tested (also in splendid isolation) on Evercreech New. Watch out for debris on the track, red knickerbockers at the ready…
Having finished the 9F our hero moved onto a long term project – another completely unique Black Five – no two quite the same! Hope that you’re sitting down because an awful lot was achieved in January, and this could take a while. The full story in Dave’s own words will be the subject of a dedicated web page, or ten… Anyway this Black 5 kit is an old one. The detail on the chassis is lacking and also not quite right for the later prototype chosen. With the help of a side frame template from Keith and one of Dave’s Black 5 books, the side frames were modified, a job that should have been done before putting the spacers in.

Checking the angle of inclination of the cylinders.
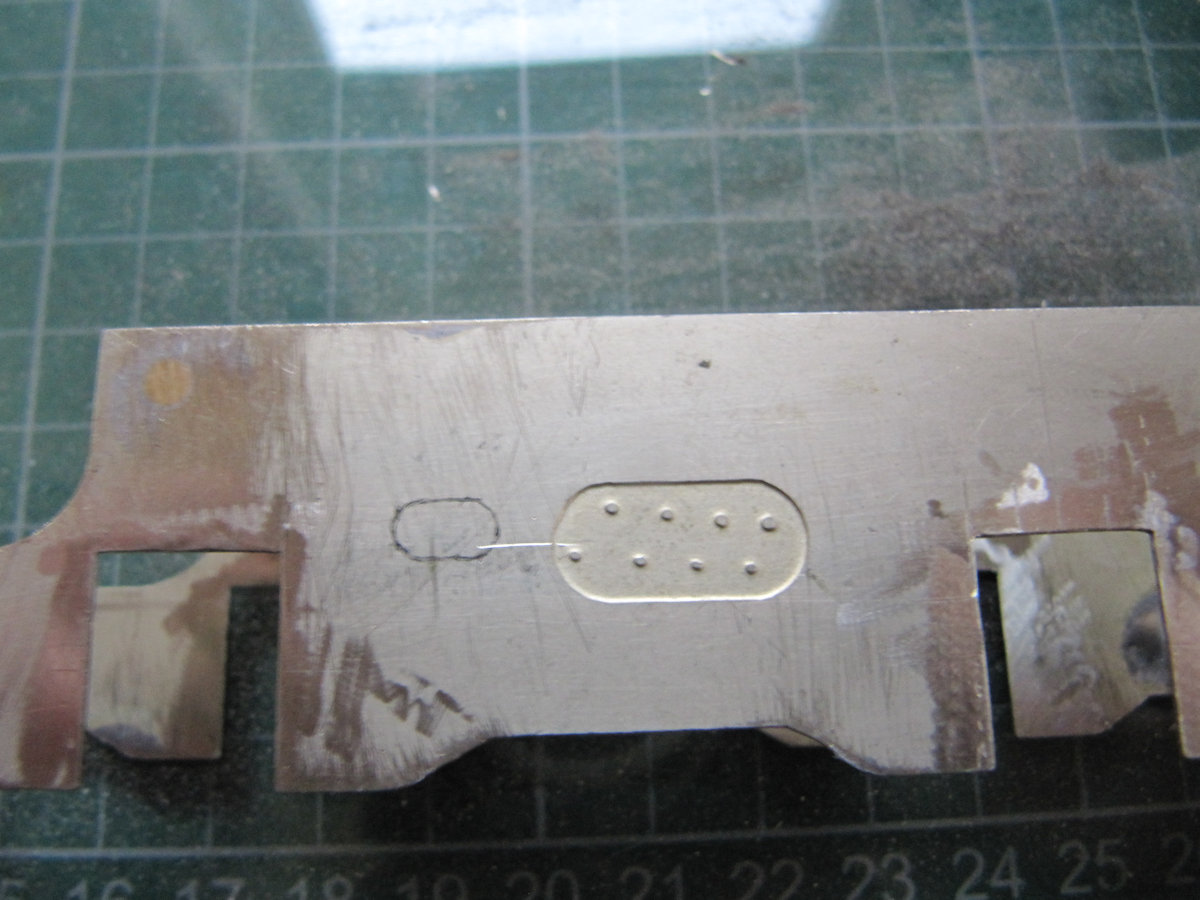

The wrong sized hole; cut it out; fill the hole; put the cutout bit behind the new hole.
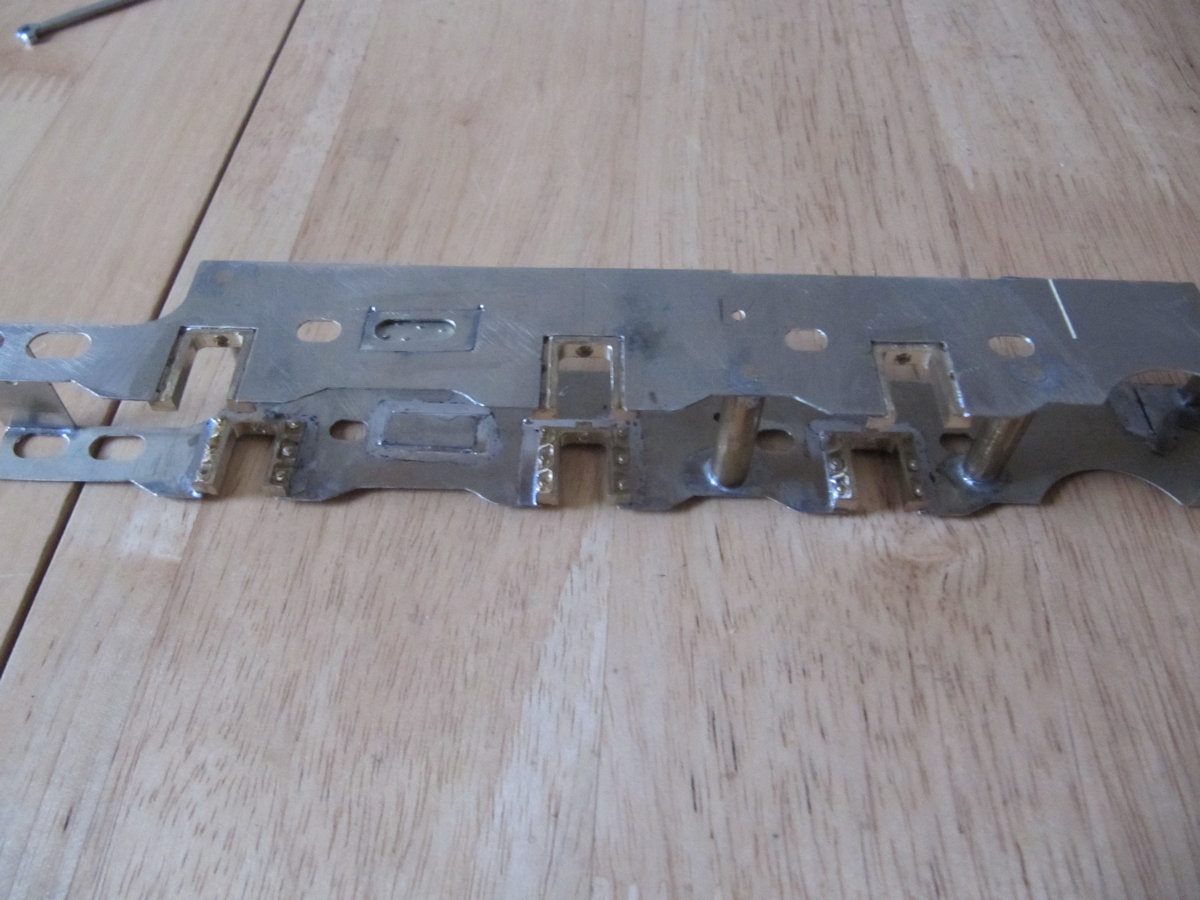

The finished sides ready for Holiday Hobbies horn-blocks to be fitted. These have bearings and are being fitted with a jig he bought at the Bristol O gauge show in January 2020 – remember when that sort of thing was possible?
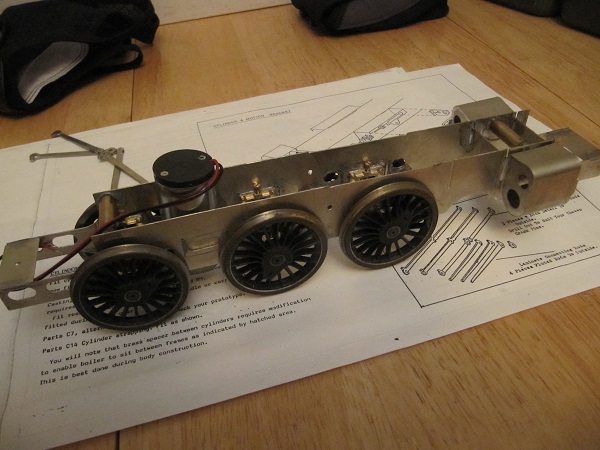
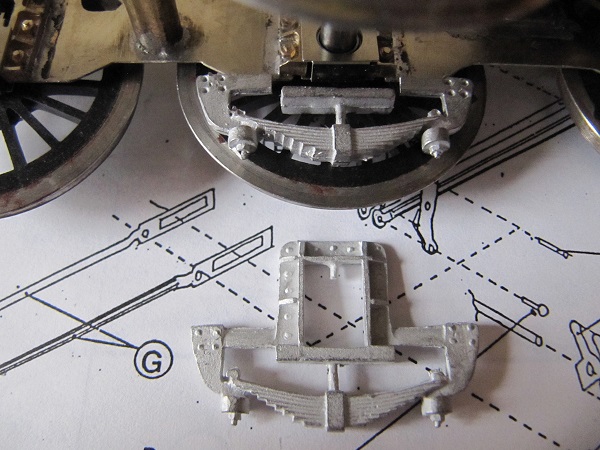
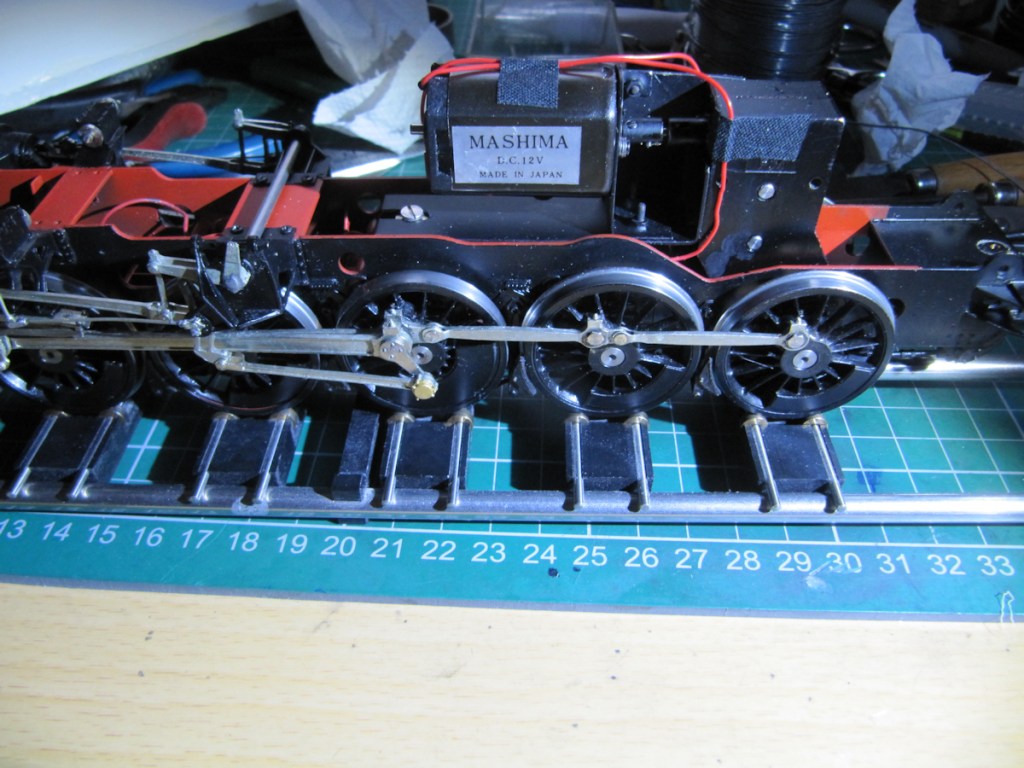
Next the wheels were put on the chassis just to get a feel for it, and to see about the fitting of the springs under the horn blocks. The gearbox is an ABC one with a Maxon motor fitted. Basic cylinder thingies fitted too. The springs supplied in the kit nor the cutouts in the frame were suitable for the engine being modelled, So using a drawing from LMS Loco Profiles No 5 (The Mixed Traffic Class 5s – Nos. 5000-5224) publication, Fusion 360 was used to “knock up” a fair representation of the spring and hangers.

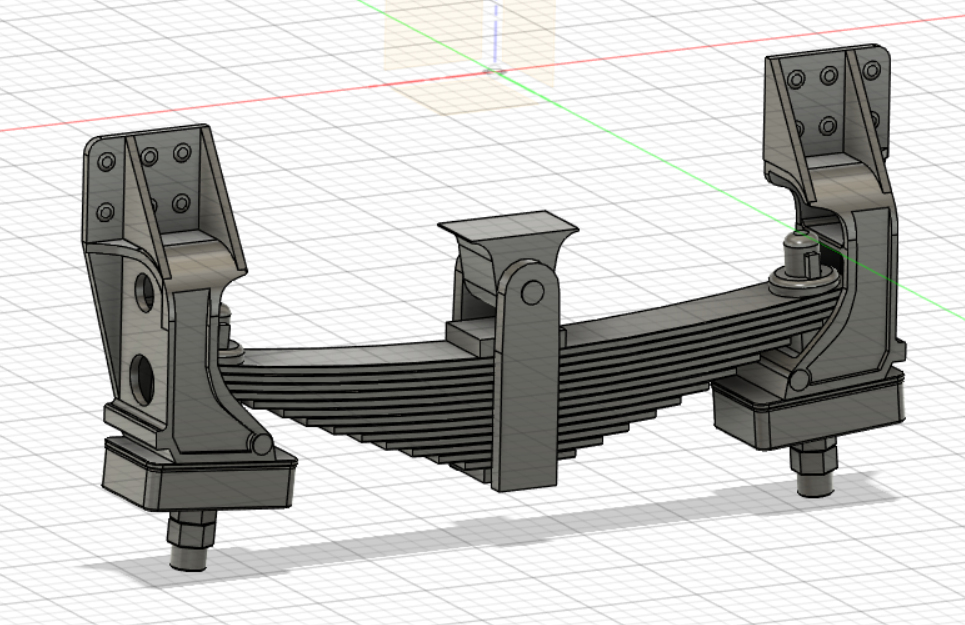
Six springs were printed, but with only a 50% success rate. Some prints had bits missing – cause unknown – but that’s 3D printing for you.
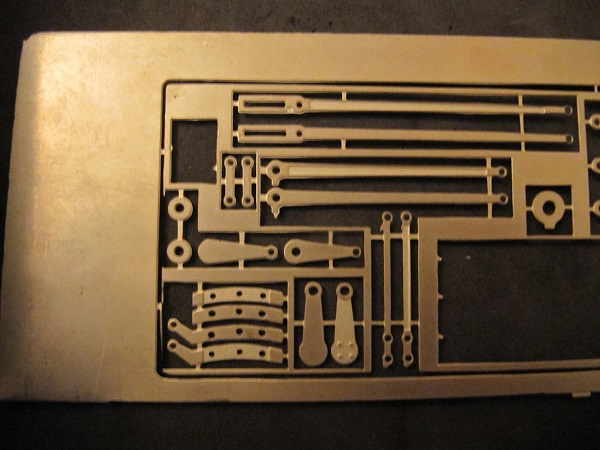

And so to the valve gear; from the fret, through assembly of the bits, to a set of valve gear ready for assembly. During that process Dave decided that it was not satisfactory to have the loco always in mid-gear. Working forward/reverse gear is required. In the third picture the Eccentric Rod is already located in the Expansion Link and can move up and down, and it will be very interesting to see how that bright idea pans out!


The next three pictures show progress in fitting the end fixtures onto the right hand cylinder. Most of the fittings are from Laurie Griffin (LG) as the white metal fittings supplied in the kit were not considered to be adequate for the job. Dave did use the white metal main cylinder front cover as it was slightly bigger than the LG version. The valve from the LG version was fitted to the kit supplied cover.


Up in the grim north the little photo plank is shaping up nicely. Dom has plucked up the courage to experiment with weathering powders. The first attempt was the bridge deck, and then onto the terraced houses, which he’s quite rightly pretty pleased with!


So with proper cold weather set in and now a third lockdown, your editor decided that it was time to start making the signals for Verwood – something he’d quite sensibly been putting off for years. First step was to collect together all the photos of the signals at Verwood, and other than what should be a bog standard Southern lattice Upper Quadrant of known height, it turns out that everything needed is available. Next, similar examples were sought to fill in details particularly for the unbalanced lattice bracket signal, which being Verwood is an unusual variant of the type. To further delay starting the actual build the two starting signals were drawn against scaled bitmaps, and dimensioned ready for the right moment to make a start – it’s never too late to procrastinate!
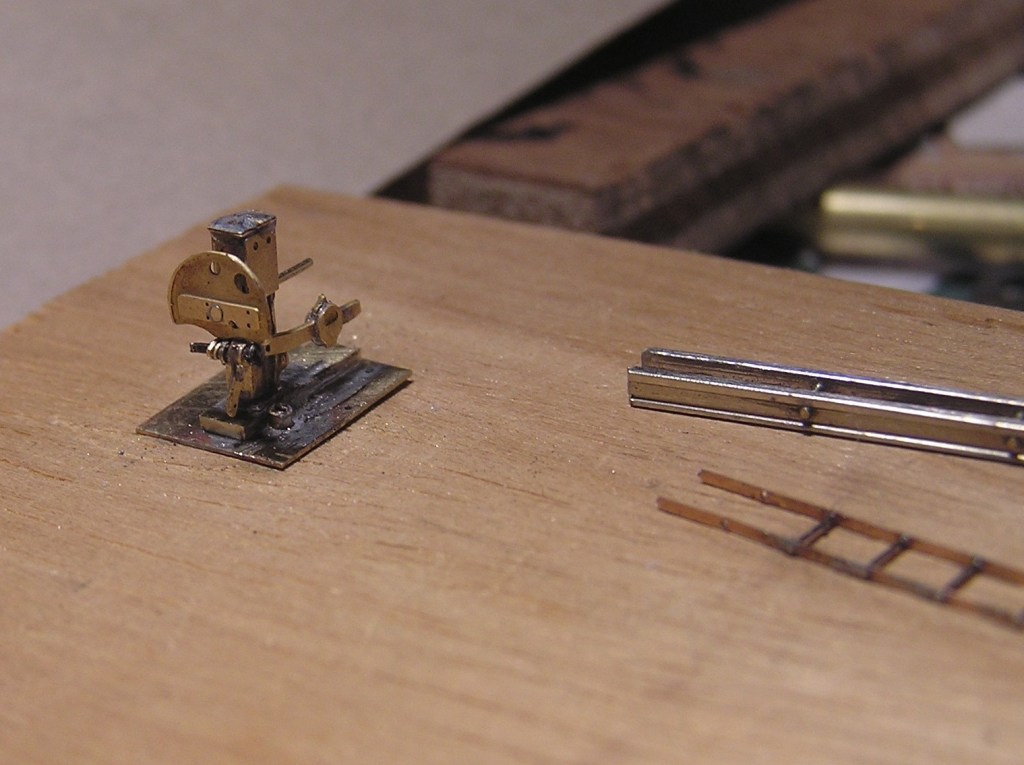
The build phase was commenced with something (very) small – the only ground signal at Verwood – a Southern Railway Westinghouse disc that controlled exit from the goods yard. An MSE etch that ‘with care’ can be made to work was used. Well, all the holes to do that have indeed been added, and lots of tiny washers have also been added to remove the floppiness in the moving balance arm – and we shall have to see once it’s painted. The largish iron plate that it would have been mounted on has also been represented leaving me more scope for ballasting round it, with the intention that it should appear to be fastened between the ends of two extra long sleepers.
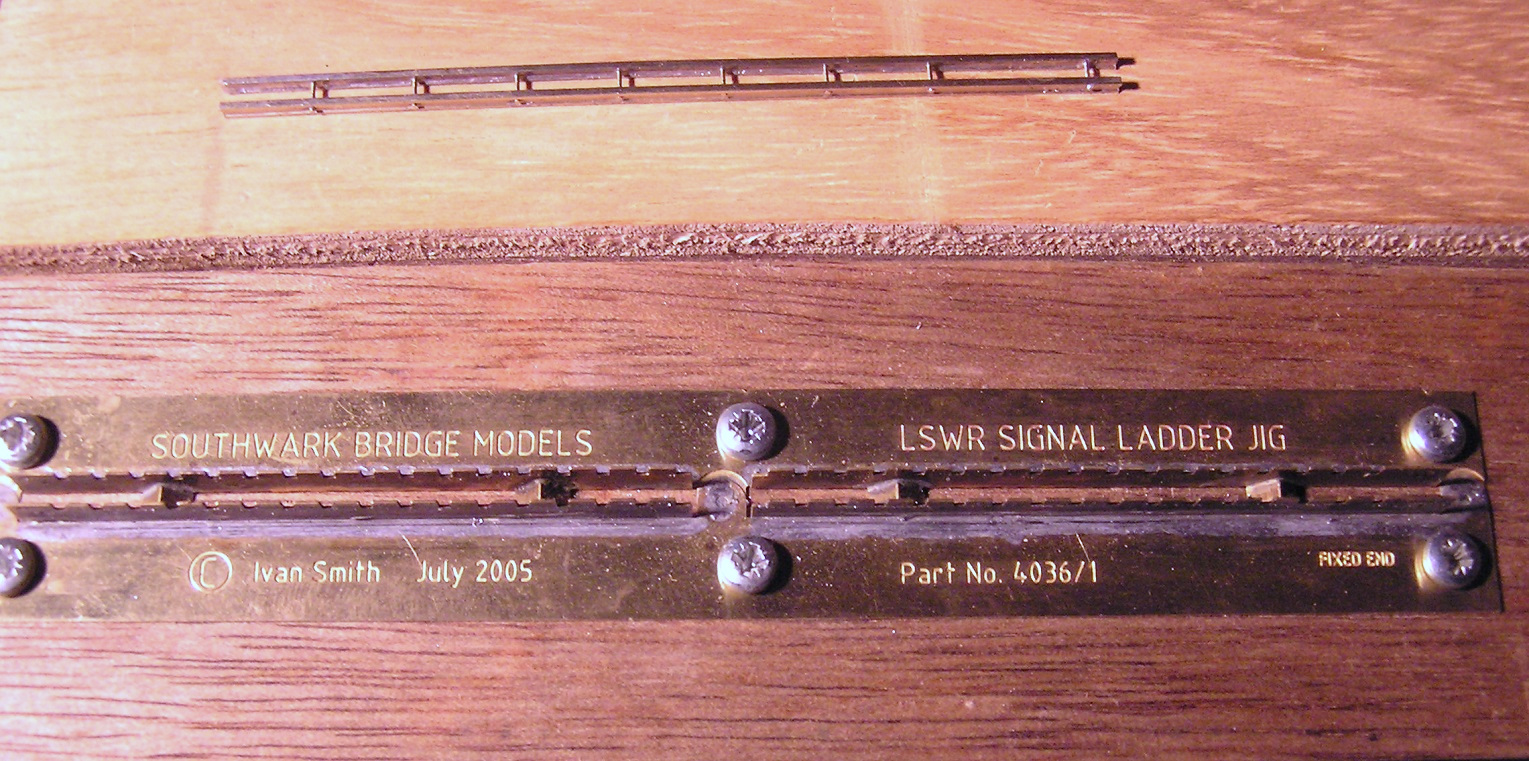

Next up was a rail built signal post for the down starting signal made from, well rails. A jig was made to space the holes for the spacing bolts. Apparently the rail head should be to the rear – in case you were wondering. Signals need ladders, so emboldened by the ground signal a very long length of ladder was assembled on a newly acquired and built Southwark Bridge Models (SBM) ladder jig. The stiles are a very skinny phosphor bronze and the holes for the rungs needed to be opened out. not capable of doing that to the 0.2mm specified and owning a lifetimes supply of 0.3mm wire – this was used instead. The 0.3mm drill bit managed over 60 holes without breaking! By rights the end result ought to be a little fragile, but it seems well up to the job.
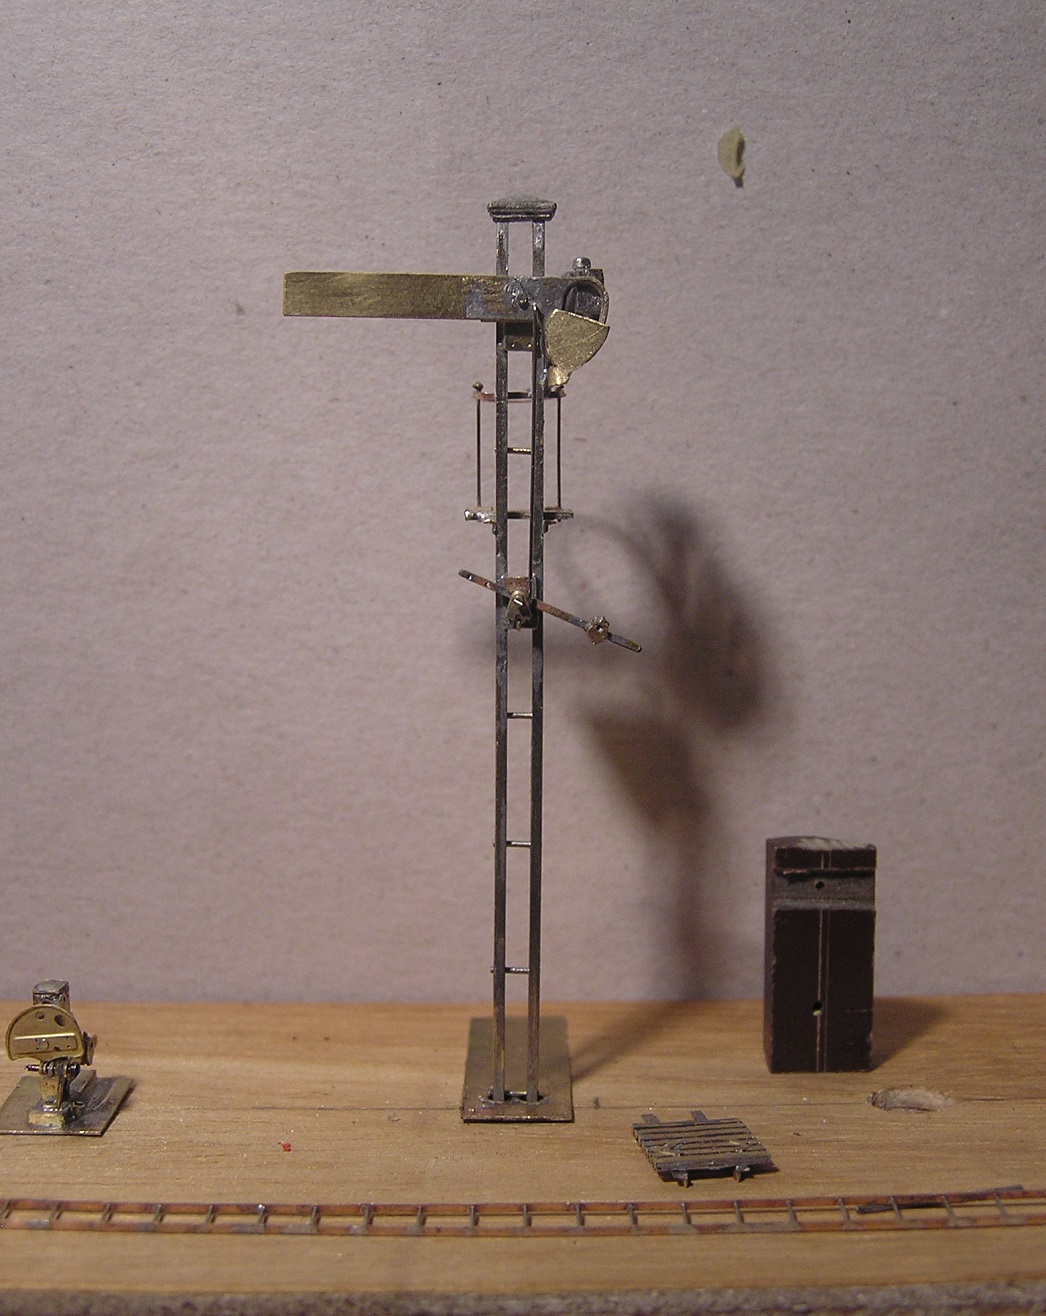


The next pictures show that the first stop signal (a rail-built Lower Quadrant (LQ) is now well on the way and about to get its ladder fitted. A SR/LSWR hybrid in real life it’s quite a hybrid in model form too. MSE contributed the balance arm, cap and lamp. Martin Finney etches contributed the arm, platform, all bearings and the lamp bracket. SBM provided the handrail. The rest including the Annett’s Shield was scratch built. For the 0.3 mm wire stanchions a representation of the knobs was added using a slice of microbore brass spaced with a piece of card. The curved safety loop was crafted from the strip provided to brace long ladder runs. With safety loop added something that looks really very flimsy is surprisingly robust. Paxolin jigs have been made to set the platform height relative to signal arm pivot, handrail height above platform, to bend and twist the handrail and to assemble the balance arm bearing. Only electricians multicore solder was used apart from attaching the whitemetal cap and to correct the shape of the lamp. It’s not perfect and the modified SR lamp isn’t glued straight yet, but good enough to add the SBM ladder and move on to the next one which will be the lattice LQ Up Starting signal.


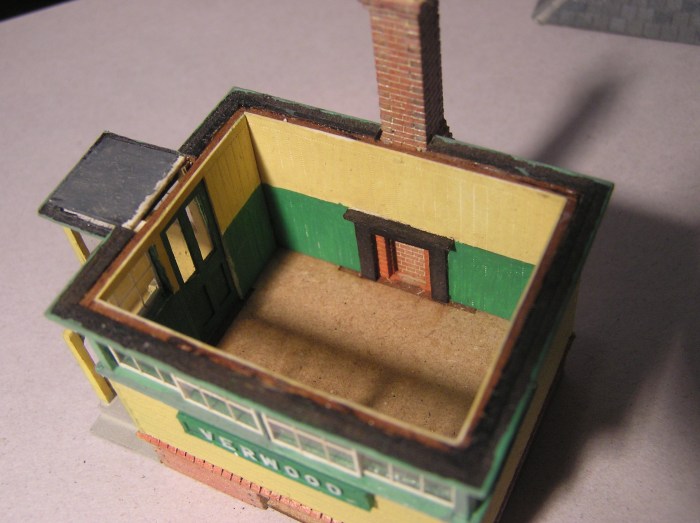
As promised last month the current test build for signal box is now glazed, and has its 3D printed nameboard and wonky vent fitted. The mortar joints need to be more pronounced and hopefully this will be tackled on what should be the final version. I have since learned that Verwood signal box was probably unique in that the elevation sheltered by the canopy was never weather boarded and the cross braced frame could be glimpsed behind an array of poster boards, so this version is sadly not quite correct for Verwood.
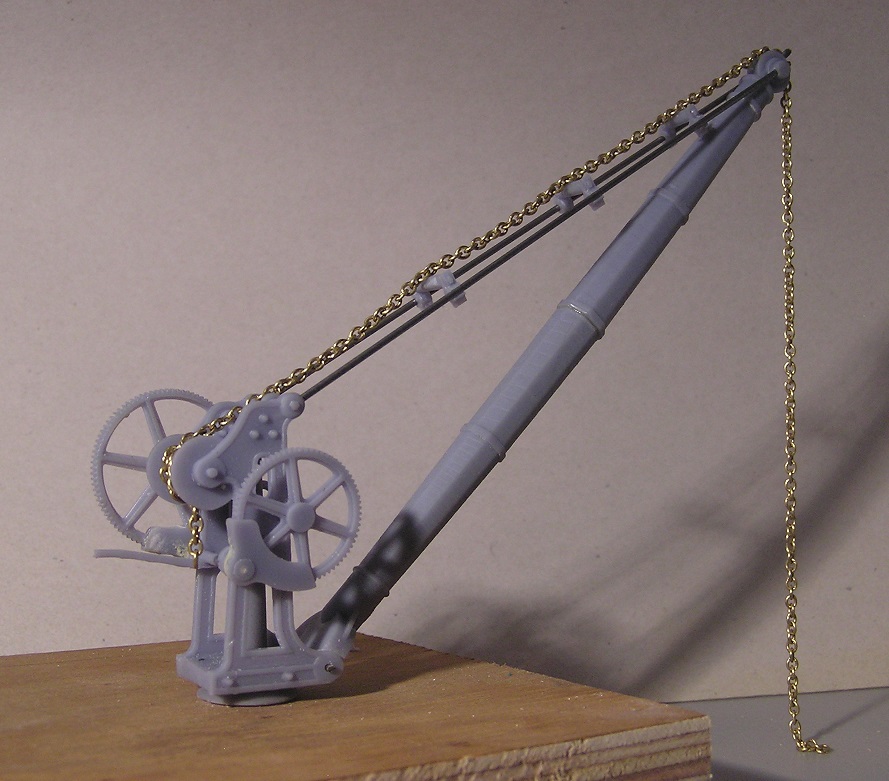

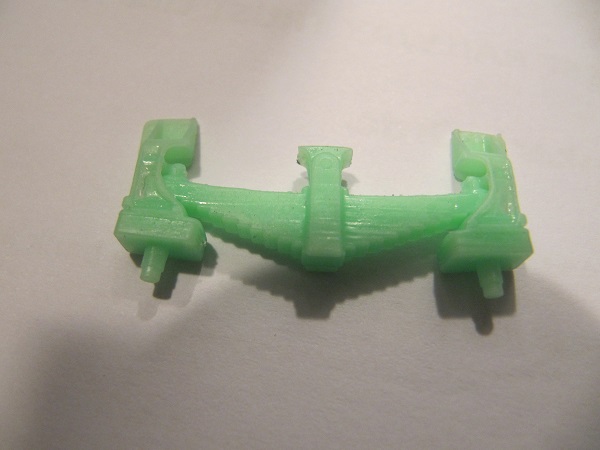
Next up is the test build for the 7mm Verwood Yard Crane as kindly 3D printed by Dave S. It is the 4mm version simply scaled up in the 3D printing software. Happily the only changes needed from the test build are to increase the number of supports on the separately printed gear wheels.

Lastly a very heavy, but securely fastened warning to us all. And yes, there was some debate as to whether the crumbly half brick wall that lurks behind the modern plaster was up to the job! A much appreciated Christmas present, it has been carefully positioned to caution anyone rash enough to approach my tiny railway workshop.
