Following our AGM on Zoom, we have a new Chairman – Ed Pickup – and a new Treasurer – Dave Haines. All other posts remained unchanged. Even more importantly perhaps is the long awaited re-opening of our clubroom – albeit strictly controlled to comply with the Government’s continuing restrictions. A one way system has been applied to ensure social distancing, and a current negative Covid test will be required for a visit. To this end, Secretary Simon is maintaining a rota to ensure that the ‘Rule of 6’ is met with Wednesdays and Thursdays having two designated sessions.
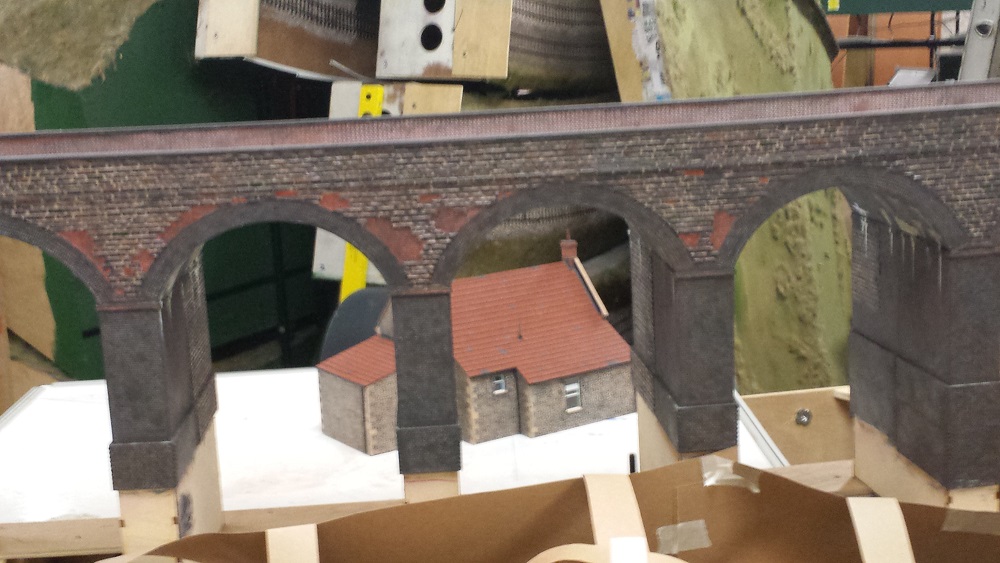
On the modelling front there is still plenty to report starting with the Allan’s superb model of Prestleigh Farmhouse.
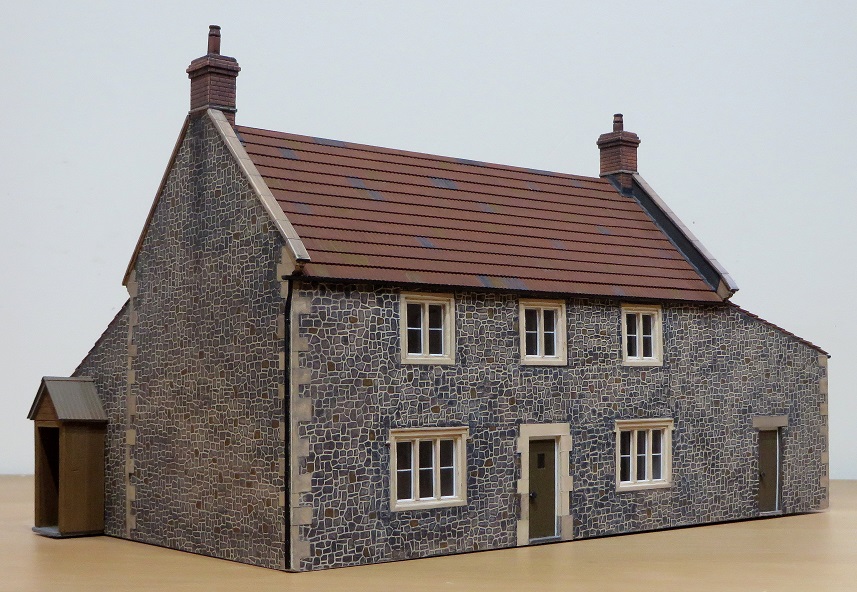
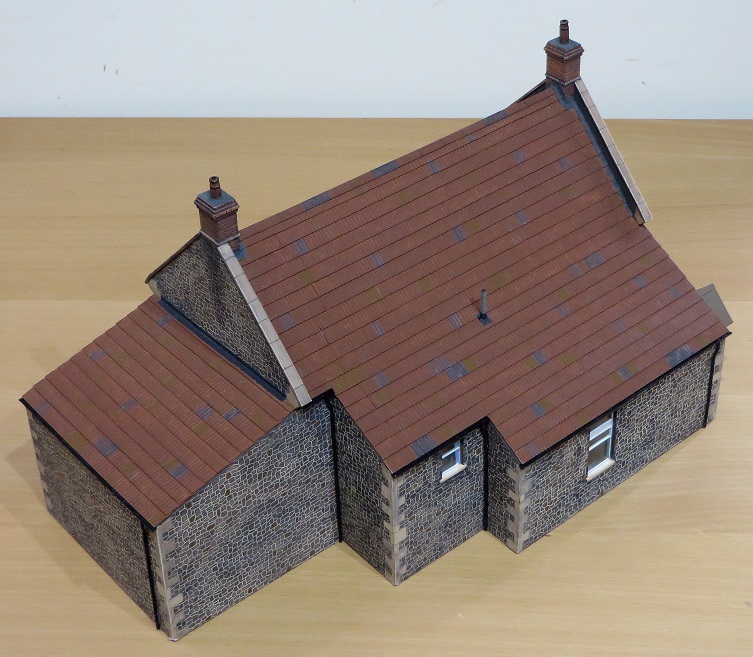

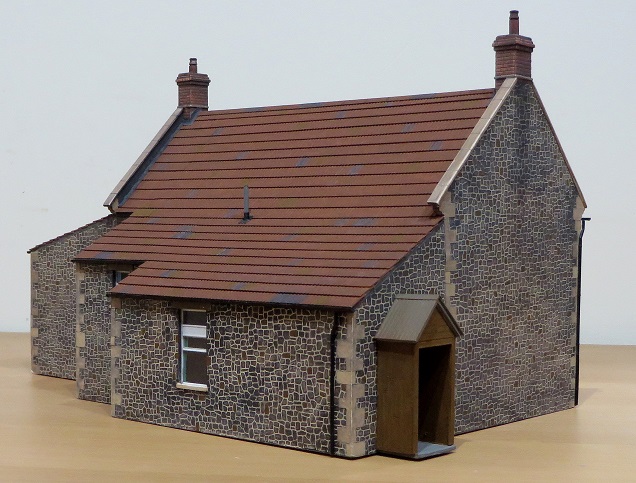
The represents the farmhouse as it was in the run-up to the closure of the railway. It has since been much extended at the rear which would totally change the view that the public would see on the layout. More views of it in situ below.

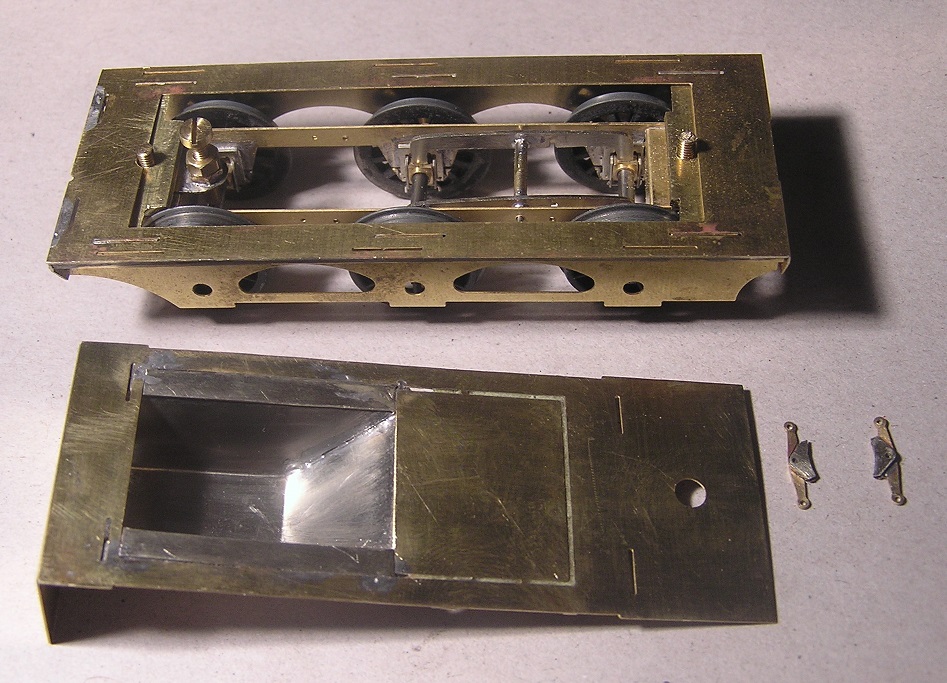
The underframes for the six wheeler Shelf Queens are coming on. Brake gear is all done – very complicated on these old carriages. Dave H likes to have it all there – some people do this in 4mm scale which he modestly tries to claim would defeat him.

Yes there should be two more pairs of wheels! The mechanical bits are from an underframe kit marketed by Slaters, the details are castings and etches now marketed by the Broad Gauge Society, but suitable for these kind of coaches (what Jim calls prehistoric). The wheels are Alan Gibson and very good – much better than the Slaters ones in my opinion. The frames and buffer beams are scratch built in brass. Footboards, gas tanks, buffers and vac pipes still to do.
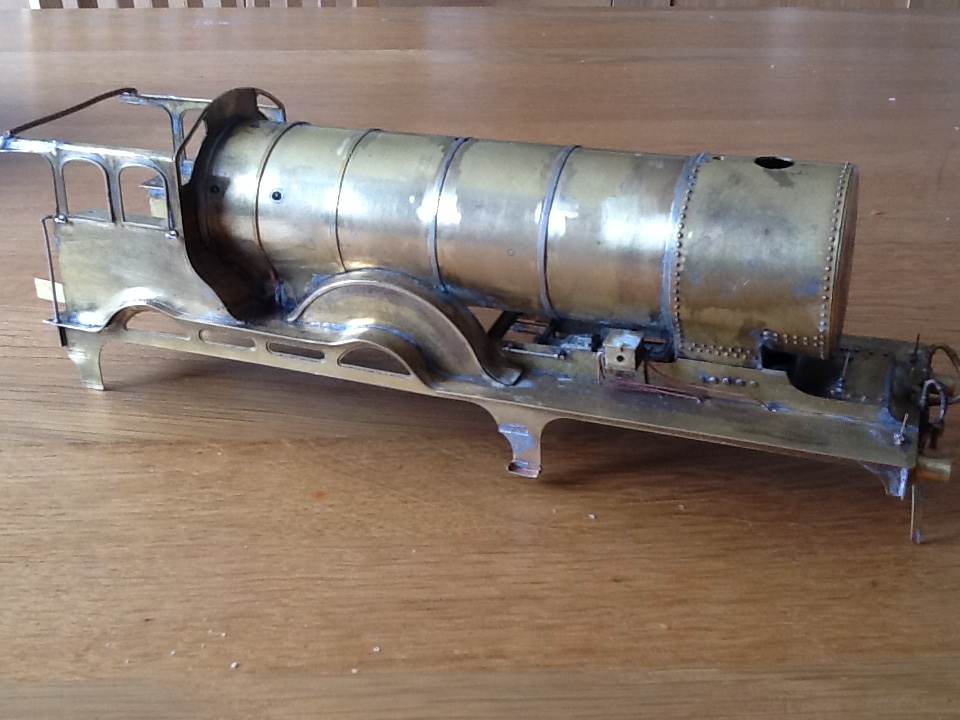
In a nice view of the loco body we can see that the 7mm scale Claude has gained its boiler bands.
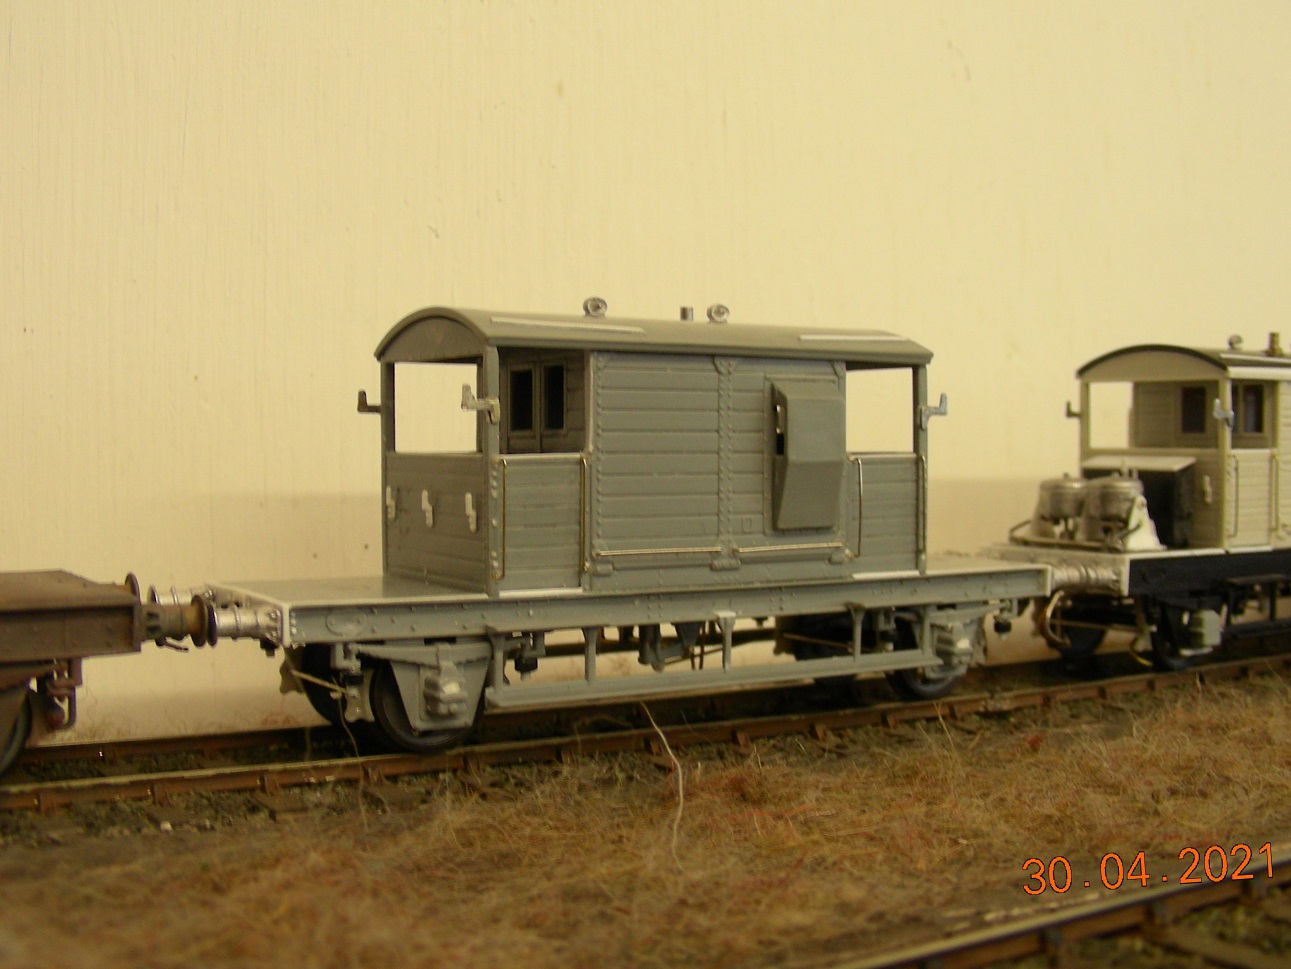
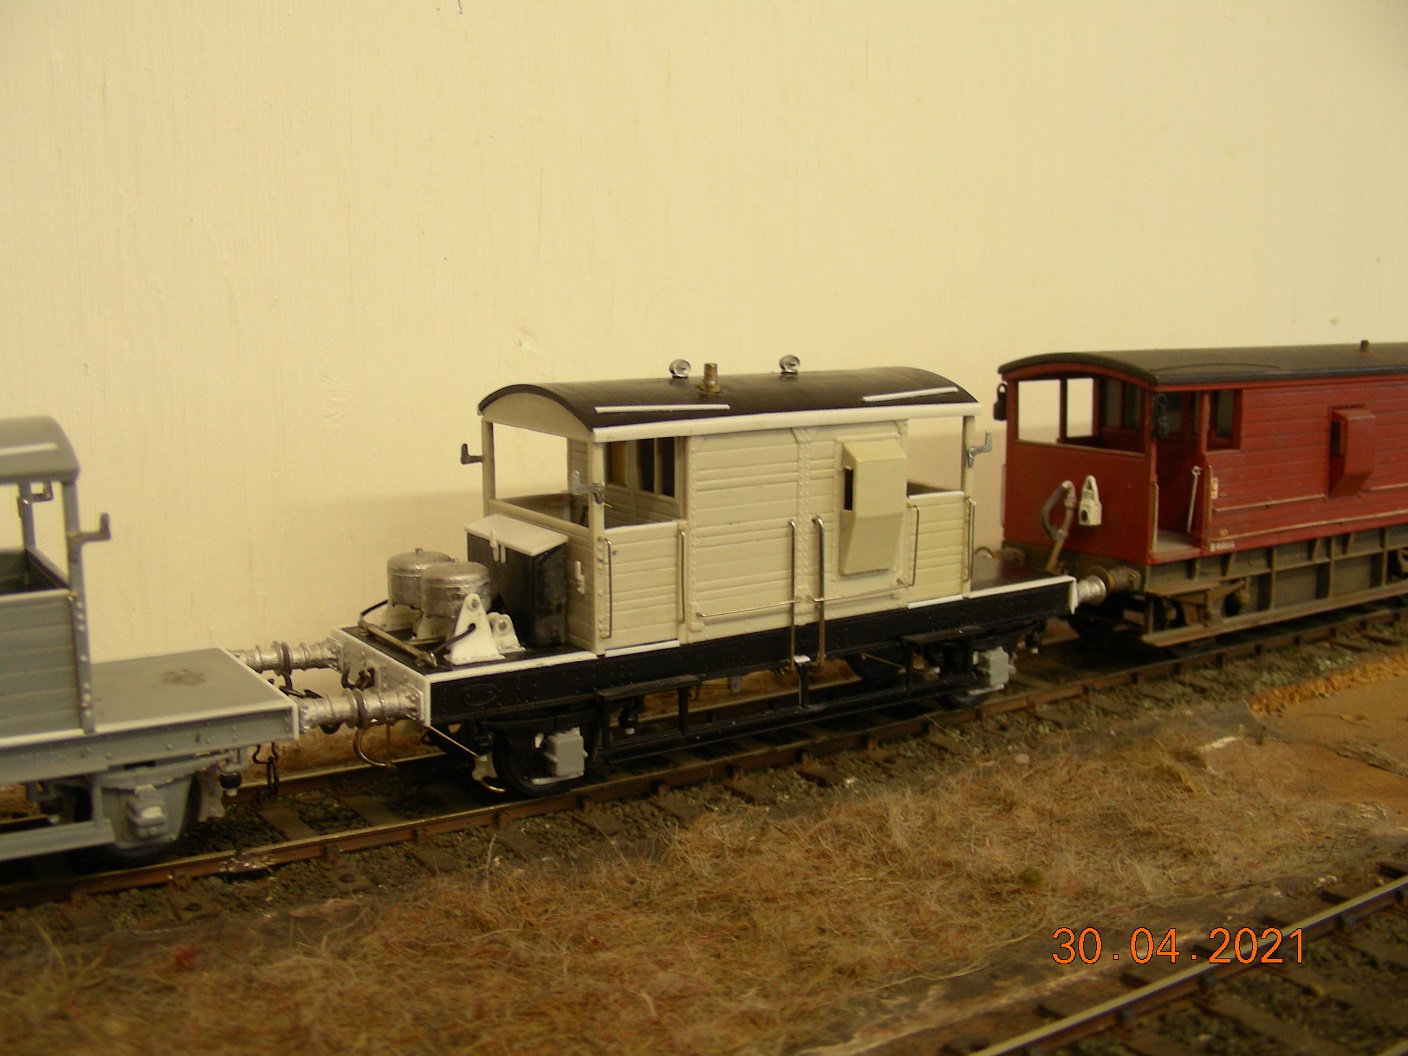
Peter has finally finished the two SR brake vans from the Cambrian kits, a 25t one ex WD, i.e. fitted, that passed to British Railways from the Shropshire and Montgomery Railway and survived well into the sixties, and the 15t version for branch line use. They’ve used Dave and Steve’s 3D printed brake shoes as the ones in the kit aren’t correct, Peter might retrofit the completed one that was built some years ago. All are 4mm EM Gauge.
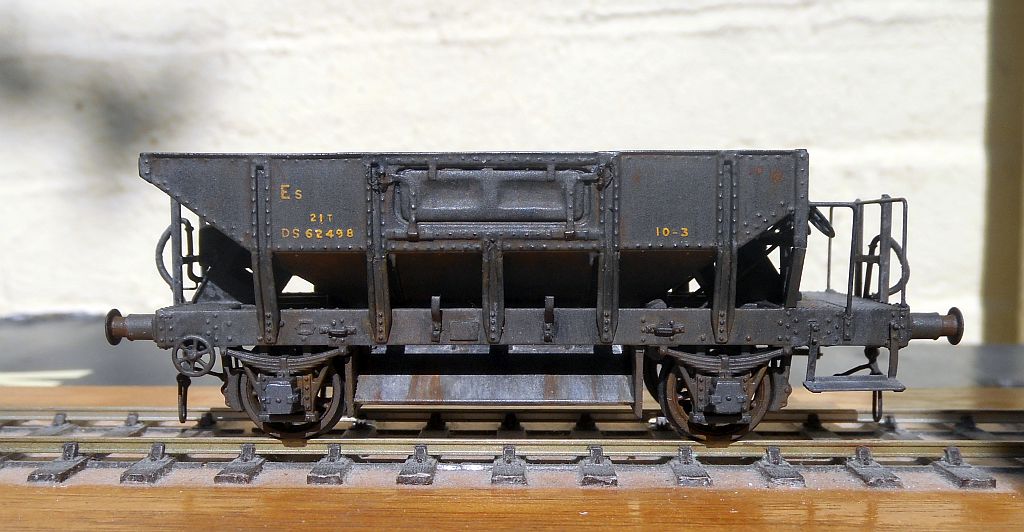


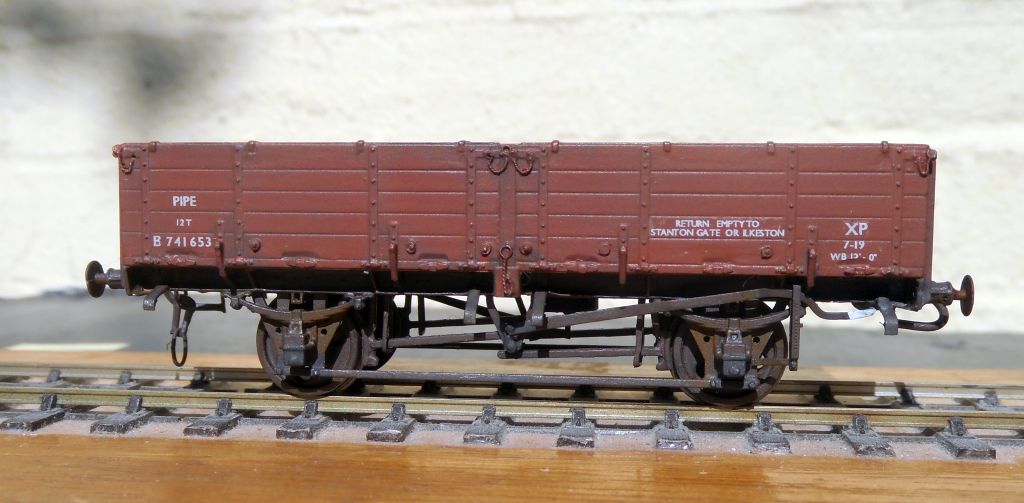
Continuing the EM Gauge theme, Peter’s son Adam thought we might like to see these – a rather involved conversion of a Hornby Trout into one of the SECR’s antecedents (built by the Leeds Forge Company) now completed and weathered, along with a BR Pipe and a GWR P7 which would be ideal to feature on Evercreech New (it’s based on a picture taken at Evercreech Junction) were it not a tad small…
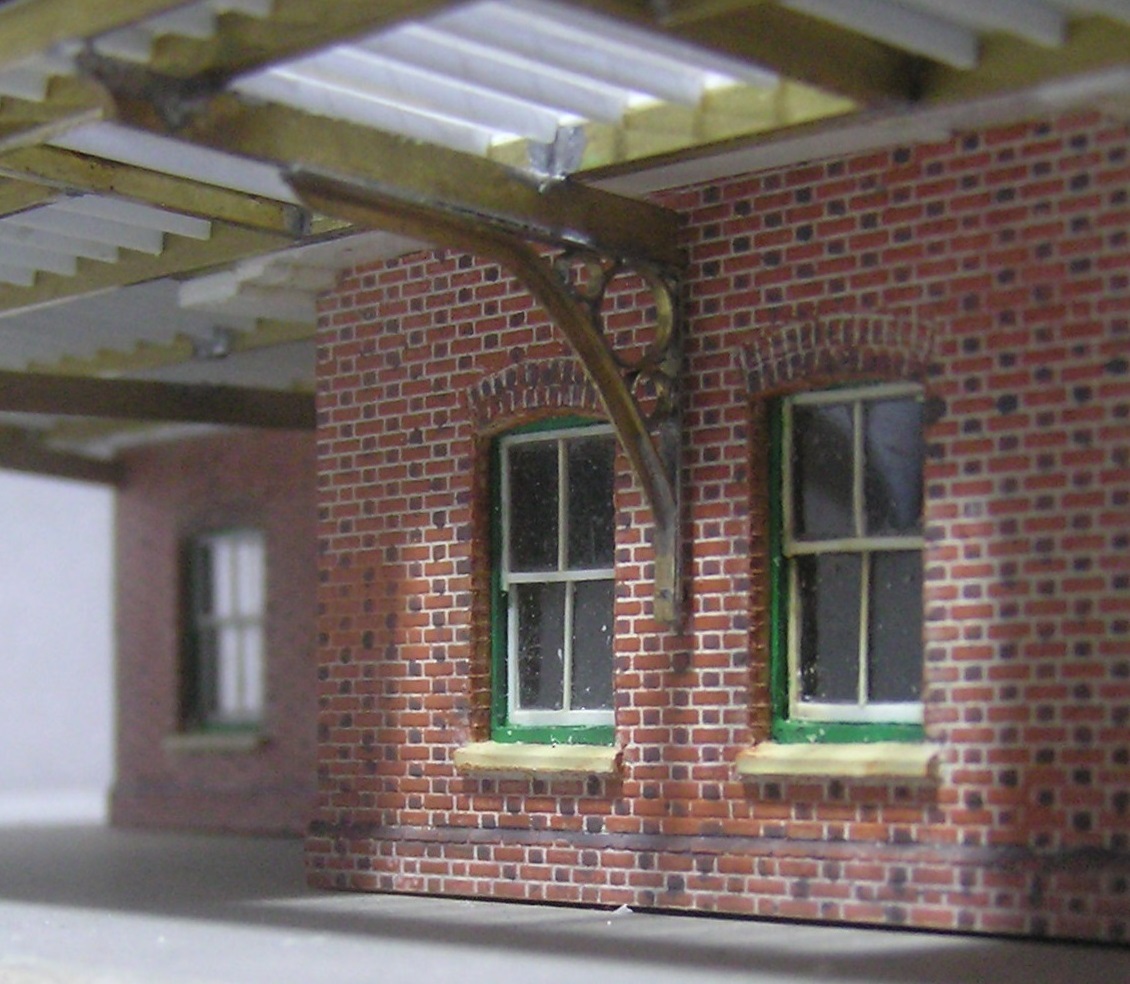

Verwood has not been forgotten and a lot of time has been spent on the canopy roof this month, firstly after a false start a much more satisfactory way of glazing the roof light was devised. The correctly spaced framing was drawn up in CAD and printed out. The glazing material was taped to this drawing and the supporting framing glued to the glazing material with Liquid Poly. The glazing material was then turned over and the assumed (overlapping) panes of glass scribed on. The glazing beads were then applied to complete the job. The completed assembly fits neatly in the hole in the canopy prepared for it, Flushed with success a start was made on the corrugated sheeting which had very visible lines of fastenings. There were four rows per sheet on most of it, and two rows on the rest. A jig centred the hole on the top of each ridge, with every fourth ridge being drilled – representing five ridges on the prototype. Each hole then received a short length of fine plastic rod trimmed to length. The rolled leadwork at the top of the skylight was also modelled.
The next challenge is to find a satisfactory way of gluing the various layers together in a way that won’t distort.
We Have:
- The brass framework
- A thin plastic sheet with the rafter detail
- A thin card layer with cutout for the glazing
- Corrugated plastic roofing sheets that need to be shimmed to look like they overlap.
Hopefully that will all be sorted out by the next blog.
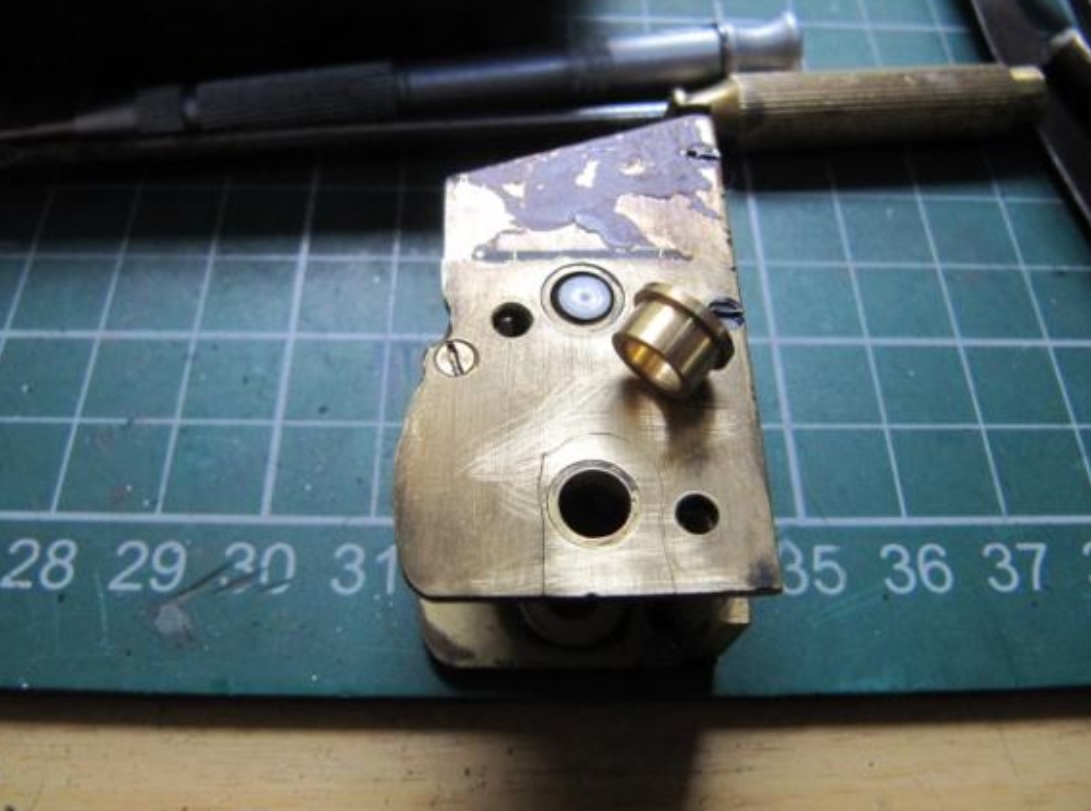
Although Verwood has more than its fair share of unfinished loco projects, Steve its impulsive Loco Superintendent is attempting a Maunsell Q Class using the old Crownline kit to convert the Airfix Fowler 4F. The kit is supposed to use the unpowered loco chassis and powered tender drive, but the SE Finecast loco chassis kit for the Q will be substituted – if one can be obtained. Quite a comprehensive kit this as it includes a complete brass tender, and for the loco only the 4F boiler and backhead will be visible once the 4F smokebox has been wrapped as instructed.

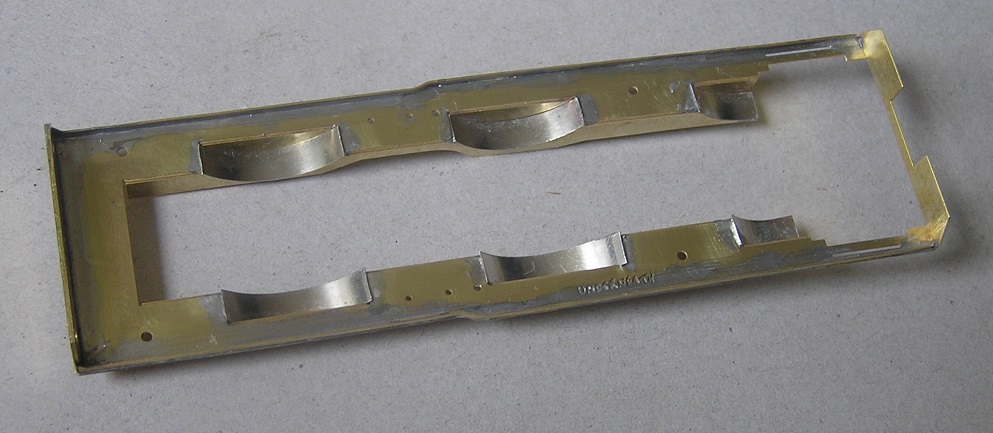
Work commenced with the running plate which in common with the Roche drawing doesn’t have the characteristic narrowing of the front half that the prototype had so that was the first challenge. The half etched splasher tops fell through the resulting holes once frame tops and splasher fronts had been folded up, so slightly wider ones cut from thin nickel silver were substituted. The half etched buffer beam was narrowed to match the reduced width of the running plate and laminated up for robustness before being soldered in. With half etched lines on only one side of the etch it was quite a relief to see the etched ‘underneath’ is indeed underneath! At that point the Airfix body was still in the post, so attention turned to the tender.
Loco and tender are to be fully compensated, and with High Level Kits (HLK) furloughed, Verwood’s supply of ten full size HLK hornblocks did not stretch to loco and tender, but with great foresight there were six HLK ‘MiniBlox’ in the sorting box. The Perseverance tender chassis that was on hand was etched for full size hornblocks, so it was decided to go with a Comet tender chassis etch that was excellent value and Wizard Models were also able to supply the least unsuitable AGW wheels to go with it (3’11” diameter 10 spokes non-bevelled). Opening out the 2mm slots in the Comet chassis accurately to clear the bearings was a fiddle and there wasn’t a lot of material left when finished. The hornblocks were then carefully soldered into the frames before they were assembled using the supplied slotted EM frame spacers. The equalising beams were drawn up in CAD, printed out, stuck to N/S sheet with UHU and fretted out as were the brake shoes intended to enhance the flat looking Comet hanger and shoe.
Some crusty old Romford wheels were fitted on pinpoint axles whilst fine tuning took place, and the trim screw was adjusted and locked to set the chassis level. Quite stout mounts were required to position the minimalist Comet chassis correctly into the Crownline body, and it was a relief to see the pinpoints of the axles centred on the holes in the frames. The completed chassis runs through the crossover on the Verwood test track much as a bogie coach would, so that was pleasing.
The Crownline tender kit is designed to take the Airfix tender drive and has a very large hole where the coal should go. A hopper was drawn up based on the Ian Beattie and Russell (Eastleigh) drawings (they differed slightly in shape), and that was soldered in. Verwood is not very far from the halfway point between Salisbury and Bournemouth, so I’m going for a dip in the coal load. Progress (or more likely the lack of) is being blogged on RMWeb – a first for the author.
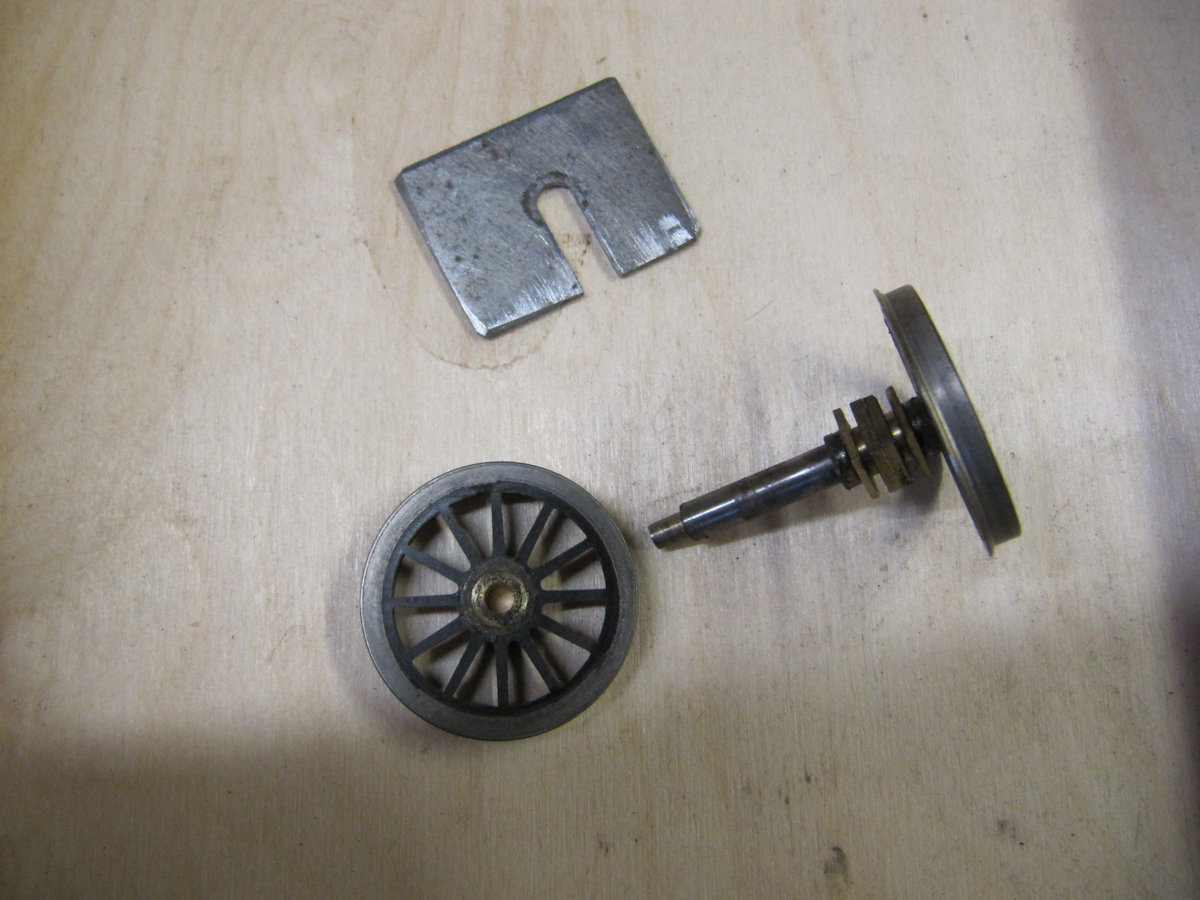
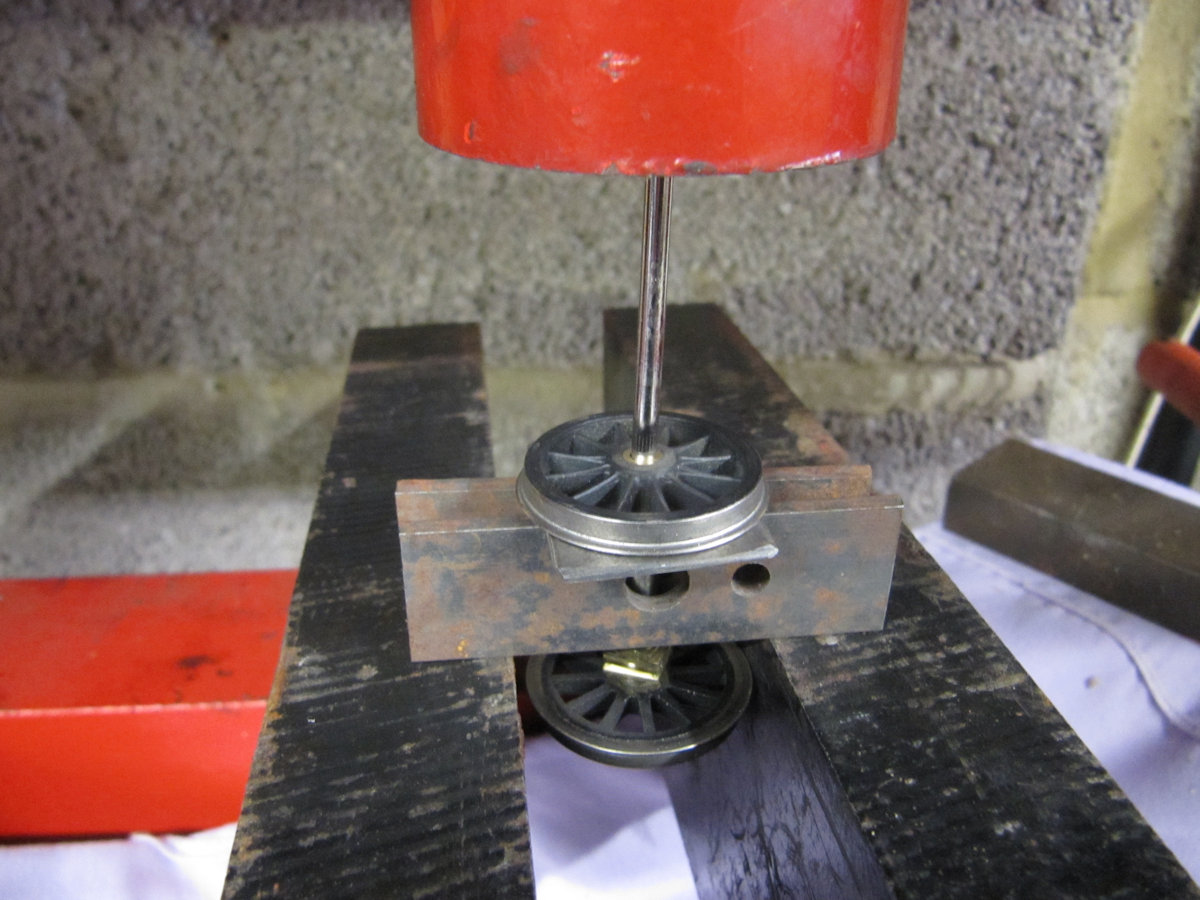
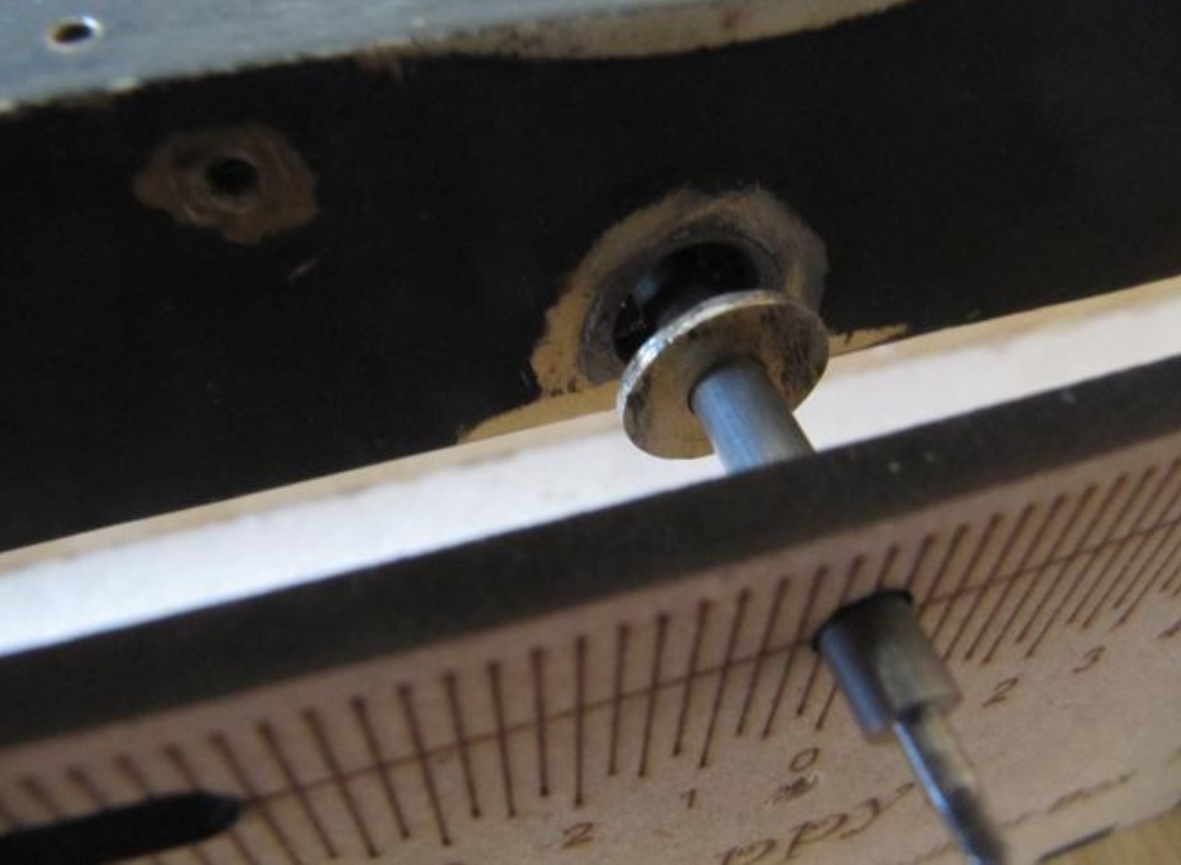
Back in 7mm Dave S asked the YMRG hive mind how they thought these wheels belonging to David S should be removed.
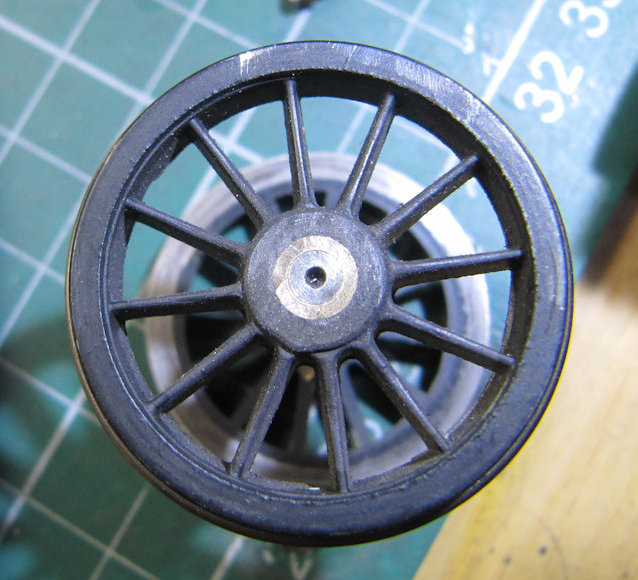

The consensus was that they were a press fit, and John hit the jackpot by identifying that they were in fact Slater’s wheels on a Morse taper. Dave S had already decided to try pressing the axle out from the wheel before John’s email arrived. So it was out with a collar that he had prepared earlier, and off to the garage where his 30 ton press lives. Not a lot resists Dave’s press and the Slater’s wheels and axles came apart easily. I’ll let the pictures do the talking now.


‘Engineer Dave’ has also been commissioned by Jim to sort out the chassis of a dodgy Duchess. For reasons your editor can’t quite fathom, this example of City of Nottingham is known as ‘Meghan’. She was built by a G0G member in North Wales, and purchased second hand via a dealer from Shrewsbury.
Just before first lockdown last year, Jim tried her round “Evercreech New” and she didn’t like the pointwork in the fiddle yard. Roll on a year and Jim realised that the B2B of the driving wheels are at least 1mm too narrow. The wheels were not Slaters, so he eventually bit the bullet and a few months ago purchased three new pairs of driving wheels. Of course, this was only the start of the problems as the whole loco is scratchbuilt, including the motion and valve gear, and this didn’t fit the Slater’s crank pins etc. Dave S takes up the story:
“I thought I’d take some pictures of today’s effort at fixing Meghan’s wobbly chassis. I started by removing (unsoldering) the centre axle bearings. As you can see, they were soldered over larger holes for adjustment.

The gearbox was removed so that new axle bearings could be inserted after expanding the existing holes.

The edge of the chassis was modified (both sides) to accept the new bearings in the gearbox.


The old front axle bearings were line bored (17/64″ diameter) to accept new axle bearings which were soldered in place. With the front and rear axles located and checked for “levelness” by fitting the wheels (it was level), the centre axle could be located.


I used my chassis building jig to locate the centre axle bearings. Springs were added at each side of the chassis to keep it central and press the bearing against the chassis side ready for soldering.”

Soldering of the centre bearings was duly completed, and the new Slaters’ wheels were fitted. No particular problems were experienced with refitting the coupling rods and valve gear since the original crankpins and return crank could be adapted to fit the new wheels. The not so dodgy Duchess is now ready for high speed testing on Evercreech New!
BR cab sides numbers and tender insignia will be added to replace the LMS ones she came with. Jim picked “City of Nottingham” as she was around to the end of the class so a good stable companion to his Black 5 and 8F. Photos of the whole loco to follow next month.
